
形状選択ツール

この形状選択ツールは"既定"ツールと呼ばれていました。これは Krita が大昔に Office の一部であったことに由来しています。でもそれではわかりにくいので、Krita での目的に合うように名前が変えられました:シェイプ選択です! このツールはベクターレイヤーでのみ動きますので、ペイントレイヤーで使おうとすると通知が表示されます。
After you create vector shapes, you can use this tool to select, transform, and access the shape's options in the tool options docker. There are a lot of different properties and things you can do with each vector shape. If you have text shapes selected, you can edit their properties with the Text Properties Docker, see Shape Selection Text Options for more information.
選択
Selecting shapes can be done by three types of actions:
シェイプを選択するには
 します。
します。複数シェイプを選択するには
ドラッグします。ブルー選択 (左から右にドラッグ): 完全におさまるシェイプのみを選択します。
グリーン選択 (右から左にドラッグ): 触れるすべてのシェイプを選択します。
Press Shift key while
to add or remove a shape from selection.
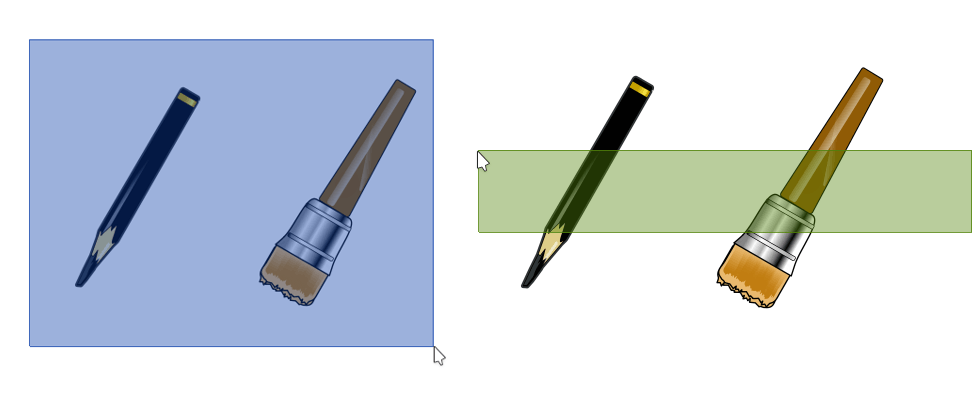
ブルー選択: 左から右に、完全に覆われるすべての画像を選択します。-- グリーン選択: 右から左に、触れるすべてのシェイプを選択します。
重要
Selecting multiple shapes is only possible for shapes within the same Vector Layer
配置、拡大縮小、傾きとねじれ
オブジェクトが選択されたら、破線のバウンディングボックスが表示されます。ボックスには四角いハンドルがあります。このバウンディングボックスを使って様々な調節: 選択したオブジェクトの配置、拡大縮小、傾きとねじれができます。
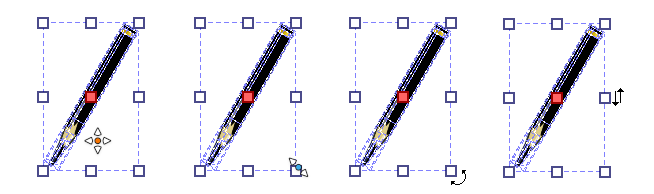
左から右に: 配置、拡大縮小、傾きとねじれ。
- 配置
バウンディングボックスの内側で
ホールドし、シェイプを好きな場所に移動します。Tip
You can lock movement to the vertical or horizontal axis: hold
and then press Shift key while moving.- 拡大縮小
四角いハンドルの内側で
ホールドし、動かしてオブジェクトの大きさを調節します。Tip
You can lock width/height ratio when resizing the shape: hold
and then press Shift while resizing.You can resize around the shape center: hold
and then press Ctrl while resizing.Combination of Ctrl + Shift is possible.
- 傾き
いずれかの角ハンドルの少し外側にカーソルを持っていき、
ドラッグでシェイプの角度を調節できます。Tip
You can constrain rotation to 45°: hold
and then press Ctrl while rotating.- ねじれ
いずれかの中央ハンドルの少し外側にカーソルを持っていき、
ドラッグでシェイプをゆがませることができます。
ツールのオプション
このメニューにあるツールのオプションは、3つのタブに分けられています。
ジオメトリ
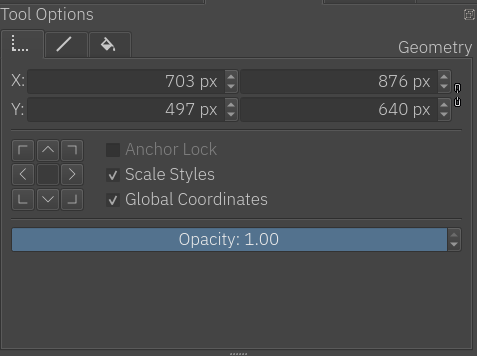
Geometry is the first section in the tool options.
- Position
Position of a shape is defined by X and Y coordinates.

Also, the origin of position (top-left, middle, bottom-right, ...) is defined by the active button:

Provided position coordinates are always relative to the origin: if the origin is modified, X and Y coordinates are updated by consequence.
Tip
You can also use Docker Arrange tools to easily:
Align shapes
Distribute shapes
Normalize distances between shapes
- Size
Size of a shape is defined by its width and height.
 Aspect ratio of a shape can be locked
 or unlocked
  .When locked, modifying the width value will automatically update the height, modifying the height value will automatically update the width.
- スタイルの拡大縮小
有効: 拡大縮小すると、ストローク幅をシェイプに合わせて拡大縮小します。
無効: 拡大縮小してもストローク幅を同じに保ちます。
- グローバル座標
変形を行う際に幅/高さバーがオブジェクトの幅/高さを使用するかを決めます。
- Fill, Stroke, Markers
Like there's a Z-Order for painting shapes, there's also an order to render shape elements (Fill, Stroke, Markers).
Which element is drawn first can change the final look of the shape.
A polygon, solid Red fill, Blue 25px solid stroke, Blue bullet markers¶ 
 Fill, Stroke, Markers
 Stroke, Fill, Markers
Markers, Stroke, Fill
Stroke, Fill, Markers
Markers, Stroke, Fill¶- 不透明度
オブジェクトの透過や通常の不透明度です。ストロークと塗りつぶしについての不透明度については次の二つのセクションで説明します。
警告
As Anchor Lock is not implemented at the moment, this checkbox is disabled.
ストローク
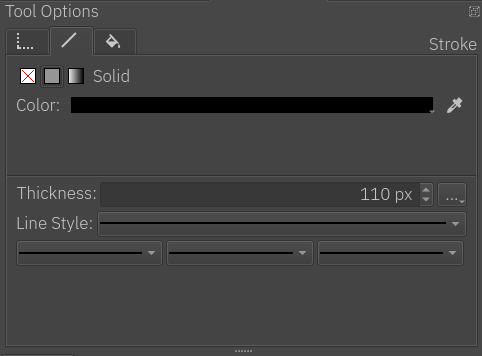
このストロークタブではオブジェクト周りのストロークがどのような見た目になるかを決めます。
最初のボタンではストロークの塗り方を設定できます: なし、単色 と グラデーション です; 同じオプションがシェイプの塗りつぶしにもあり、その二つの使い方についてより詳しくは下の"塗りつぶし"セクションを見てください。
それから、ストロークのスタイルについての設定があります:
- 太さ
ストロークの幅を設定します。シェイプを作成すると、Krita は現在のブラシサイズをストローク幅として使用します。
- 端と角のスタイル
Line Cap defines how the ends of a stroke are drawn, while Line Corner defines how segments joins (from a polyline or polygon) are drawn.
Options can be accessed by pressing the three dots button next to the thickness entry.
Possible Cap values:
 Butt
Butt Round
Round Square

Difference between cap values on 25px thickness lines: Butt, Round and Square
Possible Corner values:
 Bevel
Bevel Miter
Miter Round
Round


Difference between corner values on 25px thickness rectangle: Bevel, Miter and Round
- 線のスタイル
ストロークのスタイルを設定します: 実線、破線、点線 や 破線と点 の混合があります。

- マーカー
ストロークにマーカーを追加します。マーカーは設定により全ノード間、開始地点または終了地点に現れる小さな目印です。
塗りつぶし
このセクションはシェイプを塗りつぶす色についてです。上の ストローク セクションで述べた通り、シェイプの塗りつぶしとストロークの塗りの二つの機能は同じものです。これがその説明です:
塗りつぶしは: 単色、 グラデーション または なし (透過)があります。
- なし
塗りつぶししません。透明です。
- 単色
単一の色で、色ボタンを押すことで新しい色を選択できます。
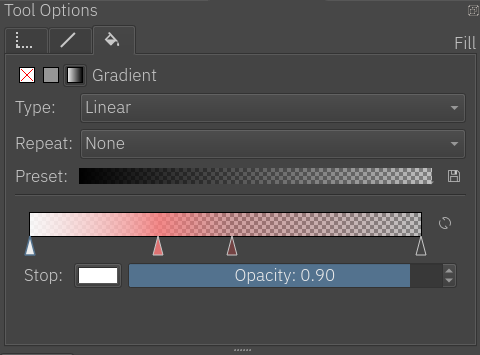
- グラデーション
名前の示す通りシェイプをグラデーションで塗りつぶします。次のオプションがあります:
- タイプ
線形や円形グラデーションです。
- 繰り返し
グラデーションをどのように繰り返すかです。
- プリセット
元のグラデーションから、好みに編集できる定義済みのグラデーションまで選べるメニューです。
- グラデーションを保存
現在のグラデーションをプリセットとして保存する手っ取り早い方法です。
- Stops Options Line
グラデーションカラーがどのように見えるかの例です。中間点は三角形で表されます。既定では最初に始点と終点の二つの点があります。線のどこでもクリックすることで中間点を作成することができます。選択するにはこの三角形の内側を
します。削除するには右か左の線の終わりまで ドラッグします。- グラデーション反転
グラデーションの向きを素早く反転します。
- 中間点
現在選択されている中間点の色を選択します。
- 不透明度
現在選択されている中間点の不透明度を選択します。
ヒント
中間点が選択されると、青い枠線でハイライトされます。これらオプションに変更が加えられると、それに伴って選択された中間点の色や不透明度も変わります。
ヒント
グラデーションは二つの方法で編集できます。一つ目はドッカーで編集できる実際のグラデーションです。ベクターは常に中間点グラデーションを使います。二つ目はキャンバス上の場所を編集することです。
- メッシュグラデーション
シェイプをメッシュグラデーションで塗りつぶします。次のオプションがあります:
- 中間点
選択した中間点の色を変えます。角の色(四角形)のみが可能で、ベジェハンドルの色(円)を変えることはできません。
- 行
メッシュグラデーションの行数を変えます。
- 列
メッシュグラデーションの列数を買えます。
- スムーズ
二つのやり方があります、バイリニア*(既定)と *バイキュービック です。バイリニア は色の段階を線形補間します、しかし`マッハバンド効果 <https://ja.wikipedia.org/wiki/%E3%83%9E%E3%83%83%E3%83%8F%E3%83%90%E3%83%B3%E3%83%89>`_ を起こすことがあります。バイキュービック は色の段階を双三次補間し、これがよりスムーズなグラデーションになります。
注釈
メッシュグラデーションは SVG draft 2 に基づいてレンダリングされます。
メッシュグラデーションの作成
シェイプのメッシュグラデーションが選択されていると、Krita は既定のメッシュグラデーションで、もう一つの色(背景色と白)とともに塗りつぶします。ツールのオプションから行と列数を変えると、メッシュグラデーションのパッチが追加され角がそれぞれ変えられるようになります。
メッシュグラデーションの編集
メッシュグラデーションの編集はとても直感的です。曲線がそれぞれ別のベジェ曲線になっています。構造を変えていくには二つの方法があります、一つは角(四角)を、もう一つはハンドル(円)をドラッグすることです。
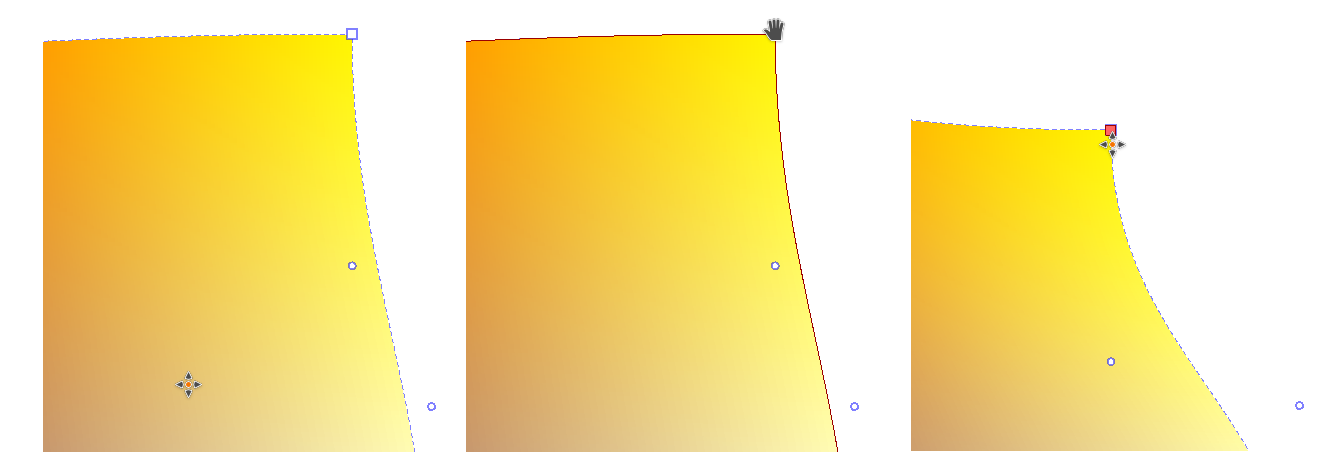
左から右へ: 通常、角にマウスホバーしたところ、角を動かして選択したところ。
色を変えるには、角を選択する必要がありツールのオプションから選択された角の色を変えます。
注釈
Inkscape からインポートするとき、シェイプがグループ化されている場合がありますが、Krita でメッシュグラデーションを編集できなくなります。これを修正するにはまずグループ解除( 経由)してください。
右クリックメニュー
シェイプ選択ツールには多数の機能がある右クリックメニューがあります。オブジェクトが選択されていると、オブジェクトの切り取り、コピーや前面/背面移動といった様々な操作を行うことができます。
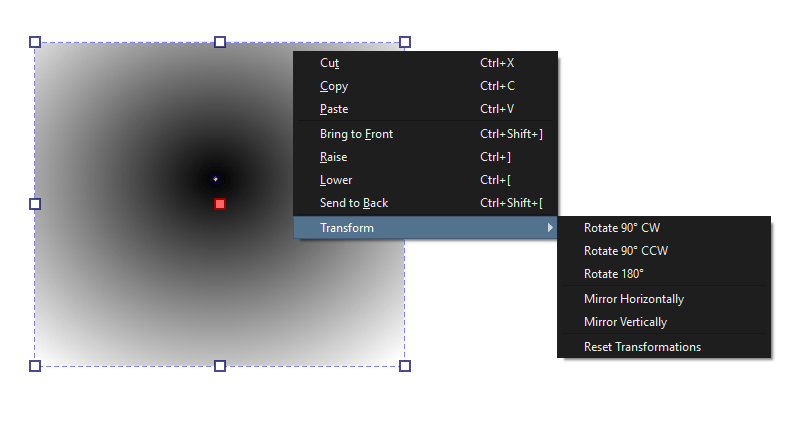
複数オブジェクトが選択されているならそれらで"論理演算"を行うことができます。右クリックメニューの一番最後にあります。選択されたオブジェクトの結合、交差、除外や分割ができます。
Shape Selection Text Options
When text shapes are selected, their paragraph properties can be edited all at once with the Text Properties Docker. Beyond that, there's a number of extra actions available:
- Convert...
See Text Types for more information.
- Flow Text in Shape
Flows the first selected text into all the selected shapes. The visual order determines the initial text flow order.
- Subtract Shape from Text Flow Area
Adds all selected shapes to the first selected text shape as subtraction areas. See Text in Shape for more information.
- Put Text On Path
Puts the whole text on the first selected path. This function will replace any pre-existing paths.
When a Text in Shape is selected, a button appears in the top right. Clicking this will switch the tool into text contour mode. In this mode you can select, move, scale and rotate the shapes that belong with a text. It is also available in the 形状編集ツール, but automatically disables in the テキストツール. When in this mode, the text properties docker will edit the text regardless of what is selected.
A number of extra actions become available in the right click menu when in the text contour mode:
- Remove Shapes from Text Flow
Remove all selected shapes from the current text.
- Toggle Flow Shape Type
Switches the shape type between Subtract and Inside.
- Set Flow Shape as Last
Make this flow shape the last in the text chain as used by text layout.
- Earlier In Chain
Move this shape earlier in the text chain.
- Later In Chain
Move this shape later in the text chain.
- First In Chain
Make this flow shape the first in the text chain as used by text layout.