
Transform Tool

The Transform tool lets you quickly transform the current selection or layer. Basic transformation options include resize, rotate and skew. In addition, you have the option to apply advanced transforms such as Perspective, Warp, Cage and Liquid. These are all powerful options and will give you complete control over your selections/layers.
When you first invoke the tool, handles will appear at the corners and sides, which you can use to resize your selection or layer. You can perform rotations by moving the mouse above or to the left of the handles and dragging it. You can also click anywhere inside the selection or layer and move it by dragging the mouse.
You can fine-tune the transform tool parameters using tool options docker. The parameters are split between five tabs: Free Transform, Warp, Perspective, Cage and Liquify.
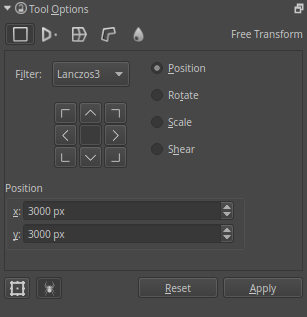
Free Transform docker.
Free transform
This allows you to do basic rotation, resizing, flipping, and even perspective skewing if you hold the Ctrl key. Holding the Shift key will maintain your aspect ratio throughout the transform. When you move the center pivot point, pressing Alt will allow you to limit it to the transformation bounds.
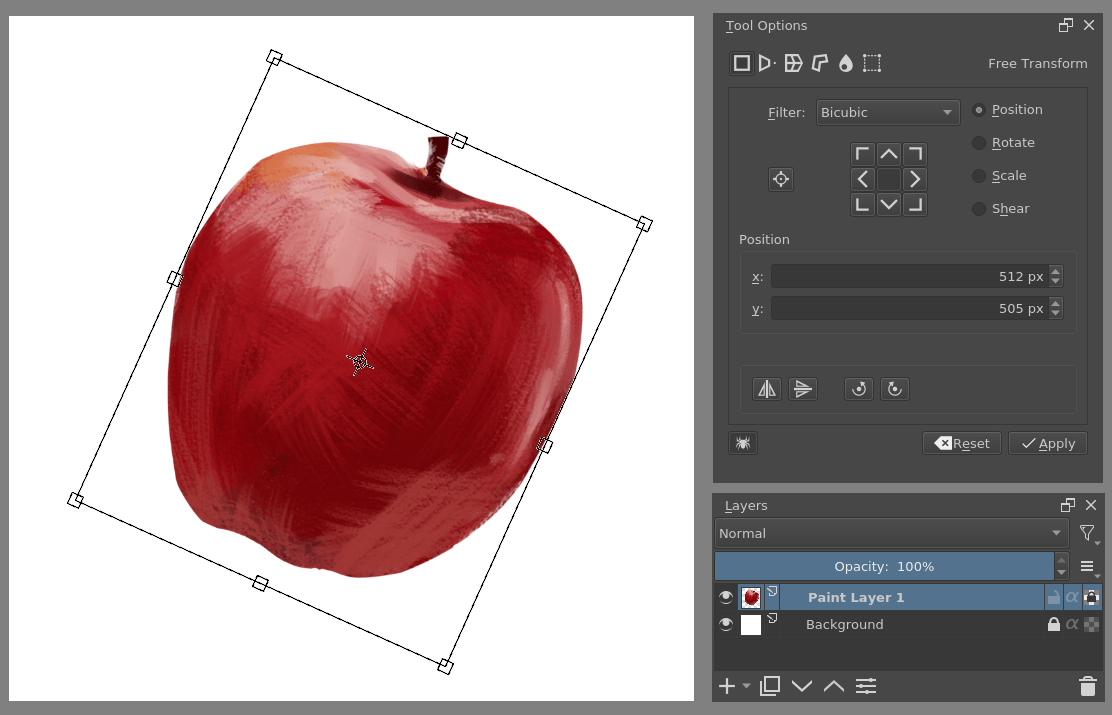
Free transform in action.
If you look at the bottom, there are quick buttons for flipping horizontally, vertically and rotating 90 degrees left and right. Furthermore, the button to the left of the anchor point widget allows you to choose whether to always transform using the anchor point, or not.
Video of how to use the anchor point for resizing.
Rotating the Transformation Bounds
It is possible to rotate the visual transformation bounds without transforming the image itself. This is particularly useful when dealing with sections of an image that were drawn diagonally, like for example, a stick at an angle.
When using Krita’s default key bindings, pressing Ctrl + Alt before trying to rotate, the cursor will switch to a bounds-rotation cursor, at which point a  + drag will rotate the visual bounds. Then, releasing the keys, a regular transformation can be performed. By rotating the transformation bounds to the actual image being transformed, it can be easier to transform the image afterwards, especially when aligning at a certain angle.
The actual keys used for this can be configured under and assigning any of the actions that sample a color from the current layer. Depending on which presets you use, this may not be bound to anything by default.
Added in version 5.3.
Perspective
While free transform has some perspective options, the perspective transform allows for maximum control. You can drag the corner points, or even the designated vanishing point.
You can also change the size, shear and position transform while remaining in perspective with the tool-options.
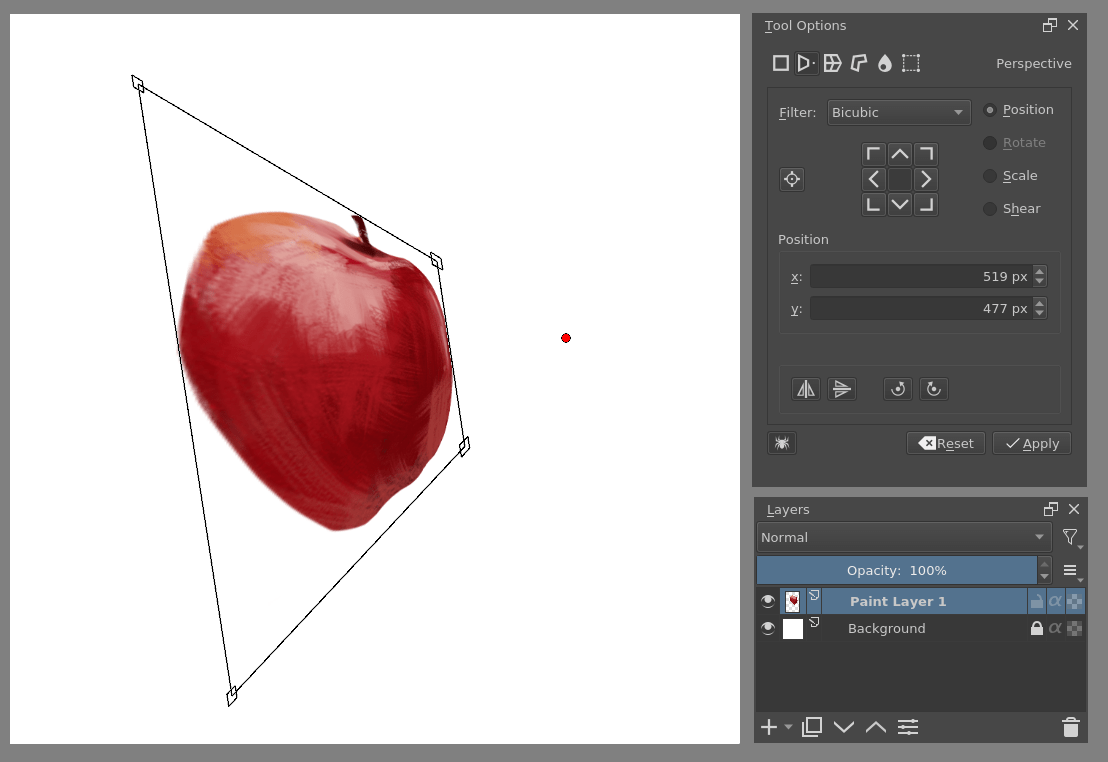
Perspective transform.
Warp
Warp allows you to deform the image by dragging from a grid or choosing the dragging points yourself.

Warp Option.

Free transform in action.
There are warp options: Rigid, Affine and Similitude. These change the algorithm used to determine the strength of the deformation. The flexibility determines, how strong the effect of moving these points are.
Anchor Points
You can divide these either by subdivision or drawing custom points.
- Subdivision
This allows you to subdivide the selected area into a grid.
- Draw
Draw the anchor points yourself. Locking the points will put you in transform mode. Unlocking the points back into edit mode.
Cage
Create a cage around an image, and when it’s closed, you can use it to deform the image. If you have at least 3 points on the canvas, you can choose to switch between deforming and editing the existing points.
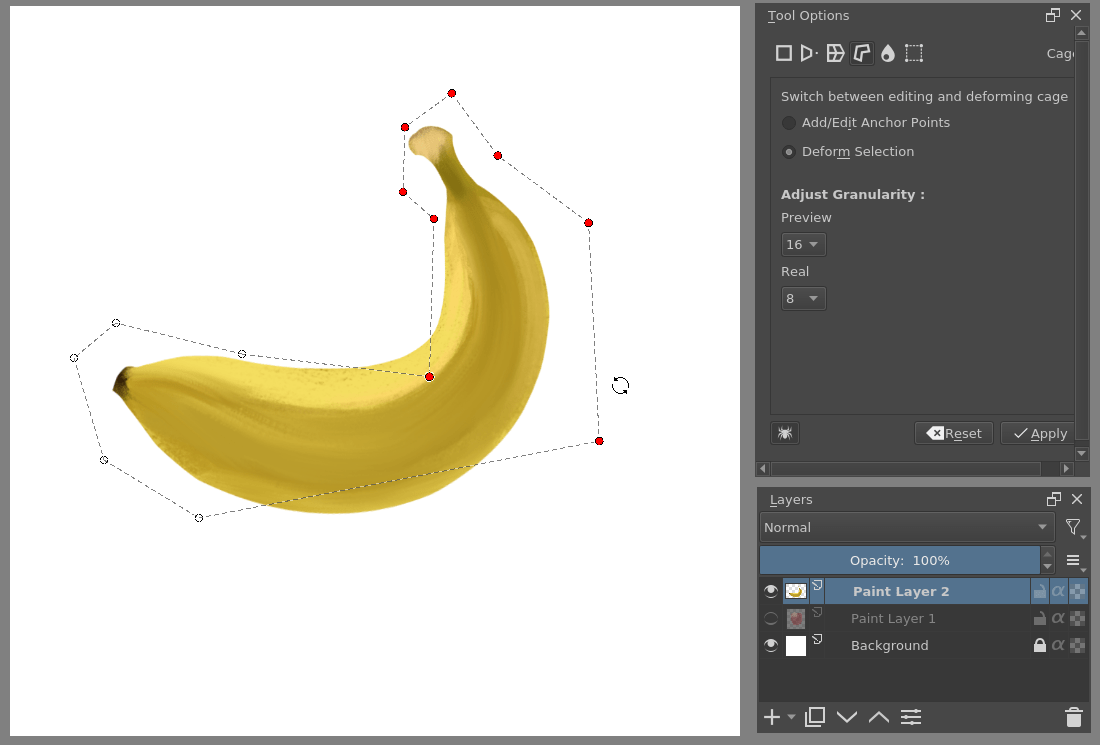
Transforming a straight banana to be curved with the cage tool.
Adjust Granularity
Added in version 4.2.
This adjusts the precision of the cage transform grid. The lower the value, the higher the quality of the transformation (and consequently, the lower the speed). When the granularity is too high, the result starts to look „blocky“.
- Preview
Adjusts the granularity of the preview. It is recommended to have this higher than the Real value, as it speeds up adjusting.
- Real
Adjusts the granularity of the final result.
Hotkeys
Both Cage and Warp use little nodes. These nodes can be selected and deselected together by pressing the Ctrl key before clicking nodes.
Then you can move them by pressing the cursor inside the bounding box. Rotating is done by pressing and dragging the cursor outside the bounding box and scaling the same, only one presses the Ctrl key before doing the motion.
Liquify
Like our deform brush, the liquify brush allows you to draw the deformations straight on the canvas.
- Move
Drag the image along the brush stroke.
- Scale
Grow/Shrink the image under the cursor.
- Rotate
Twirl the image under the cursor.
- Offset
Shift the image under the cursor.
- Undo
Erases the actions of other tools.
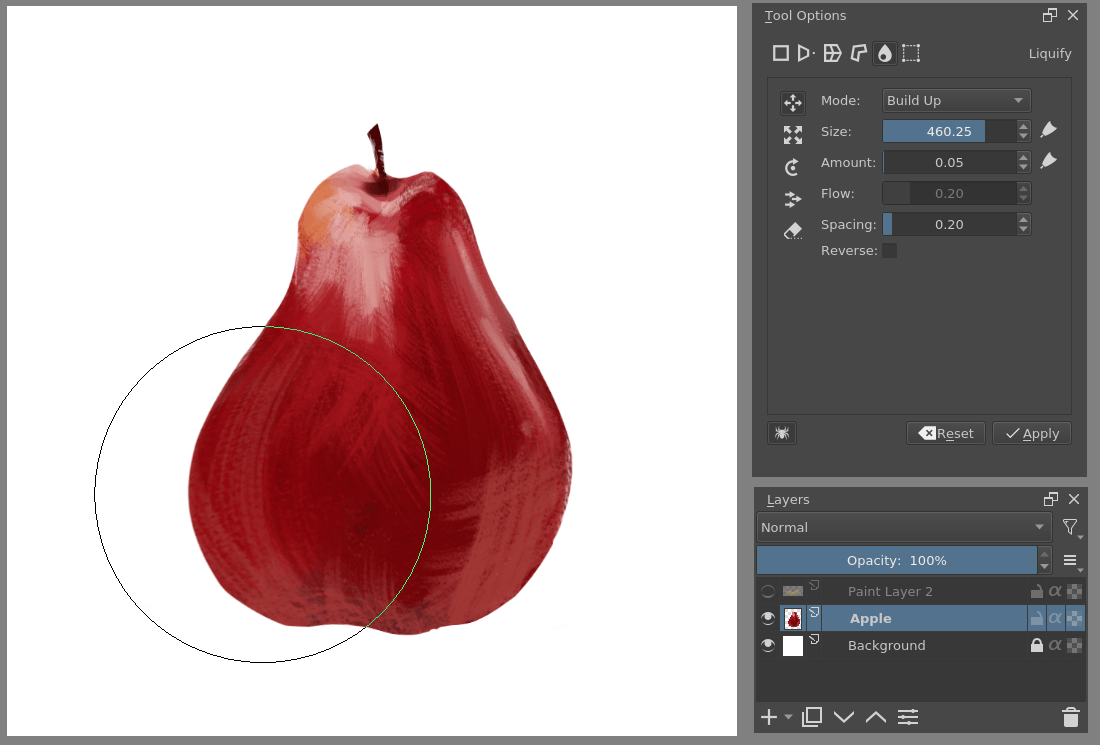
Liquify used to turn an apple into a pear.
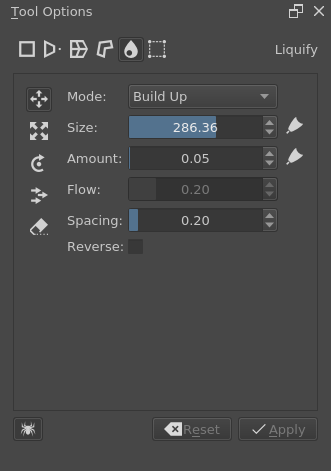
In the options for each brush there are:
- Mode
This is either Wash or Build up. Wash will normalize the effect to be between none, and the amount parameter as maximum. Build up will just add on until it’s impossible.
- Size
The brush size. The button to the right allows you to let it scale with pressure.
- Amount
The strength of the brush. The button to the right lets it scale with tablet pressure.
- Flow
Only applicable with Build up.
- Spacing
The spacing of the liquify dabs.
- Reverse
Reverses the action, so grow becomes shrink, rotate results in clockwise becoming counter-clockwise.
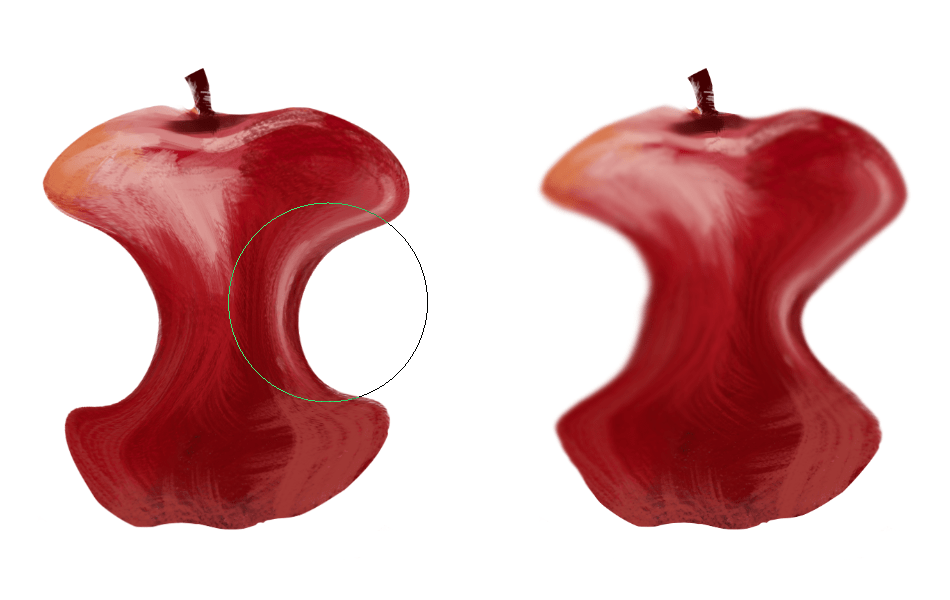
Liquify on the left and deform brush on the right.
Krita also has a Deform Brush Engine which is much faster than liquify, but has less quality. If you are attempting to make liquify a little faster, note that it speeds up with the less information it needs to process, so working with liquify within a selection or using liquify on a separate layer with little on it will greatly enhance the speed.
Mesh
Added in version 4.4.2.
The mesh transform is similar to the warp and the cage transform, except that its interface uses patches comprised of Bezier curve segments. This transform mode is particularly useful for placing images and textures on curved surfaces:

Curving a logo to an apple with the mesh transform, with the control points shown.
This is a very keyboard shortcut heavy transform mode. When you start the transform you will see the overlay, which consists of several nodes that can be dragged around. You can drag on the segments between the nodes to curve them precisely, or drag on patches themselves to freely transform them. Ctrl + Alt + + drag shortcut on nodes and segments will allow you to subdivide the mesh. For more precision, enable the control points in the tool options, so each Bezier segment can be fine-tuned to your content.
To assist in maintaining the curvature of a mesh, this tool has a concept of ‚locked‘ transform. This mode is signalled by the lock icon in the cursor, and on by default. When this is enabled, adjusting one segment will also adjust its neighbouring segment in another patch. You can press Shift key while dragging a segment or control point to turn this feature off, allowing for sharp angles in the mesh. After a sharp angle has been created, the locked mode will try to keep this as well.
Shortcuts
- Node or control point move
- + drag any of the round points. The big ones are the ‚nodes‘ which determine the corners of a patch, and the small ones are the ‚control points‘, which determine the curvature for their associated segment.
- Unlocked node or control point move
Shift +
+ drag on a node or control point.- Locked segment move:
- + drag on a segment. As explained above, this will adjust neighbouring segments as well, to keep the curvature of the node intact.
- Segment move
Shift +
+ drag on a segment of the mesh.- Free patch deform:
- + drag on an empty area inside the mesh. This will allow you to intuitively adjust a segment by just clicking anywhere and dragging. The whole segment will then adjust all its control points around the point of the cursor.
- Split mesh or Move/Delete split:
Ctrl + Alt +
+ drag on a border segment to split the meshCtrl + Alt +
+ drag on a node to change the splitCtrl + Alt +
+ drag away a node to remove the split
- Select multiple nodes
Ctrl +
on a node or control or segment, these can then be moved- Move selection or mesh
Shift +
+ drag on empty area outside the mesh.- Rotate selection or mesh
- + drag on an empty area outside the mesh, if there is a selection of nodes, it will rotate only them, otherwise the whole mesh will be rotated.
- Scale selection or mesh
Ctrl +
+ drag on empty area outside the mesh, if there is a selection of nodes, it will scale only them, otherwise the whole mesh will be scaled.
Tool options
- Mesh Size
Gives precise controls to change the amount of patches vertically and horizontally. When increasing or decreasing the amount of patches, Krita will try to keep the curvature the same, which can be used to your advantage.
- Show control points
This will toggle the control points.
Transform Multiple Layers
Krita allows you to transform multiple layers at once.
In Krita versions older than 5.0 this required using the Recursive Transform option while transforming a group layer, whose icon was a little spider. Since 5.0, this option is enabled by default for group layers (To achieve non-recursive transformation you can use the layer lock feature).
Spremenjeno v verziji 5.2: Transforming multiple layers doesn’t require a group anymore, now all layers selected in the layer docker will be transformed at once.
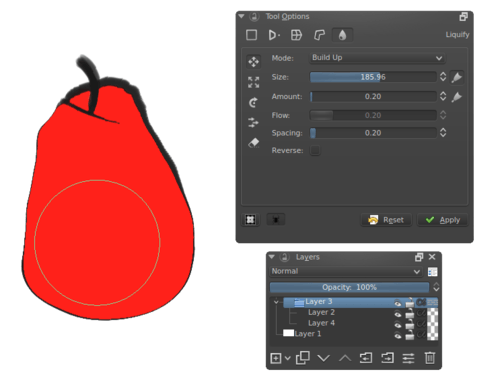
Krita allows you to transforms all the layers in the group, so with this apple, both the lineart as the fill will be transformed.
Continuous Transform
If you apply a transformation, and try to start a new one directly afterwards, Krita will attempt to recall the previous transform, so you can continue it. This is a continuous transform. You can press the Esc key to cancel this and start a new transform, or press Reset in the tool options while no transform is active.
Transformation Masks
These allow you to make non-destructive transforms, check here for more info.