Colorize Mask
A tool for quickly coloring line art, the Colorize Mask Editing tool can be found next to the gradient tool on your toolbox.
This feature is technically already in 3.1, but disabled by default because we had not optimized the filling algorithm for production use yet. To enable it, find your krita configuration file, open it in notepad, and add “disableColorizeMaskFeature=false” to the top. Then restart Krita. Its official incarnation is in 4.0.
Usage
This tool works in conjunction with the colorize mask, and the usage is as follows:
For this example, we’ll be using the ghost lady also used to explain masks on the basic concepts page.
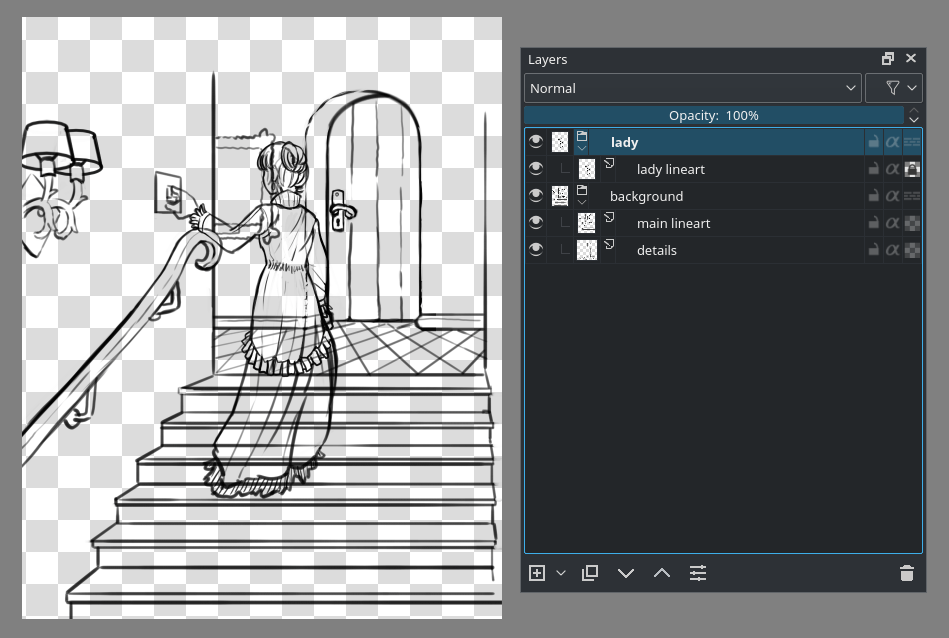
This image has the line art for the lady separated from the background, and what’s more, the background is made up of two layers: one main and one for the details.
First, select the colorize mask editing tool while having the line art layer selected.  the canvas will add a colorize mask to the layer.
You can also
  the line art layer, and then . The line art will suddenly become really weird, this is the prefiltering which are filters through which we put the line art to make the algorithm easier to use. The tool options overview below shows which options control that.
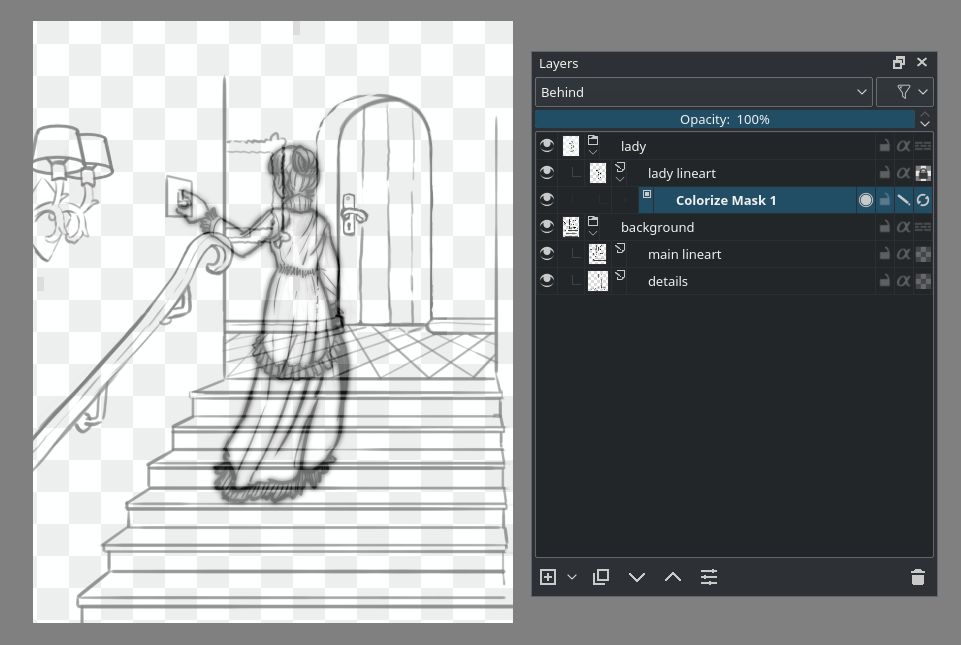
Now, you make strokes with brush colors, press Update in the tool options, or tick the last icon of the colorize mask properties. In the layer docker, you will be able to see a little progress bar appear on the colorize mask indicating how long it takes. The bigger your file, the longer it will take.
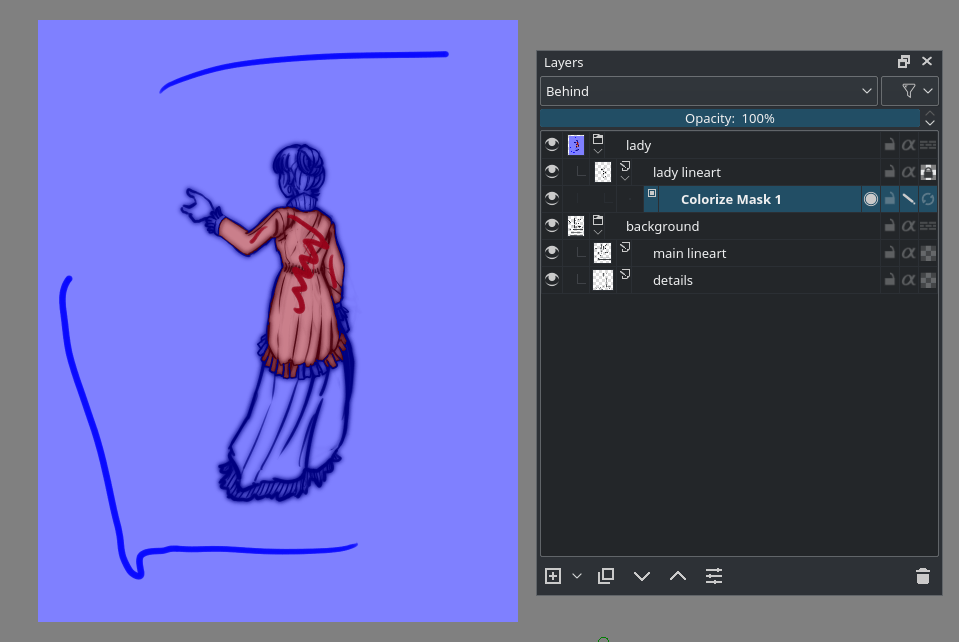
We want to have the blue transparent. In the tool options of the colorize editing tool you will see a small palette. These are the colors already used. You can remove colors here, or mark a single color as standing for transparent, by selecting it and pressing “transparent”. Updating the mask will still show the blue stroke, but the result will be transparent:
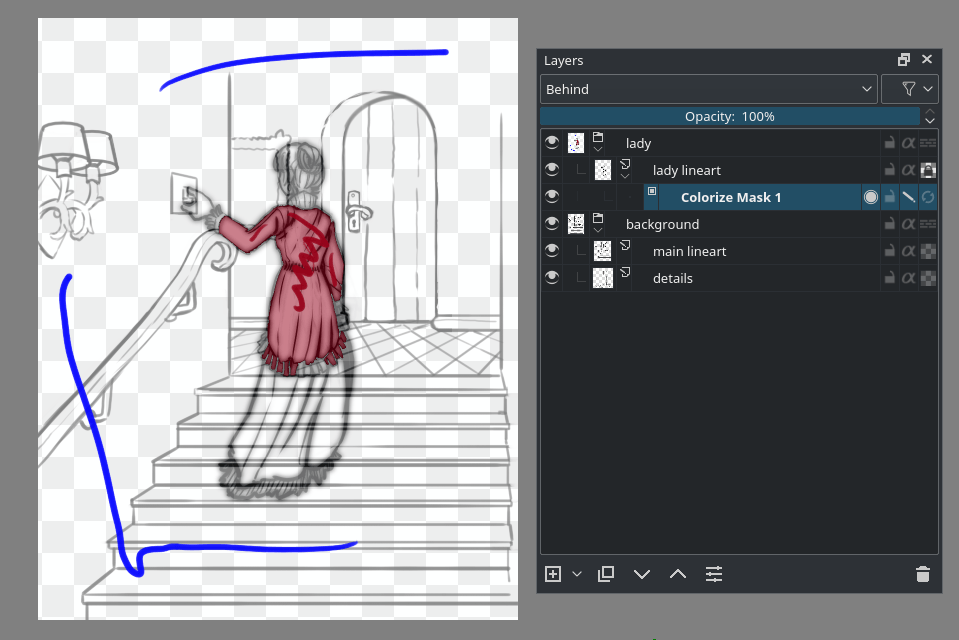
Because the colorize mask algorithm is slow, and we only need a part of our layer to be filled to fill the whole ghost lady figure, we can make use of Limit to layer bounds. This will limit Colorize Mask to use the combined size of the line art and the coloring key strokes. Therefore, make sure that the colorizing keystrokes only take up as much as they really need.
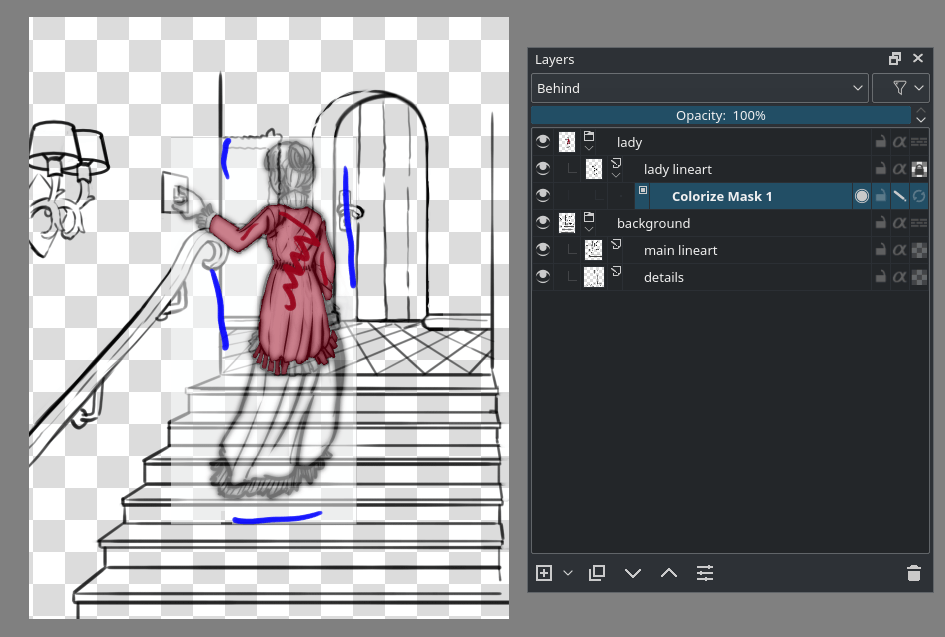
Now the algorithm will be possibly a lot faster, allowing us to add strokes and press Update in rapid succession:
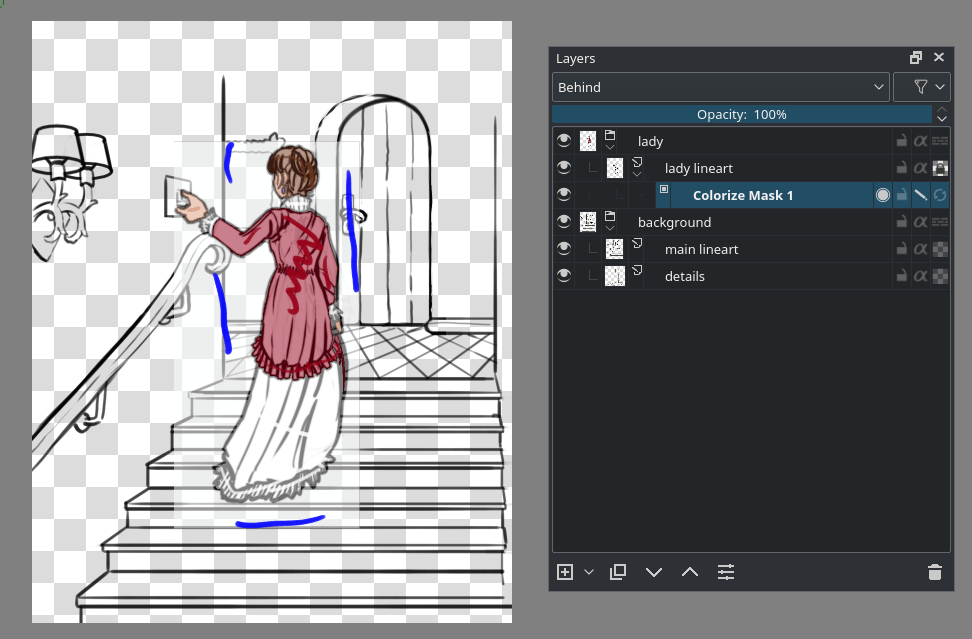
To see the final result, disable Edit Key Strokes or toggle the second to last icon on the colorize mask.
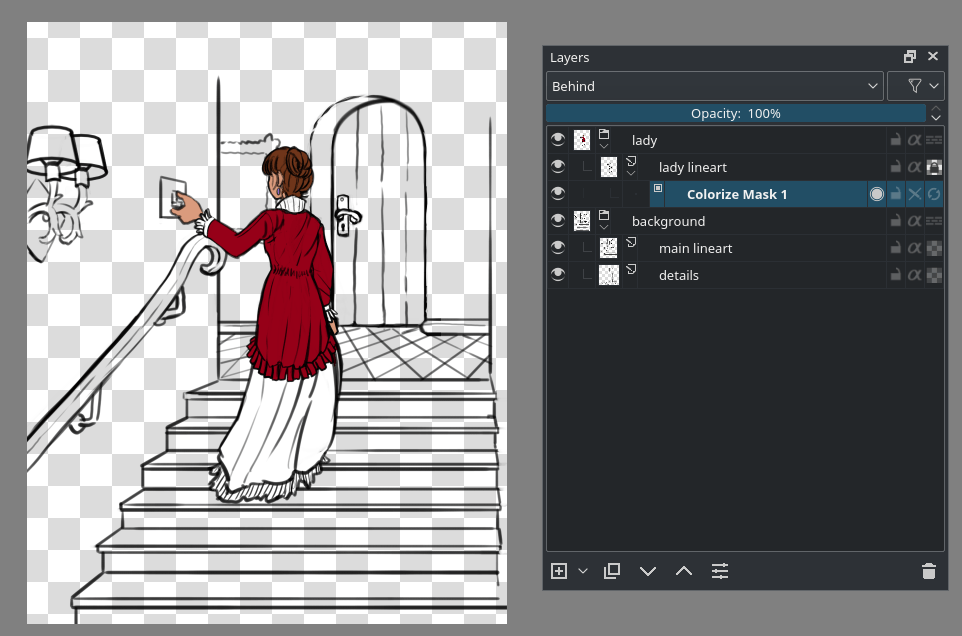
If you want to edit the strokes again, re-enable Edit Key Strokes.
Now, the colorize mask, being a mask, can also be added to a group of line art layers. It will then use the composition of the whole group as the line art. This is perfect for our background which has two separate line art layers. It also means that the colorize mask will be disabled when added to a group with pass-through enabled, because those have no final composition. You can recognize a disabled colorize mask because its name is stricken through.
To add a colorize mask to a group, select the group and  the canvas with the Colorize Mask editing tool, or
  the layer to .
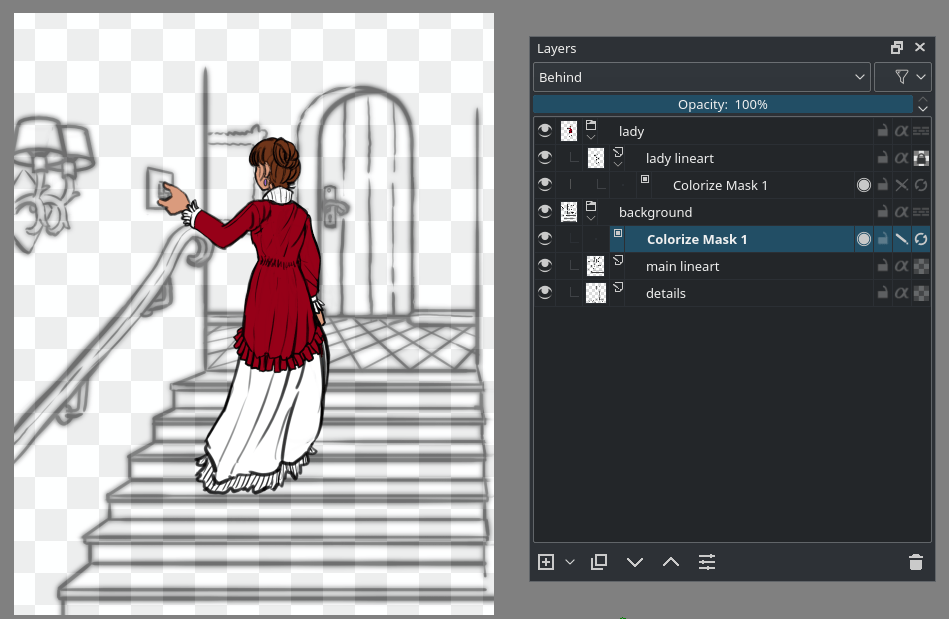
Now, we add strokes to the background quickly. We do not need to use the because the background covers the whole image.
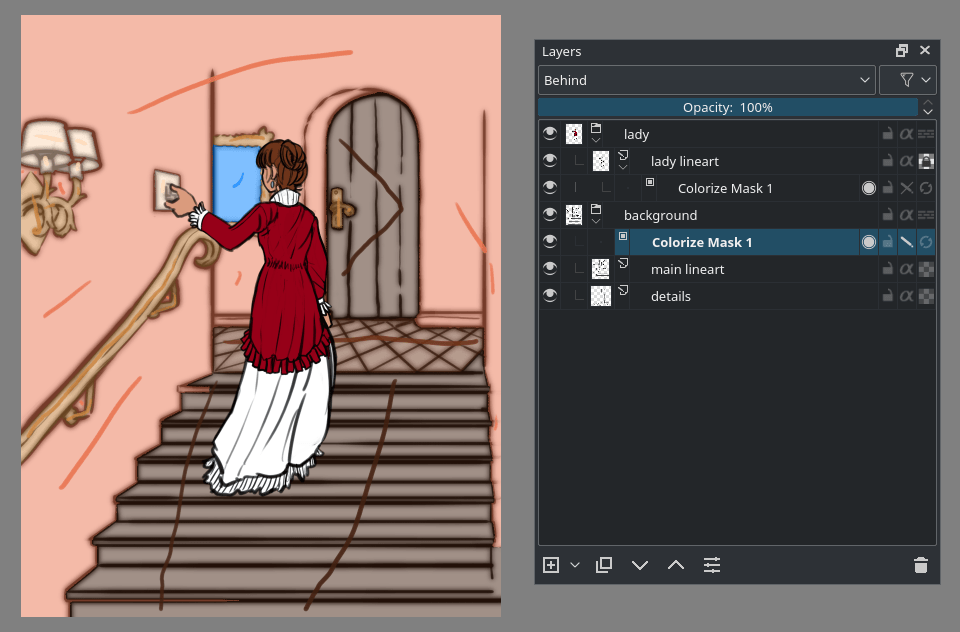
For the record, you can use other brushes and tools also work on the colorize mask as long as they can draw. The Colorize Mask Editing tool is just the most convenient because you can get to the algorithm options.
Out final result looks like this:
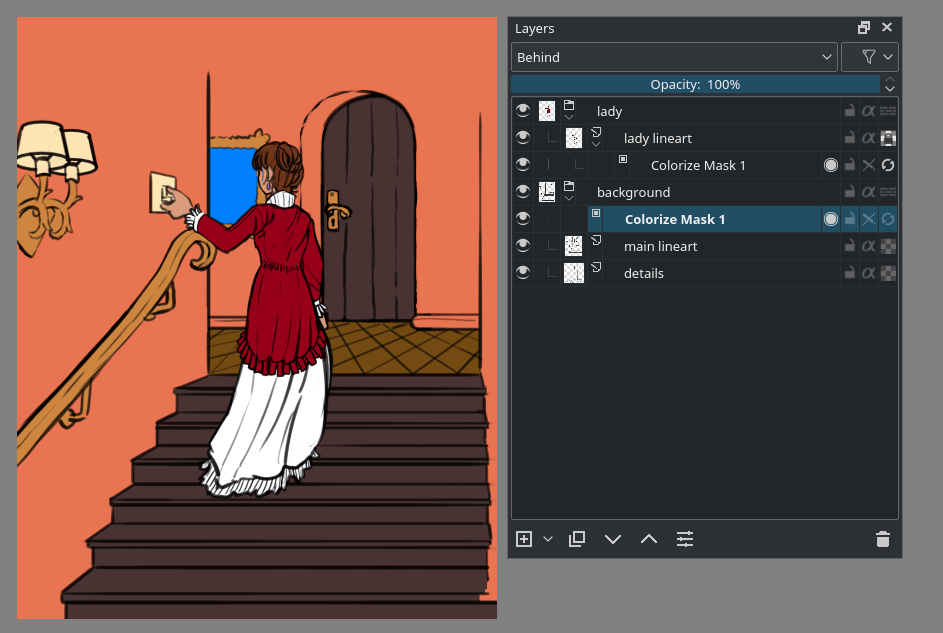
Now we are done,  the colorize mask and . Then, . This will give separate color islands that you can easily edit:
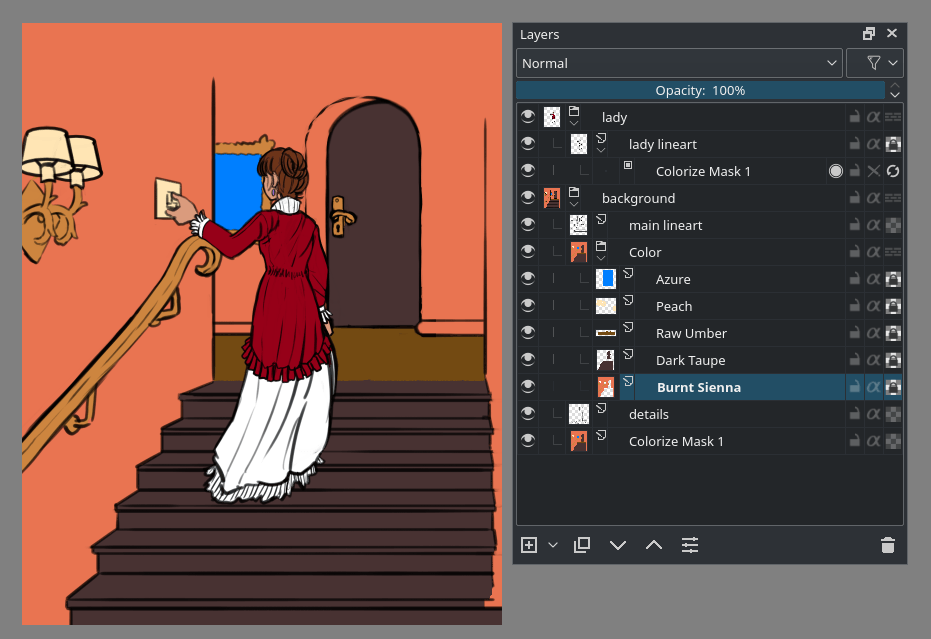
This way we can very quickly paint the image. Due to the colorize mask going from the first image to the following took only 30 minutes, and would’ve taken quite a bit longer.
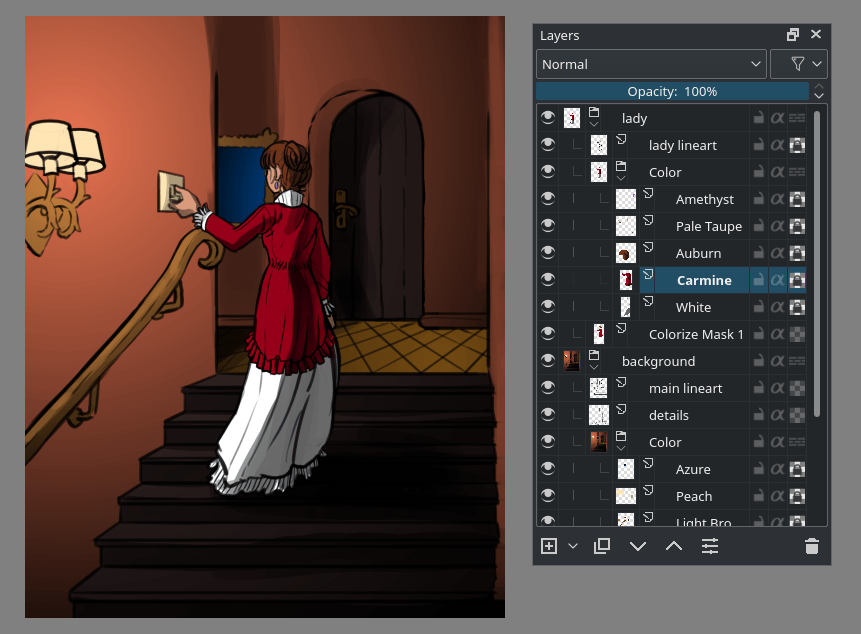
The colorize masks are saved to the .kra file, so as long as you don’t save and open to a different file format, nor convert the colorize mask to a paintlayer, you can keep working adjust the results.
Tool Options
- Update
Run the colorize mask algorithm. The progress bar for updates on a colorize mask shows only in the layer docker.
- Edit key strokes
Put the mask into edit mode. In edit mode, it will also show the ‘prefiltering’ on the line art, which is for example a blur filter for gap closing.
- Show output
Show the output of the colorize mask. If Edit key strokes is active, this will be shown semi-transparently, so it will be easy to recognize the difference between the strokes and the output.

On the Left: Show Output is on, Edit Key Strokes is off. In the Middle: Show Output and Edit Key Strokes are on. On the Right: Show Output is off and Edit Key Strokes is on.
- Limit to layer bounds
Limit the colorize mask to the combined layer bounds of the strokes and the line art it is filling. This can speed up the use of the mask on complicated compositions, such as comic pages.
- Edge detection
Activate this for line art with large solid areas, for example shadows on an object. For the best use, set the value to the thinnest lines on the image. In the image below, note how edge detection affects the big black areas:
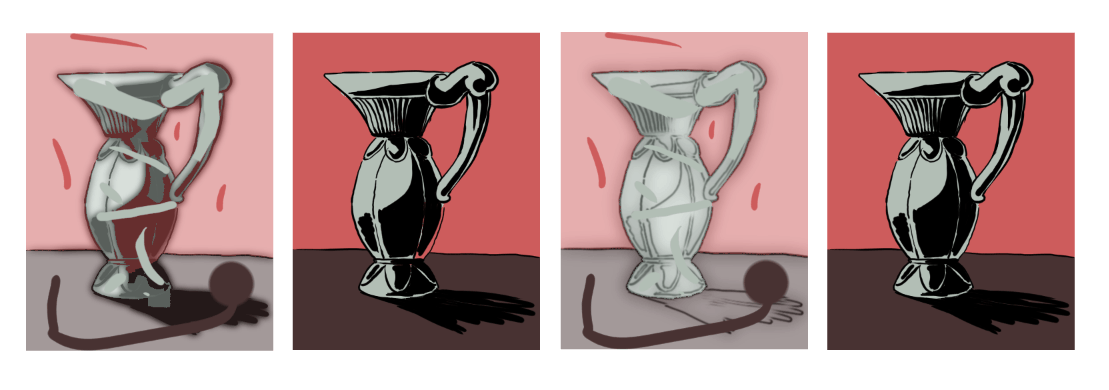
From left to right: an example with big black shadows on an object but no edge detection, the same example without the edit key strokes enabled. Then the same example with edge detection enabled and set to 2px, and that same example without edit key strokes enabled.
- Gap close hint
While the algorithm is pretty good against gaps in contours, this will improve the gap recognition. The higher this value is, the bigger the gaps it will try to close, but a too high value can lead to other errors. Note how the prefiltered line art (that’s the blurry haze) affects the color patches.

On the Left: Gap close hint is 0px. In the Middle: Gap close hint is 15px (the lines are 10px). On the Right: Gap close hint is 275px.
- Clean up
This will attempt to handle messy strokes that overlap the line art where they shouldn’t. At 0 no clean up is done, at 100% the clean-up is most aggressive.
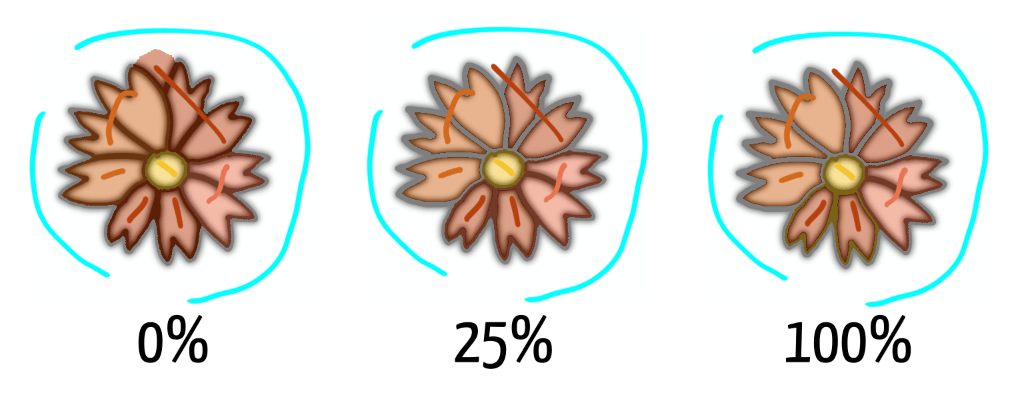
- Key strokes
This palette keeps track of the colors used by the strokes. This is useful so you can switch back to colors easily. You can increase the swatch size by hovering over it with the mouse, and doing Ctrl +
 .
.- Transparent
This button is under the keystrokes palette, you can mark the selected color to be interpreted a ‘transparent’ with this. In the clean-up screenshot above, cyan had been marked as transparent.
Layer properties
The colorize mask layer has four properties. They are all the buttons on the right side of the colorize mask layer:
- Show output
 The show output icon allows you to toggle whether you’ll see the output from the colorize algorithm.
- Lock
 This icon stops the mask from being edited.
- Edit key strokes
 This icon shows whether the colorize mask is in edit mode. In edit mode it’ll show the strokes, and the output will be semi-transparent.
- Update
 This icon will force the colorize mask to update, even when you’re in a different tool.
Note
Colorize masks cannot be animated.
