
Grids and Guides Docker
This docker controls the look and the visibility of both the Grid and the Guides decorations. It also features a checkbox to quickly toggle snapping on or off.
Grids
Grids in Krita can currently only be orthogonal and diagonal. There is a single grid per canvas, and it is saved within the document. Thus it can be saved in a Templates.
- Show Grid
Shows or hides the grid.
- Snap to Grid
Toggles grid snapping on or off. This can also be achieved with the Shift + S shortcut.
- Type
The type of Grid.
- Rectangle
An orthogonal grid.
Check Orthogonal grid for dedicated properties description.
- Isometric (Legacy)
A diagonal grid. Isometric doesn’t support snapping.
Check Isometric (Legacy) grid for dedicated properties description.
- Isometric
A diagonal grid. Isometric doesn’t support snapping.
Check Isometric grid for dedicated properties description.
- Grid Offset
Offsets the grid’s position, in pixels.
Orthogonal grid
The following options are available for the Rectangular grid:
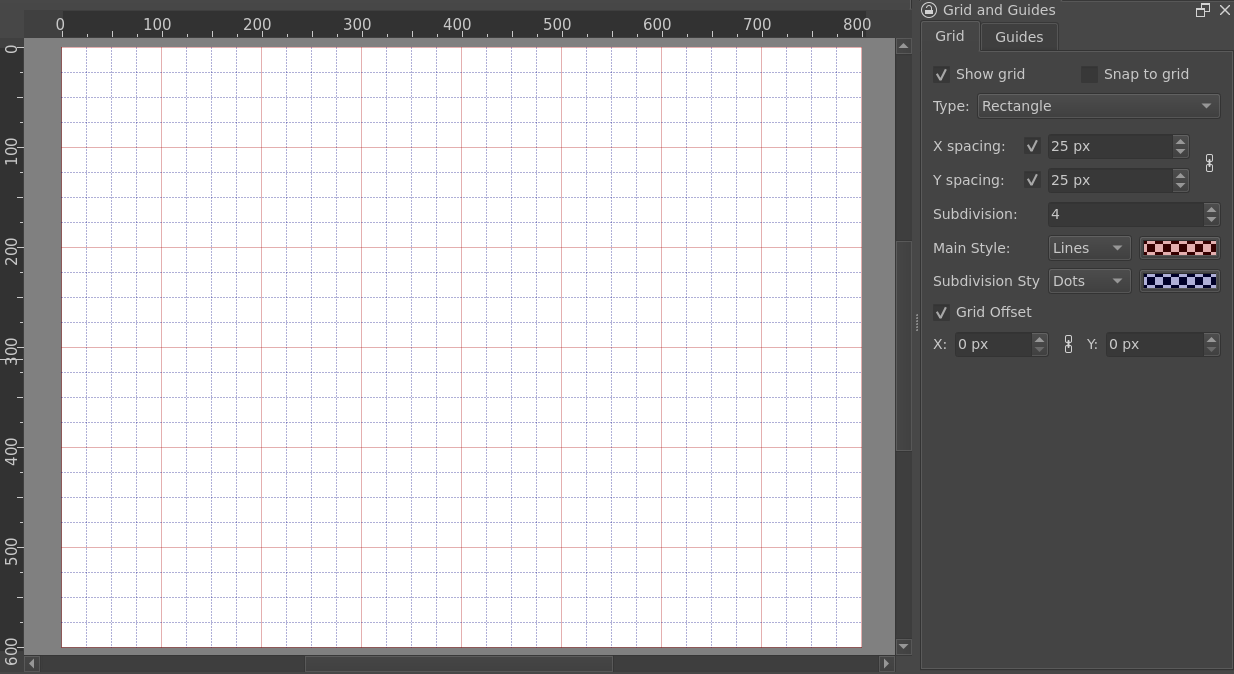
Main lines (solid, red) are drawn every 4 subdivisions.
Subdivision lines (dot, blue) are drawn for every subdivision between main lines.
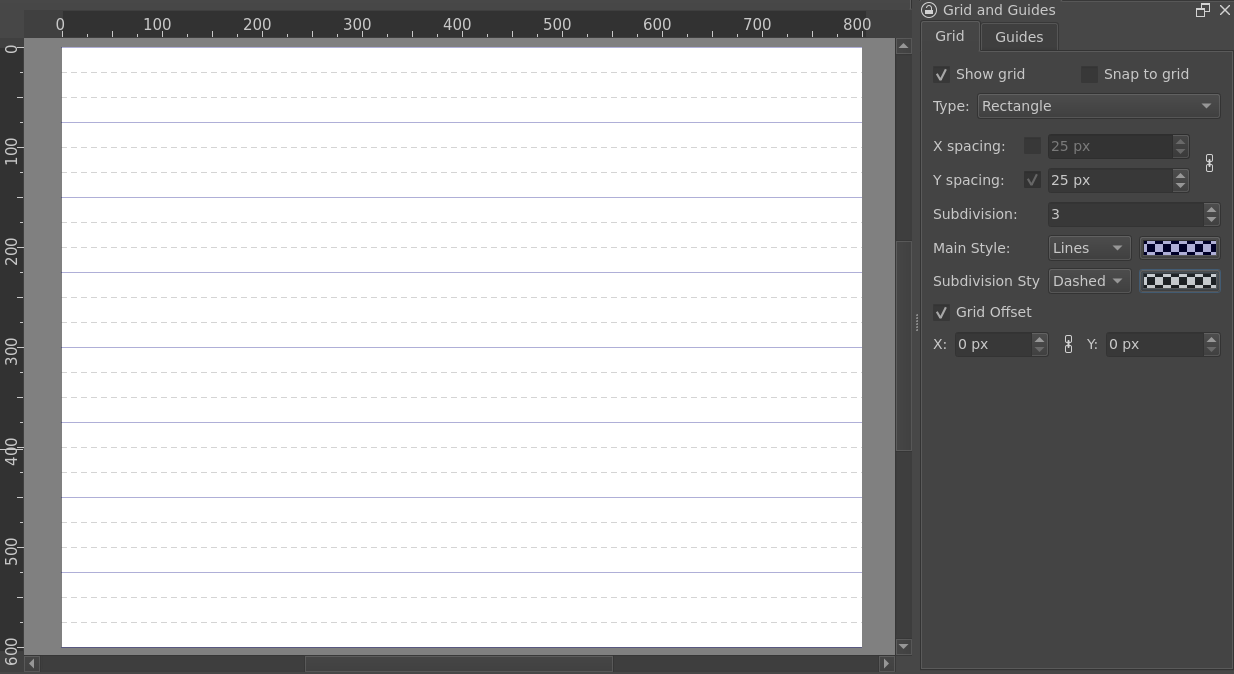
Vertical lines not rendered
Main lines (solid, blue) are drawn every 3 subdivisions.
Subdivision lines (dashed, grey) are drawn for every subdivision between main lines.
- X spacing
Sets the space between vertical grid lines, in pixels.
When unchecked, vertical lines are not drawn.
- Y spacing
Sets the space between horizontal grid lines, in pixels.
When unchecked, horizontal lines are not drawn.
- Subdivision
Groups cells together as larger squares and changes the look of the lines it contains. A subdivision of 2 will make cells appear twice as big, and the inner lines will become subdivisions.
- Main Style
Controls the line style & color for grid’s main lines.
- Subdivision Style
Controls the line style & color for grid’s subdivision lines.
Isometric (Legacy) grid
The Isometric (Legacy) grid is how isometric grids were rendered for Krita 5.2 and before. Cell size is calculated from Cell spacing option.
The following options are available for the Isometric (Legacy) grid:
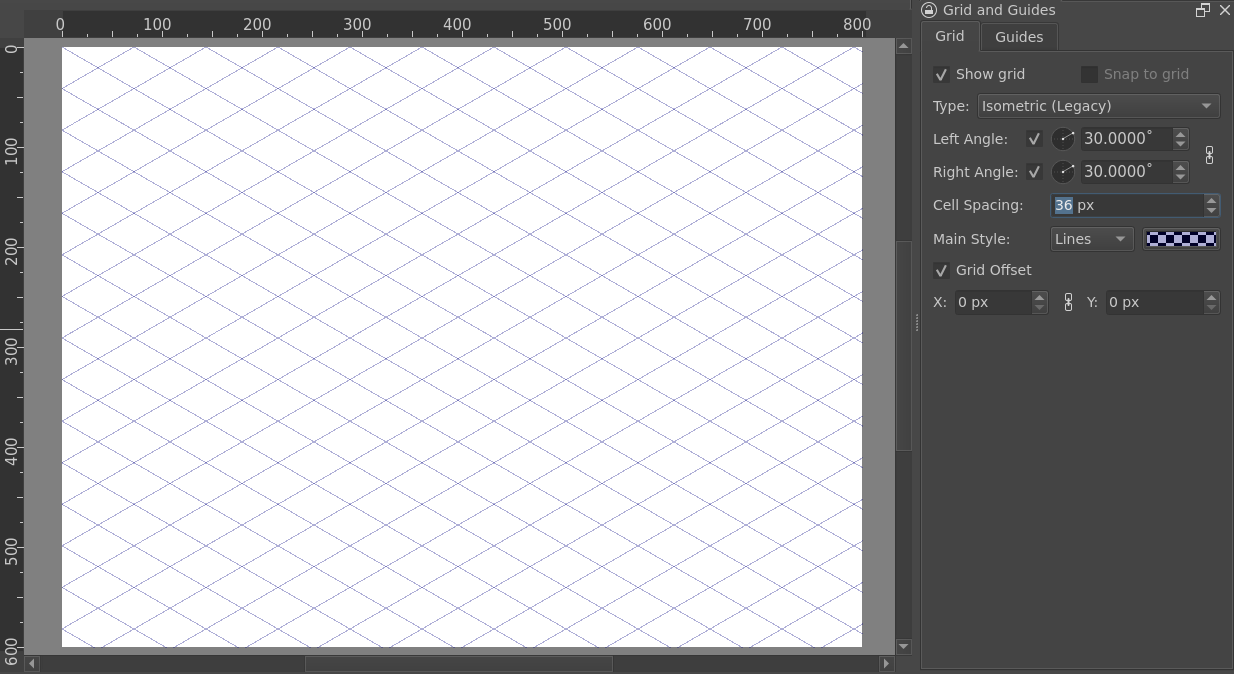
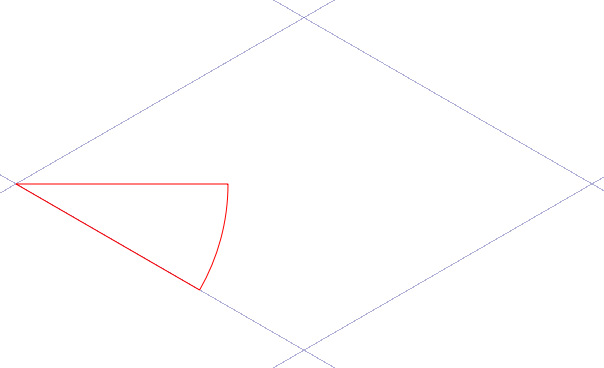
- Left Angle
The angle of the lines, counterclockwise.
When unchecked, left angle lines are not drawn.
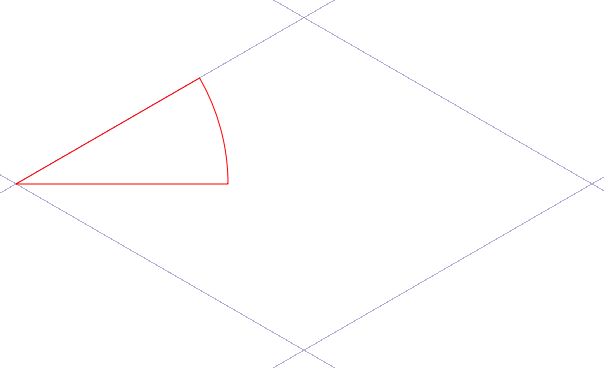
- Right Angle
The angle of the lines, clockwise.
When unchecked, right angle lines are not drawn.
- Cell spacing
Determines how much both sets of lines are spaced.
- Main Style
Controls the line style & color for grid.
Tip
Set both angles to 30° for true isometric.
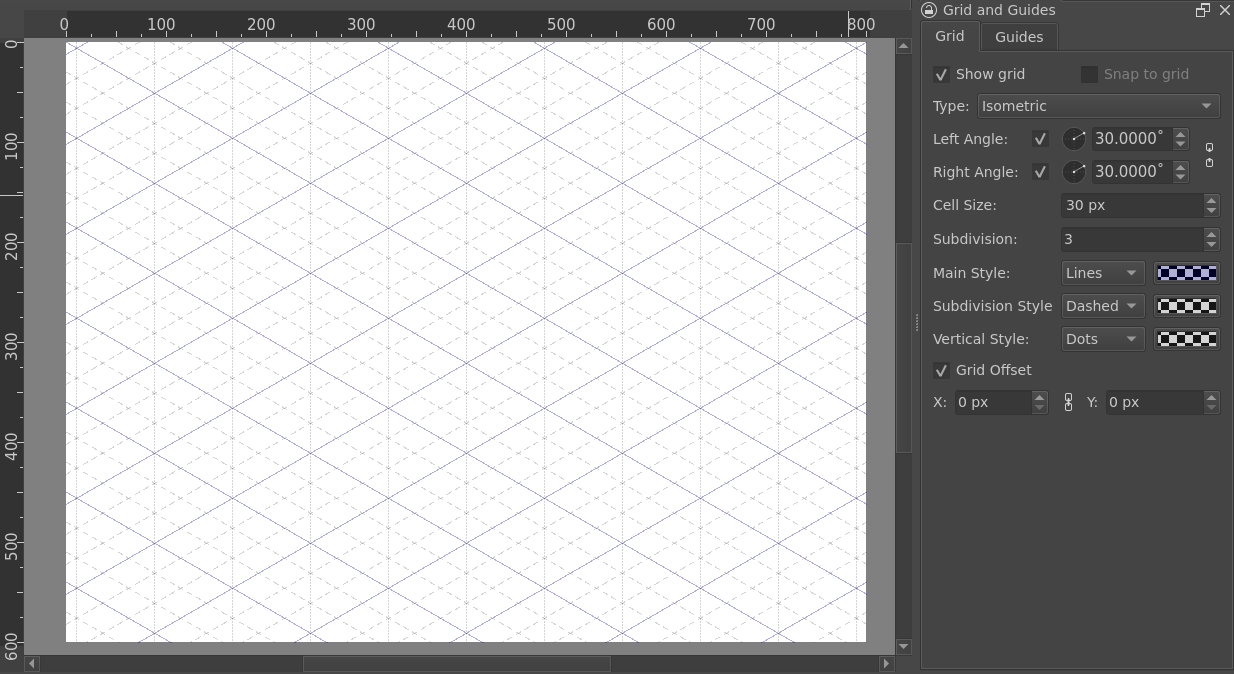
Isometric grid
The Isometric grid use a different method than Isometric (Legacy) to generate cells. Size is defined by the Cell size option. It also provides additional parameters to render the grid.
The following options are available for the Isometric grid:
- Left Angle
The angle of the lines, counterclockwise.
When unchecked, left angle lines are not drawn.
- Right Angle
The angle of the lines, clockwise.
When unchecked, right angle lines are not drawn.
- Cell Size
Determines size length for cells, in pixels.

- Subdivision
Groups cells together as larger cells and changes the look of the lines it contains. A subdivision of 2 will make cells appear twice as big, and the inner lines will become subdivisions.
- Main Style
Controls the line style & color for grid’s main lines.
- Subdivision Style
Controls the line style & color for grid’s subdivision lines.
- Vertical Style
Controls the line style & color for grid’s vertical lines.
Vertical lines are drawn only if both Left Angle and Right Angle have the same value.
It’s possible to force vertical lines to not be drawn by selecting None as line style.
Tip
Set both angles to 30° for true isometric.
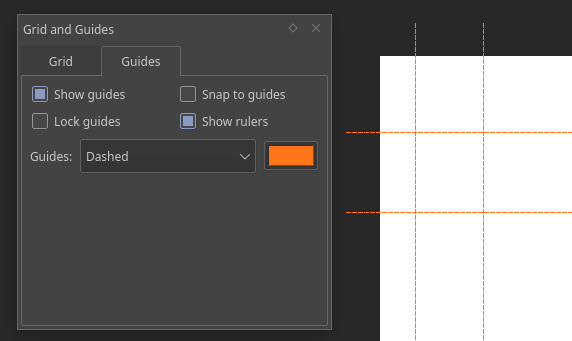
Guides
Guides are horizontal and vertical reference lines. You can use them to place and align layers accurately on the canvas.
Creating Guides
To create a guide, you need both the rulers and the guides to be visible.
Rulers. ()
Guides. ()
To create a guide, move your cursor over a ruler and drag in the direction of the canvas. A line will appear. Dragging from the left ruler creates a vertical guide, and dragging from the top ruler creates a horizontal guide.
Editing Guides
Place your cursor above a guide on the canvas. If the guides are not locked, your cursor will change to a double arrow. In that case, click and drag to move the guide. To lock and unlock the guides, open the Grid and Guides Docker. Ensure that the Guides tab is selected. From here you can lock the guides, enable snapping, and change the line style.
Note
Currently, it is not possible to create or to move guides to precise positions. The only way to achieve that for now is to zoom in on the canvas, or to use the grid and snapping to place the guide.
Removing Guides
Click on the guide you want to remove and drag it outside of the canvas area. When you release your mouse or stylus, the guide will be removed.