Onion Skin Docker

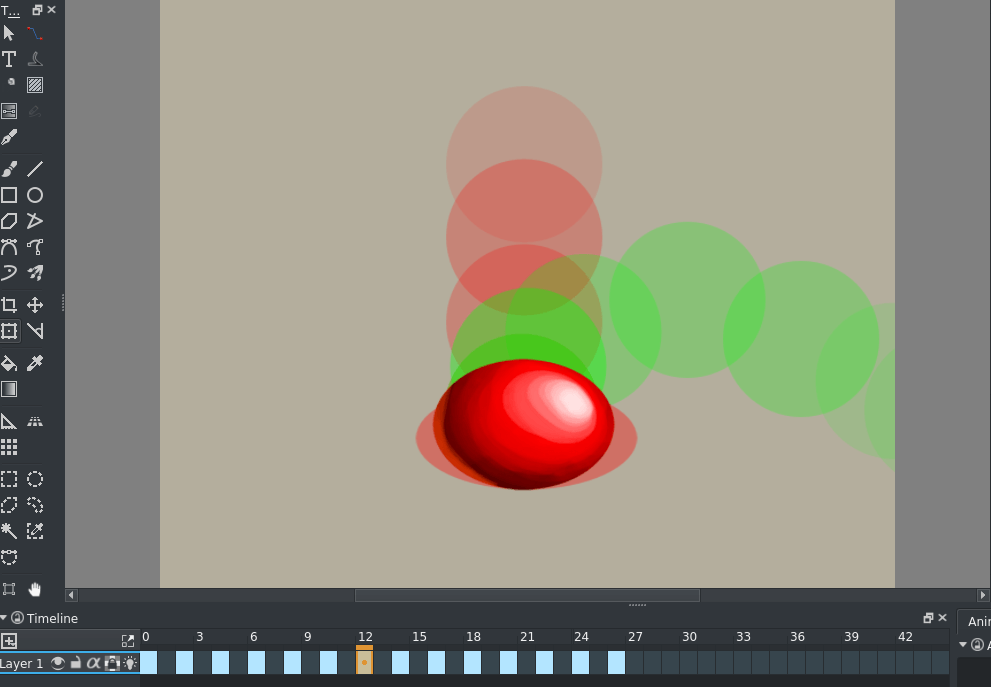
To make animation easier, it helps to see both the next frame as well as the previous frame sort of layered on top of the current. This is called onion-skinning.

Basically, they are images that represent the frames before and after the current frame, usually colored or tinted.
You can toggle them by clicking the lightbulb icon on a layer that is animated (so, has frames), and isn’t fully opaque. (Krita will consider white to be white, not transparent, so don’t animated on an opaque layer if you want onion skins.)
Changed in version 4.2: Since 4.2 onion skins are disabled on layers whose default pixel is fully opaque. These layers can currently only be created by using background as raster layer in the content section of the new image dialog. Just don’t try to animate on a layer like this if you rely on onion skins, instead make a new one.
The term onionskin comes from the fact that onions are semi-transparent. In traditional animation animators would make their initial animations on semitransparent paper on top of an light-table (of the special animators variety), and they’d start with so called keyframes, and then draw frames in between. For that, they would place said keyframes below the frame they were working on, and the light table would make the lines of the keyframes shine through, so they could reference them.
Onion-skinning is a digital implementation of such a workflow, and it’s very useful when trying to animate.

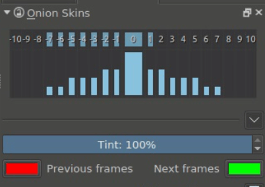
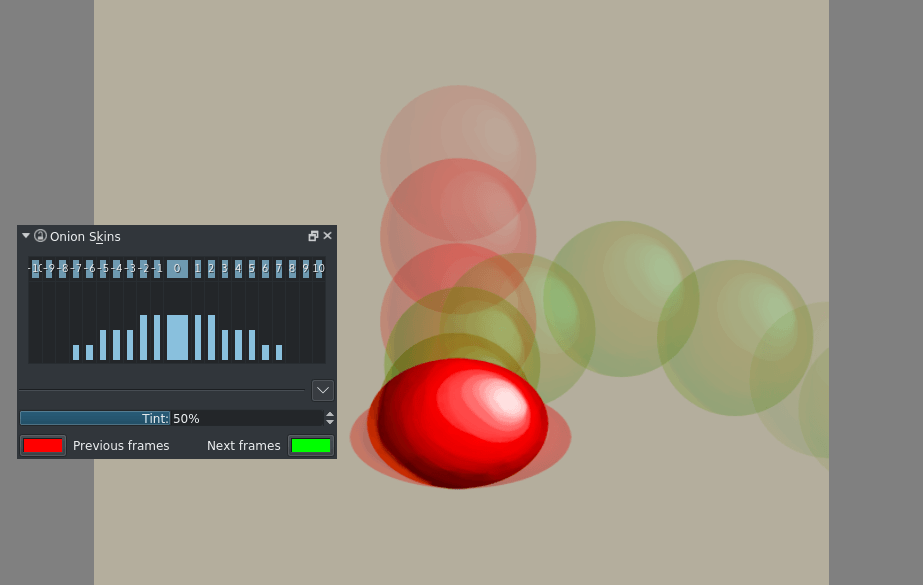
The slider and the button with zero offset control the master opacity and visibility of all the onion skins. The boxes at the top allow you to toggle them on and off quickly, the main slider in the middle is a sort of ‘master transparency’ while the sliders to the side allow you to control the transparency per keyframe offset.
Tint controls how strongly the frames are tinted, the first screen has 100%, which creates a silhouette, while below you can still see a bit of the original colors at 50%.
The Previous Frame and Next Frame color labels allows you set the colors.
