Curve Brush Engine

The curve brush is a brush engine which creates strokes made of evenly spaced lines. It has, among other things been used as a replacement for pressure sensitive strokes in lieu of a tablet.
Settings
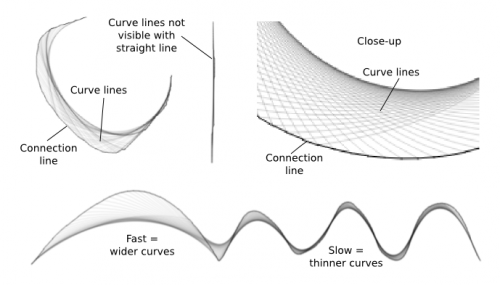
First off, the line produced by the Curve brush is made up of 2 sections:
The connection line, which is the main line drawn by your mouse.
The curve lines I think, which are the extra fancy lines that form at curves. The curve lines are formed by connecting one point of the curve to a point earlier on the curve. This also means that if you are drawing a straight line, these lines won’t be visible, since they’ll overlap with the connection line. Drawing faster gives you wider curves areas.
You have access to 3 settings from the Lines tab, as well as 2 corresponding dynamics:
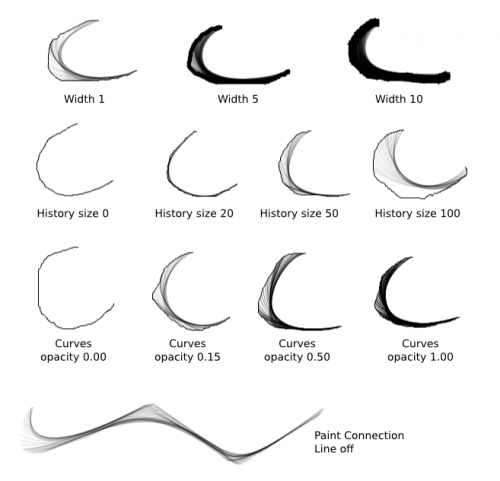
Line width: this applies to both the connection line and the curve lines.
Line width dynamics: use this to vary line width dynamically.
History size: this determines the distance for the formation of curve lines.
If you set this at low values, then the curve lines can only form over a small distances, so they won’t be too visible.
On the other hand, if you set this value too high, the curve lines will only start forming relatively „late“.
So in fact, you’ll get maximum curve lines area with a mid-value of say… 40~60, which is about the default value. Unless you’re drawing at really high resolutions.
Curves opacity: you can’t set different line widths for the connection line and the curve lines, but you can set a different opacity for the curve lines. With low opacity, this will produce the illusion of thinner curve lines.
Curves opacity dynamics: use this to vary Curves opacity dynamically.
In addition, you have access to two checkboxes:
Paint connection line, which toggles the visibility of the connection line.
Smoothing, which… I have no idea actually. I don’t see any differences with or without it. Maybe it’s for tablets?
Drawing variable-width lines
And here’s the only section of this tutorial that anyone cares about: pretty lineart lines! For this:
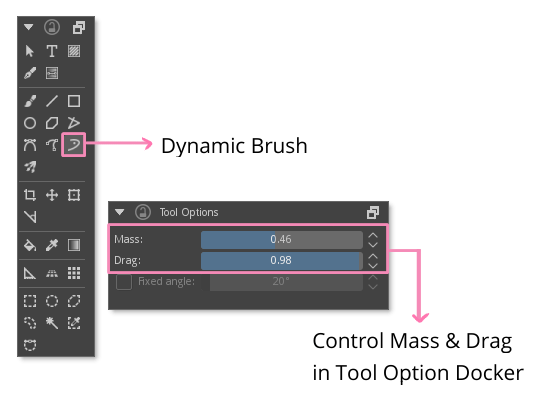
Use the Draw Dynamically mode: I tend to increase drag to at least 50. Vary Mass and Drag until you get the feel that’s most comfortable for you.
Set line width to a higher value (ex.: 5), then turn line width dynamics on:
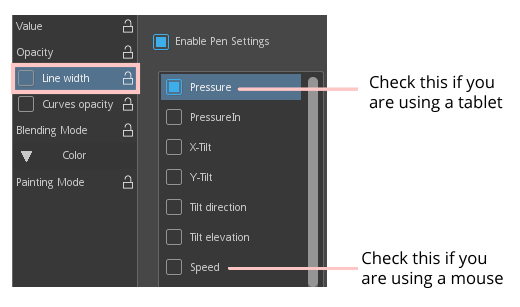
If you’re a tablet user, just set this to Pressure (this should be selected by default so just turn on the Line Width dynamics). I can’t check myself, but a tablet user confirmed to me that it works well enough with Draw Dynamically.
If you’re a mouse user hoping to get variable line width, set the Line Width dynamics to Speed.
Set Curves opacity to 0: This is the simplest way to turn off the Curve lines. That said, leaving them on will get you more „expressive“ lines.
Additional tips:
Zig-zag a lot if you want a lot of extra curves lines.
Use smooth, sweeping motions when you’re using Draw Dynamically with Line Width set to Speed: abrupt speed transitions will cause abrupt size transitions. It takes a bit of practice, and the thicker the line, the more visible the deformities will be. Also, zoom in to increase control.
If you need to vary between thin and thick lines, I suggest creating presets of different widths, since you can’t vary the base line width from the canvas.
Alternative:
Use the Draw Dynamically mode
Set Curves opacity to 100
Optionally decrease History size to about 30
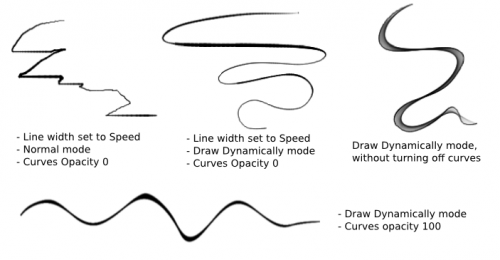
The curve lines will fill out the area they cover completely, resulting in a line with variable widths. Anyway, here are some comparisons:
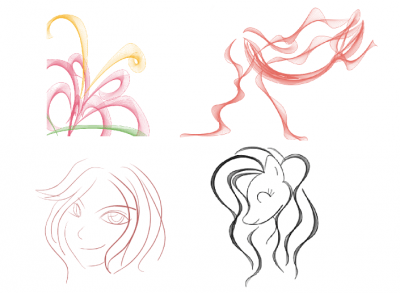
And here are examples of what you can do with this brush: