
ペイントツール SAI から来た人のための Krita の紹介
これ Krita でどうやるの?
このセクションで Krita とペイントツール SAI が共有する機能や、しかしどう違うのかについて説明します。
キャンバスガイド
Krita は、SAI と同じように、視点を反転/回転/複製することができます。SAI とは違い、これらはキーボードキーに紐づけられています。
- ミラー
反転は M キーに紐づけられています。
- 回転
色々なやり方があります: 4 と 6 キー、または Ctrl + [ と Ctrl + ] ショートカットで15度ずつ左か右に回転します。より洗練された回転には Shift + スペース + ドラッグ か シフト +
 + ドラッグ ショートカットを使用します。回転をリセットするには 5 キーを押します。
- ズーム
+ と -、または Ctrl +
ショートカットを使ってズームアウト/インすることができます。1、2 または 3 キーでズームをリセット、ページに合わせてズーム、またはページ幅に合わせてズームします。
素早く画像全体を見渡すには にあるキャンバスプレビュードッカーが使えます。
またツールバーにコマンドを置けば、少し SAI のような感じになります。 メニューに行きます。ツールバーは二つありますが、メインのツールバーに追加します。
それから、左の列に何か入力して検索します。例えば、「元に戻す」などです。「元に戻す」アクションを選択して右にドラッグします。右のアクションを選択して、 をクリックします。 を切り替えるとテキスト表示をなくせます。それから OK を押します。右が終わったら、元に戻す が保存とグラデーションアイコンに挟まれているはずです。
同じことを やり直す、選択解除、選択反転、ズームアウト、ズームイン、表示倍率をリセット、キャンバスを左に回転、右に回転、左右反転表示 とおそらく 手ブレ補正: 簡易、手ブレ補正: スタビライザー に対して行うことで、ほとんどすべての SAI のトップバー機能を Krita のトップバーに持ってこれるでしょう (しかし、小さい画面でこれをするとブラシとツールバーのものが右のドロップダウンメニューに隠れてしまうかもしれませんので、少し試してみる必要があります)。
選択を隠す、回転をリセット は現在ツールバー設定では使えません。ショートカット Ctrl + H と 5 を使う必要があります。
注釈
Krita 3.0 は今現在ツールバーのテキスト変更には対応していません。現在開発中です。
右クリックカラーサンプラー
これは で設定できます。統合された画像から背景色を抽出 の前の Ctrl +  ショートカットが書かれた項目をダブルクリックすれば
  でウィンドウが出るようになります。
注釈
Krita 3.0 はペイントツール SAI 互換入力リストが標準で付いています。ほとんどの機能を慣れたキーで使うためにはペイントツール SAI 用のショートカットリストと組み合わせて使ってください。
スタビライザー
フリーハンドブラシのツールのオプションドッカーの中にあります。高性能なタブレットには基本を使い、スタビライザーがペイントツール SAI に近いものになっています。遅延 をオフにすればデッドゾーンが無くなります。
透過
ペイントツール SAI ユーザの多くを混乱させる物事の一つに、Krita 透過表示にチェッカー柄を使うことが挙げられます。そんなに一般的でないわけではないのですが、キャンバス背景が白の方がお好みであれば、それは可能です。新規作成ダイアログで 背景: キャンバス色にする を選べば画像の背景が白になります。メニューの からまた透過に戻せます。もし PNG か JPG にエクスポートする場合、アルファチャンネル(透過)を格納する のチェックを外して背景色を白にします(既定では黒になっています)。
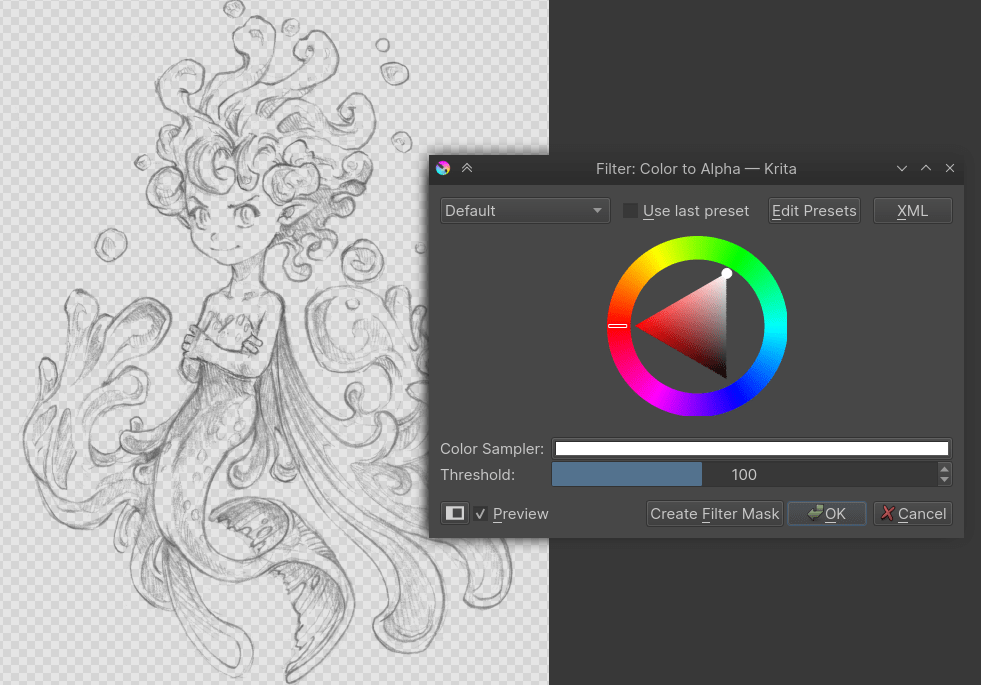
SAI のように、メニューの の フィルタ: 色をアルファに ダイアログから白黒画像を素早く黒と透過の画像にできます。
ブラシ設定
もう一つ面白くも勘違いされているのは、Krita のブラシエンジンはそんなに複雑ではないと思われていることです。結局、トップバーからはサイズや流量、不透明度だけを変えることができます。
これはあまり正しくありません。ドッカーにブラシ設定がないというよりはツールバーのドロップダウンにあるからです。最も簡単にアクセスする方法は F5 キーを使うことです。見てわかる通り、実際は結構複雑です。ブラシを作れる 10 以上のブラシエンジンがあります。ペイントツール SAI で慣れたものはピクセルブラシ(インク)、色ぼかしブラシ(ブラシ)、フィルタブラシ(覆い焼き、焼きこみ)です。
塗りブラシ作成の例としてピクセルブラシが挙げられ、不透明度と流量で ペンの設定を有効化する のチェックを外し、オプションリストのサイズ以外のすべてからチェックを外します。それからブラシ形状でタブの 自動ブラシ を選び、ブラシアイコン下のアンチエイリアスをオンにして減衰を 0.9 にします。そして最後に描点間隔を「自動」 にして数を 0.8 に設定します。
ブラシの隅々まで細かい設定ができ、まとめて他の人と共有することができます。パックとブラシのインポートは から行え、.bundle や .kpp ファイルをインポートすることができます。
消去
消しゴムは Krita の合成モードで、ペイントツール SAI でいう透過モードのようなものです。E キーか 合成モード ドロップダウンから選択することで有効になります。
合成モード
Krita は多くの合成モードがあり、ありがたいことにペイントツール SAI にあるすべてはバイナリを除けば存在します。合成モードを管理するには、それぞれに小さいチェックボックスがあり、チェックをつけてお気に入りに登録します。
乗算、スクリーン、オーバーレイと通常はお気に入りに入っています。Krita の輝度はペイントツール SAI のとは若干違い、色の照度関係をレイヤーの色の照度関係で置き換えます。
SAI の輝度モードは Krita の 4.2.4 で導入された Luminosity/Shine (SAI) モードと同一です。SAI の影モードは 色焼きこみ と、Hard Mix は輝度と影モードと同じです。
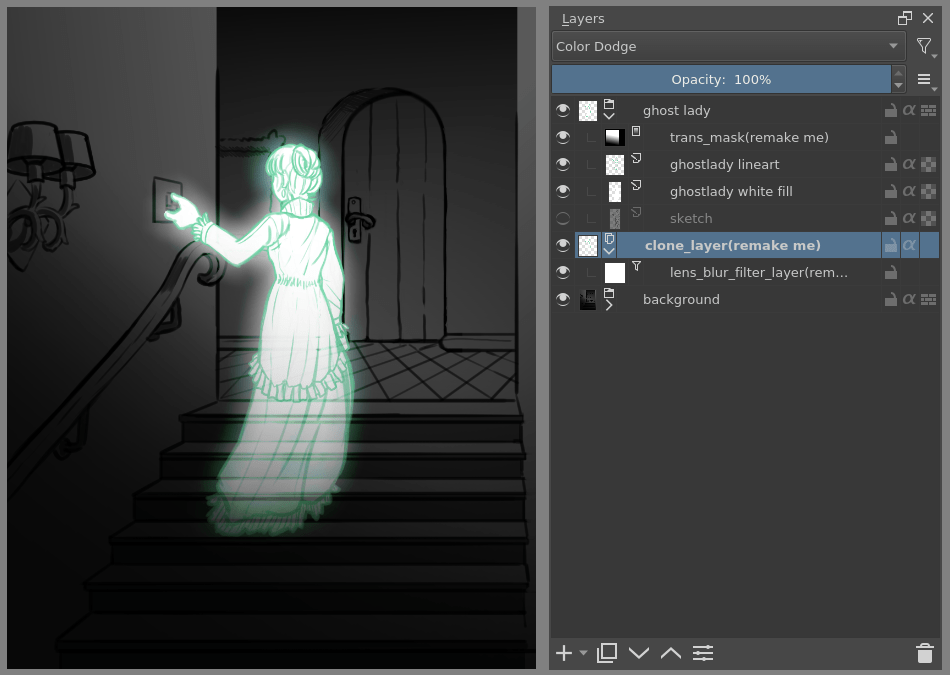
レイヤー
- アルファをロック
これはそれぞれのレイヤーの隣にあるチェッカーボックスアイコンです。
- クリッピンググループ
Krita のクリッピングマスクではすべての画像を一つのレイヤーに収める必要があり、それから 'a' アイコンを押すか、Ctrl + Shift + G ショートカットを押します。
- インクレイヤー
これは Krita のベクターレイヤーで、テキストも扱えます。
- マスク
これら Krita で透過に影響するグレースケールのレイヤーは透過マスクと呼ばれ、ペイントツール SAI のように、レイヤーと同様にグループに対しても適用できます。選択があるときに透過マスクを作ると、選択をベースとして使います。
- レイヤーの消去
これは にありますが、単に Del キーを押すこともできます。
二つの色を混ぜる
ペイントツール SAI でこのドッカーを使っている場合、Krita のデジタル混色ドッカーが役に立つでしょう。スライダーをドラッグすることで色がどれだけ混ぜられるか変えられます。
Krita を使うと他に何があるの?
より多くのブラシカスタマイズ
ブラシ設定エディタはもうお判りでしょう。スケッチブラシ、グリッドブラシ、変形ブラシ、複製ブラシ、テクスチャを使うブラシ、傾き、回転や速度に反応するブラシ、広がるブラシや色を変えるブラシ。Krita での選択肢はかなり多いです。
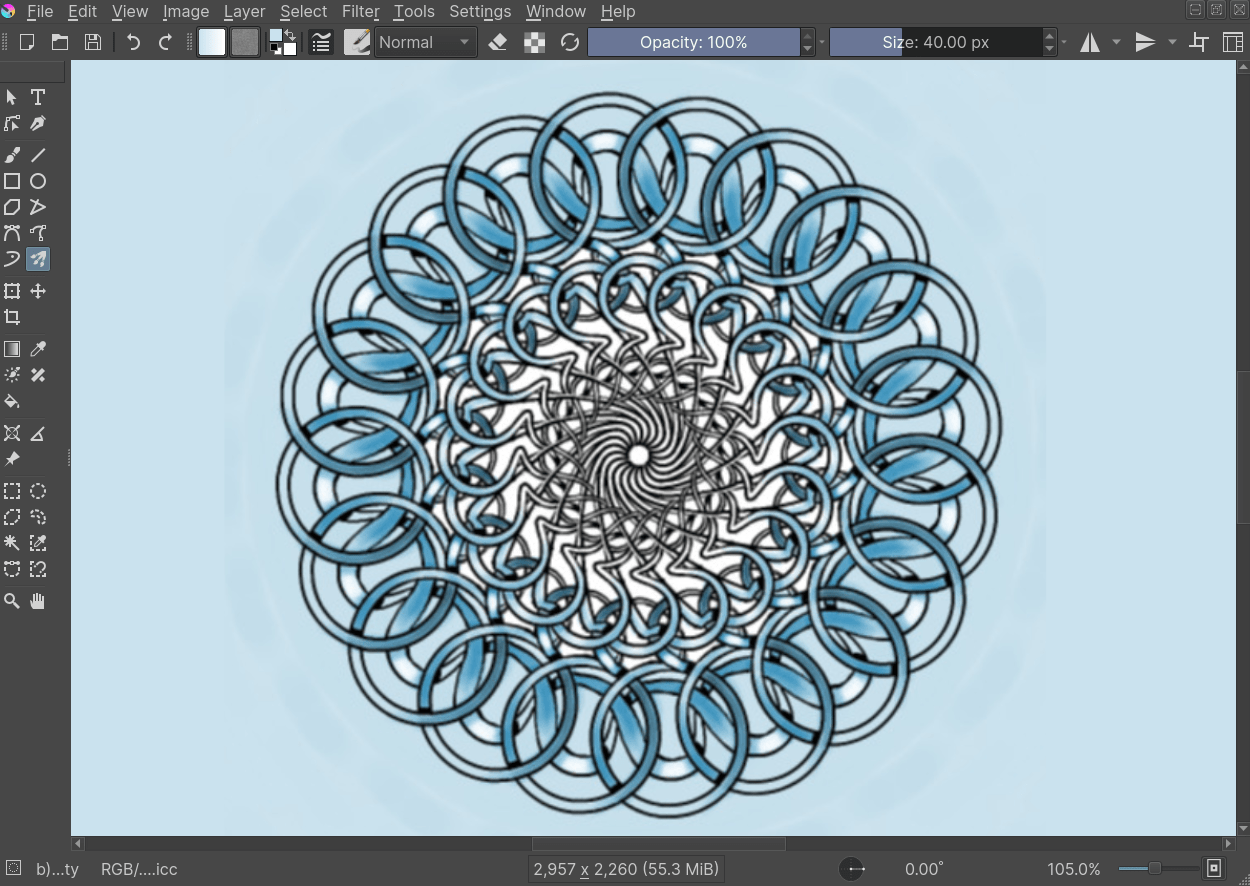
色の違う選び方
HSV スライダー、RGB スライダー、色相環の中の三角形はあります。しかしまた HSI、HSL や HSY' スライダー、CMYK スライダー、パレット、円形セレクタ、四角形セレクタ、小さいセレクターや大きいセレクター、色履歴と影セレクタもあります。 に行き、ドッカー: ドロップダウンボックスのオプションを選択して、メインで使う色選択の形とタイプを変更します。
色履歴は H キーで、通常使う色は U キーで、影選択は Shift + N と Shift + M ショートカットで呼び出せます。大きなセレクタはキャンバス上で Shift + I ショートカットで呼び出すことができます。
図形ツール
円、多角、パス、Krita ではこれらを簡単に描くことができます。
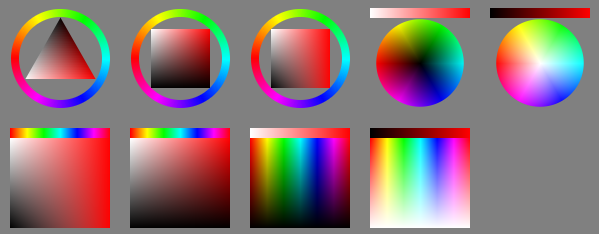
マルチブラシ、ミラーシンメトリとラップアラウンド
これらのツールで素早く左右対称画像、マンダラやタイル状のテクスチャを描くことができます。背景と抽象模様に便利です。
アシスト
ブラシをスナップすることができるパース、同心円といった補助が使えます。
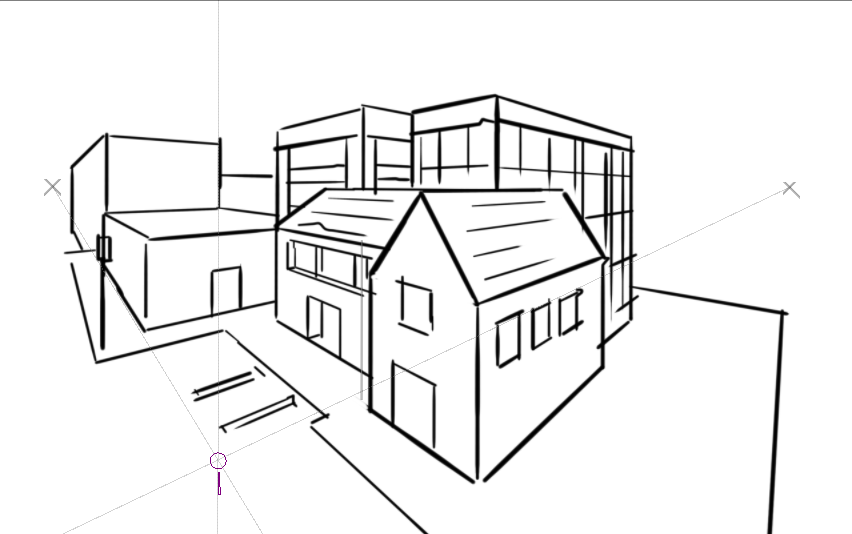
Krita の消失点補助を使ってみたところ。
レイヤーのロック
南京錠アイコンでレイヤーをロックすれば描けなくなります。
クイックレイヤー選択
R キーを押したまま絵の部分を押すと、Krita はカーソル下のレイヤーを選択します。大量のレイヤーを扱うときにとても便利です。
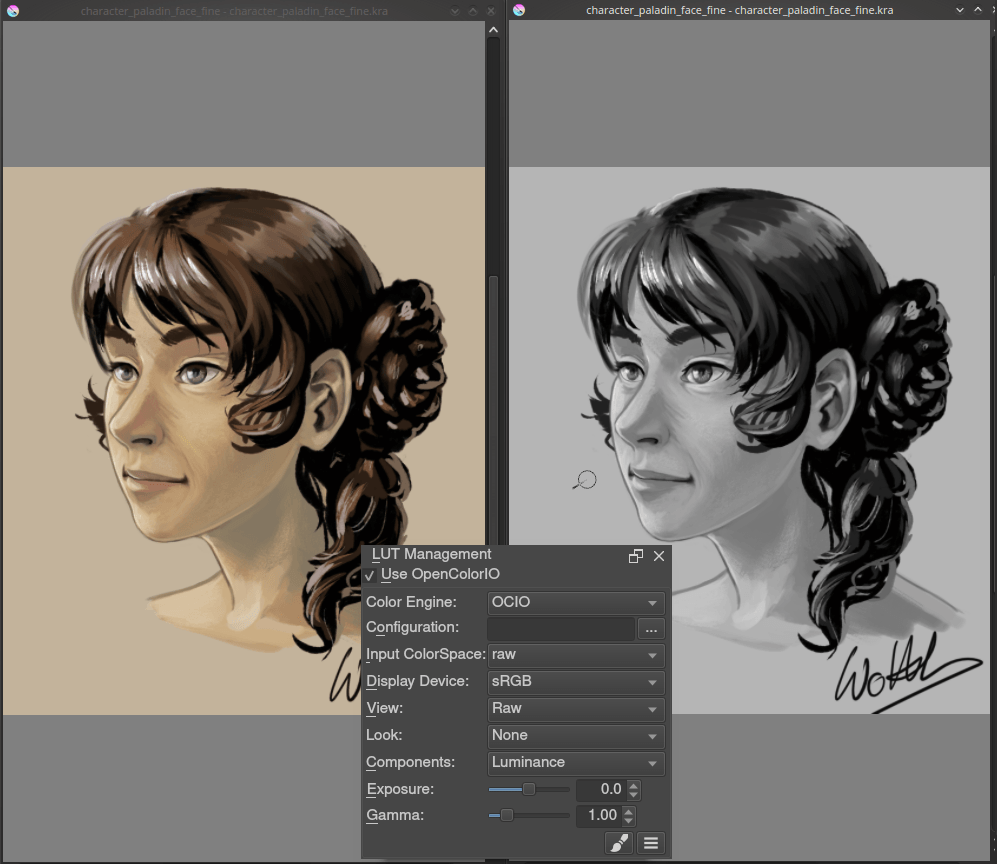
色管理
これで印刷用の準備作業をしたり、LUT ドッカーで画像をより分析する小技が使えます。例えば、LUT ドッカーを使って分けたビューの色をグレースケールにし、値をすぐに見ることができます。
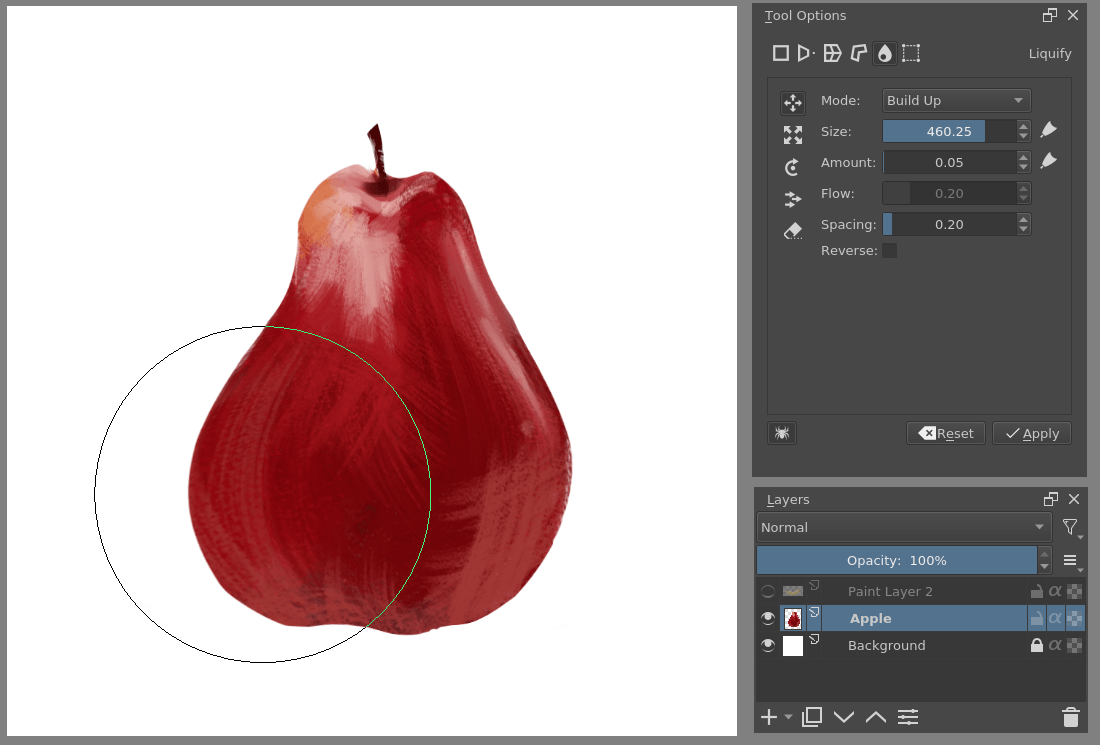
洗練された変形ツール
ただ回転や拡大縮小するだけではなく、格子、ラップ、液化や変形ツールとマスクを使った非破壊変形もあります。
フィルタ、非破壊フィルタレイヤーとマスク
カラーバランスやカーブといったフィルタで簡単に影レイヤーが作れます。実際フィルタレイヤーとレイヤーマスクを下に書いたものに直に適用できます。
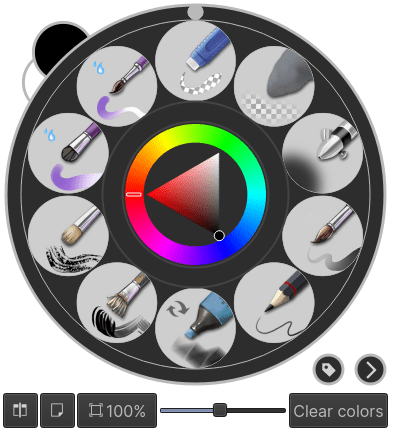
ポップアップパレット
既定で右クリックで出てくる円形のものです。タグを付けてブラシを管理し、ポップアップパレットに表示されるものを管理できます。また小さい色選択や色履歴もあり、直にブラシを切り替えることができます。
ペイントツール SAI に比べて Krita に欠けているものは?
ベクター線の可変幅
レイヤーの選択ソースオプション
Dynamic hard-edges for strokes (the fringe effect)
No mix-docker
プリセットに関連付けられたスタビライザー
プリセットごとのホットキー
さいごに
この紹介で Krita に慣れて、使うのが楽しくなればと願います。