
オプション
エアブラシ
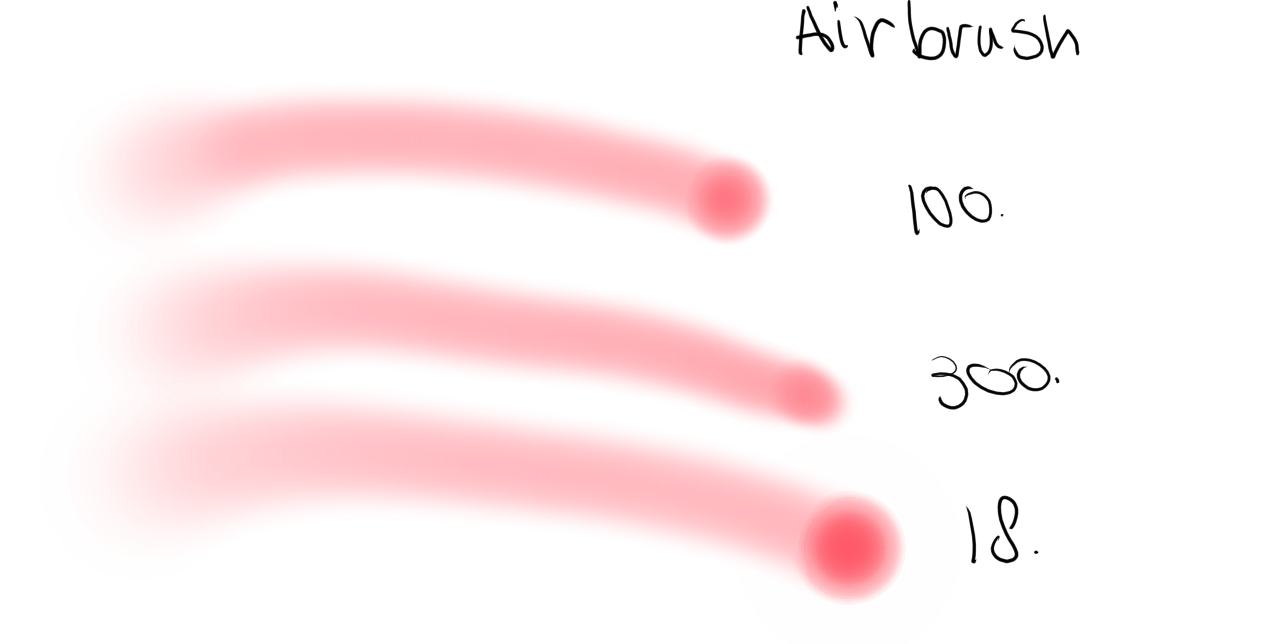
ブラシを押下したままでも、キャンバス上に色を追加していきます。値を下げると、より早く色がついていきます。
線対称反転
ブラシ形状をセンサーからの入力に合わせて反転させます。
- 水平方向
マスクを水平方向に反転させます。
- 垂直方向
マスクを垂直方向に反転させます。
反転例の一部に 回転 を使用しています。
回転
Brush Tip Angle
The final brush tip rotation depends on the enabled Rotation Sensors. Let's first review the basic behavior of the brush tip with an example brush that uses the text "BRUSH" as the brush tip texture. If no Sensor is active, and the brush tip rotation is 0 degrees, the brush looks like this:

As the brush tip rotation is increased, the tip rotates counter-clockwise:

When the Rotation option is enabled, it adds its angle contribution to the base tip angle shown above. Though the way how each sensor affects the brush rotation is different.
Pressure sensor
For the Pressure sensor, the original non-rotated brush state is linked to the pressure value of 50%. When the user increases the pressure, the brush rotation increases (i.e. rotates counter-clockwise). When the user decreases the pressure, the brush rotation decreases (i.e. rotates clockwise).
Most of the sensors behave like the Pressure sensor, i.e. non-rotated state is at sensor value of 50%, increasing the sensor value increases the rotation, decreasing the sensor value decreases the rotation.
There are two notable exceptions to this rule: Tilt Direction and Drawing Angle sensors.
Tilt Direction
Tilt Direction sensor is linked to the physical direction of the stylus in space. It links the vertical axis of the brush to the direction of the stylus:


When Krita cannot detect stylus' tilt direction, it puts the brush into neutral position. The neutral position of the pen tilt corresponds to the pen being held in the right hand at a 3 o'clock position

The neutral position is used in one of the following cases:
the stylus stands strictly vertically
the tablet device doesn't support tilt
the mouse is used (which doesn't support tilt either)
注釈
For left-handed users, there's an option to adjust the global tilt offset in the Tablet Settings. To get the same neutral point rotation but with the left hand, the global tilt offset should be set to 180 degrees.
To get a natural looking brush tip with the Tilt Direction sensor enabled, the brush tip rotation angle needs to be set to 90 degrees:

Drawing Angle
Drawing Angle sensor is commonly used in combination with rake-type brushes. It is especially useful because it does not rely on tablet-specific sensors.
In contrast to Tilt Direction it links the horizontal axis of the brush to the direction of the direction of the painting stroke:


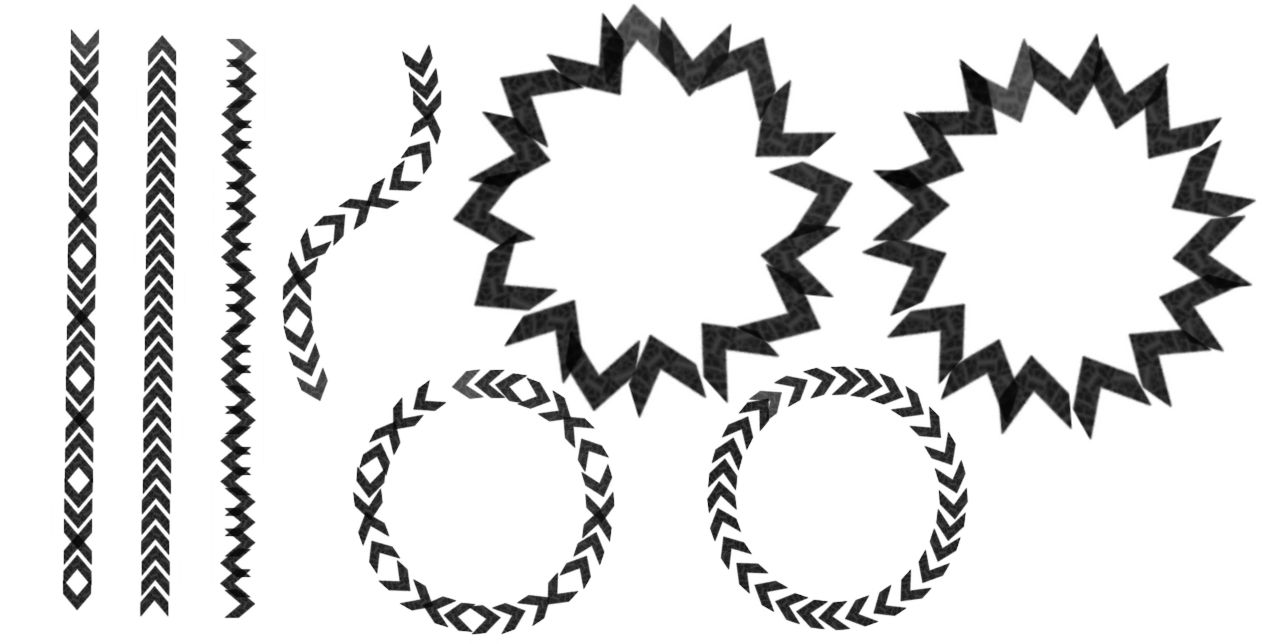
Other sensors
In addition to the sensors discussed above, there are many other Rotation Sensors available that allow for a variety of effects.
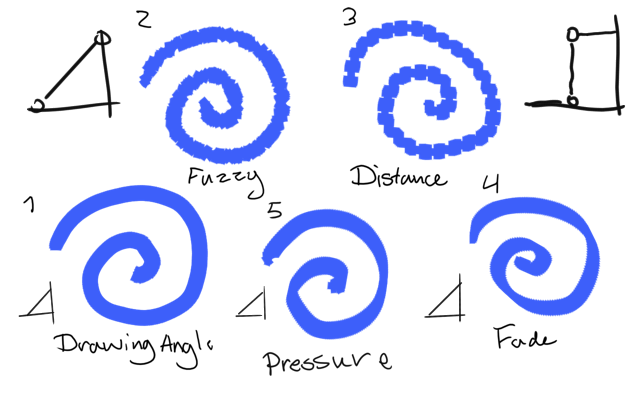
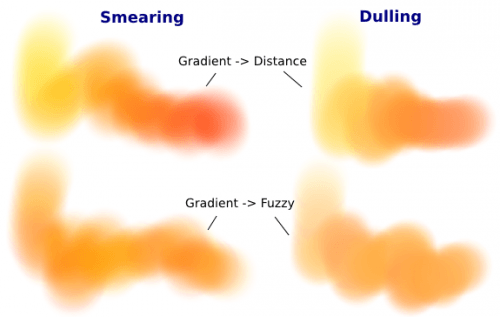
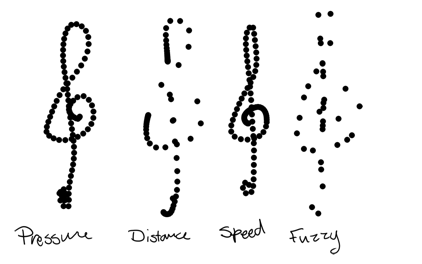
上の例は、様々なパラメーターを試したものです。
ファジー -- これもよく使われ、テクスチャに程よいランダムさが加わります。
距離 -- センサーカーブを良く調整すれば、良いパターンを作ることができます。
減衰 -- 一方からもう片方へ少しずつ回転を減衰させます。
筆圧 -- また違った線を作ることができるものです。
明度の強さ
Added in version 4.4: ブラシ形状にセンサーに応じた明度の強さを設定することができます。Lightness Map モードのブラシ形状でのみ利用できます。
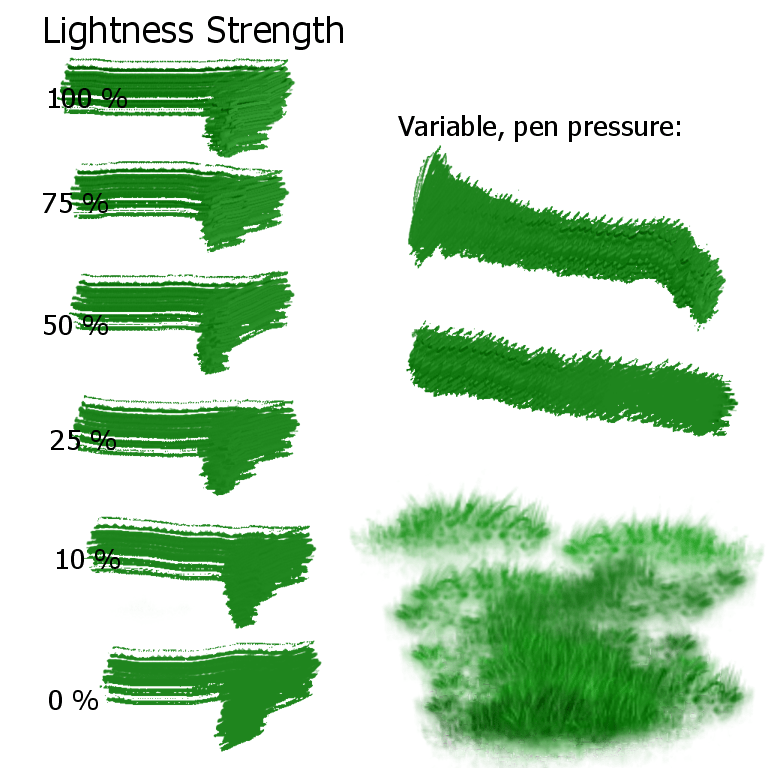
これはブラシ形状のコントラストを変えますので、100%であれば、ブラシの明るさの違いが最も出ることになり、0%であればその正反対になります。様々なインパスト技法のブラシになったり、多様なテクスチャスタンプとして使うことができます。
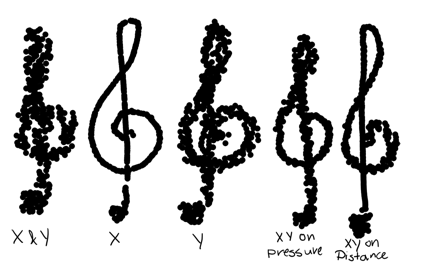
描点の散らばり
このパラメーターはブラシ描点をランダムな場所に置くことができます。センサーに応じて効果を変えることもできます。
- X
描いている方向からの散らばります。
- Y
描いている方向に直交して散らばります(効果のほとんどがこれです)。
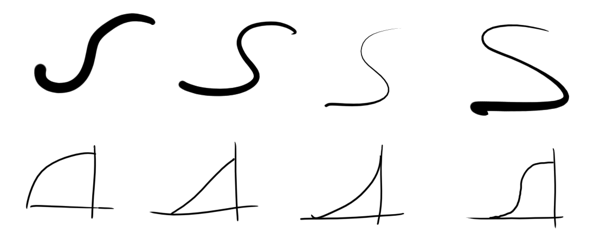
ブラシ端の硬さ
ブラシマスクにしきい値フィルタを追加します。ストロークブラシにも使えますが、ピクセルアートのブラシにも有用です。
- 強さ
しきい値を操作し、下にあるセンサーによっても変えられます。
- Soften Edge
完全な不透明でないピクセルをどうするか調整できます。ストロークに少しの柔らかさを追加できます。
バージョン 4.2 で変更: これはサブピクセル精度ではなくしきい値を操作するように変更され、スライダーが追加されました。
- Align the brush preview outline to the pixel grid.
Whether to have the brush outline align to the pixel grid. This is useful with some forms of pixel art.
Added in version 5.1.
サイズ
このパラメーターは直接の直径ではなく、どう変わるかのカーブになっています。
なのでもしブラシの直径を固定したければ、ブラシ形状を固定します。サイズのパラメーターをロックしてもこのカーブのみがロックされます。センサーでこのカーブを動かすことでブラシの種類に幅が出ます。例えば、普通に線を描きたいときには、凹状のカーブを筆圧に設定します。これで太く描くには強く押さなければいけなくなります。
またサイズをファジーや遠近法に設定し、パース と組み合わせるのもよく使われます。
Softness
減衰をセンサーでコントロールできるようになります。
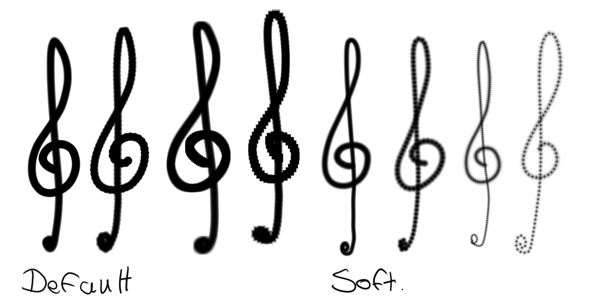
ブラシが消える効果をわずかに付けることができます。特に柔らかいブラシや大きなブラシで有効です。
Source
ブラシ描点の元となる色を選びます。
- 現在の描画色
現在の描画色です。
- グラデーション
アクティブなグラデーションを使います。
- 描く描点でランダム
ブラシの描点ごとにランダムな色を選びます。
- 全体でランダム
ランダムなノイズパターンが描かれます。
- パターン
アクティブなパターンを使用しますが、対応はストロークごとに違います。
- ロックされたパターン
ブラシ描点にパターンロックします。
Mix
Source で選んだ色の混色をここで調整できます。現在の描画色とグラデーションを選んだ時に使うことができます。現在の描画色をソースとして選んだ場合、現在の描画色と背景色の間で混色が行われます。グラデーションを選んだ場合は、選択されたセンサーに応じてグラデーションのどの部分が使われるかを変えることができます。
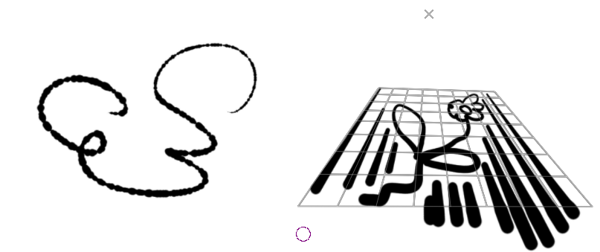
使用例
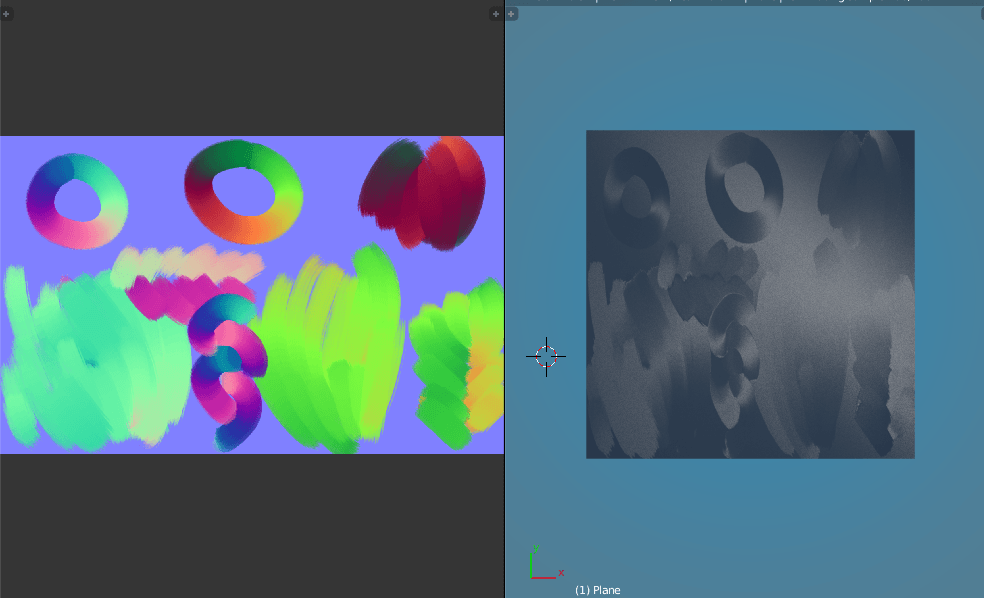
- フローマップ
上は Krita で描いたフローマップを Blender で使用した例です。ブラシは と に設定されています。このグラデーションは通常の 360° 色が含まれています。フローマップは brushed metal、hair などの複数のシェーダーや、一部の川シェーダーで使用されます。
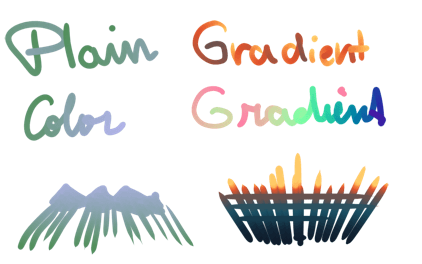
グラデーション
と Mix を使うのと全く同じですが、色ぼかしブラシでのみ利用できます。
以下のことができます:
既定の 設定はそのままに、描画色と背景色を変える
具体的にグラデーションを選択する
もしくはカスタムグラデーションを作る。
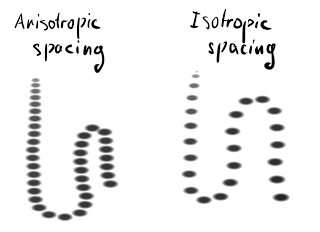
描点間隔
- Isotropic spacing
ブラシの縦横比によってではなく、直径にのみによって間隔を設定できます。
縦横比
パラメーターに紐づけてブラシの縦横比を変えることができます。定義済みブラシにも使えます。
