
Mixing Colors
Much like physical media, there are many ways to mix colors together in Krita. Traditional painters and illustrators often use techniques like glazing, scumbling, and hatching to mix colors directly on their canvas, on top of mixing colors together on a palette or even within the hairs of their brush. With a little bit of practice and know-how, and thanks to the variety of powerful tools in Krita, we can mimic all of these mixing techniques in digital painting.
In both traditional and digital painting, mixing techniques can be divided into two major categories: let’s call them “on-canvas” and “off-canvas”.
On-Canvas Mixing
On-canvas mixing techniques are ones where multiple colors are combined directly on the canvas as the artist paints. This takes a few forms, including layering semi-transparent color on top of another color, using texture to change how a color is perceived, or even in the interaction between two areas of wet paint in traditional media. Bottom line: on-canvas mixing happens right on the canvas and is a great tool for artistic exploration and “happy accidents”.
Glazing
In traditional painting, glazing is overlaying many different semi-transparent layers to create on-canvas color mixtures. Likewise, in digital painting we can also use glazing to mix colors directly on our canvas. This is one of the most fundamental and commonly used mixing techniques in digital painting.
We first lay down a semi-transparent layer on top of another color that we intend to mix with. Then, we pick the resultant color with the Ctrl +  shortcut (this can be configured in the canvas input settings), and paint with that. Depending on our brush’s opacity setting, each time we glaze one color over another we will get a color that is somewhere between those two colors, often leading to a nice mixture.
We can mix even more easily with glazing when we set our brush’s flow to a lower setting. Subtly different than opacity, flow is transparency per dab instead of stroke, and so it gives us softer strokes without giving up control.
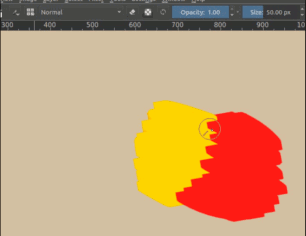
Furthermore, we can combine glazing with various blending modes to achieve different, interesting effects. For example, glazing with the multiply blending mode to create nice shadows:
Staring with line art and base colors.
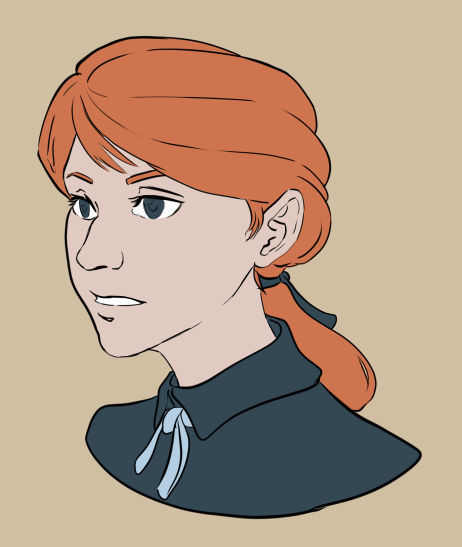
Using a semi-transparent brush that’s set to multiply, we can add colored layers to suggest shadows and mid-tones. The multiply blending mode will darken and interact with each base color differently.
Then, using a brush with low flow (~0.30), we can pick the resulting colors and lay down more layers. Not only does this help you define the different planes and forms that are so crucial for creating a sense of depth and three-dimensionality, it also gives quite a nice, painterly effect!

Continue with a lower opacity and flow to create even smoother gradients. Make your edges as sharp or smooth as your subject matter and art style demands!
Smudging
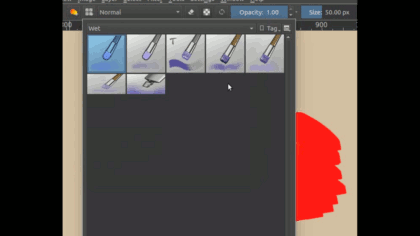
Smudge mixing is done with the Color Smudge Brush Engine, a special brush engine that allows you to mix your current brush color with the color(s) under the brush. It’s a very powerful type of brush that gives a lovely painterly effect. Performance wise, it’s a bit more demanding and slower than the regular pixel brush.
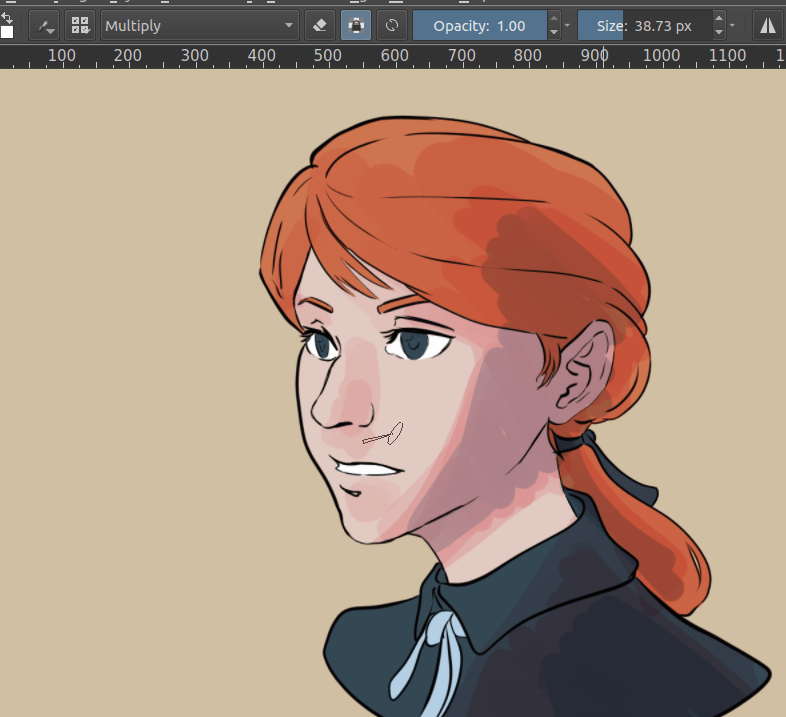
If you remove all paint from a smudge brush, you get a simple-yet-powerful smudge effect:
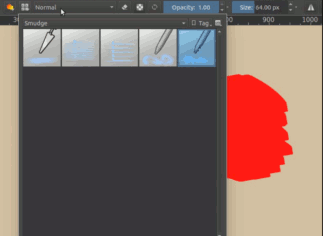
Different smudge brushes have different effects, so be sure to try them all out!
Scumbling
Scumbling is similar to glazing, except instead of having a semi-opaque layer, we use layers of textured or patterned paint.
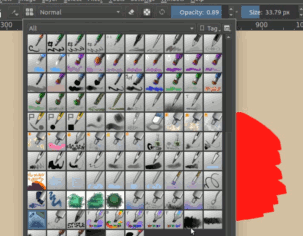
Like most painting programs, Krita allows you to pick a Brush Tips, which can be used to create a textured effect like that of scumbling.
Krita’s brush engines also allow you to use Texture. This allows you to create interesting and stylized screentone-like effects.
With glazing can get you pretty far when it comes to defining planes and forms, scumbling is the best method to create texture and to break up big pasty flats in your painting.
Off-Canvas Mixing
Off-canvas mixing has basically always been a core tool for artists everywhere; when we think of the stereotypical artist we might imagine someone with a few brushes in one hand and a wooden palette in the other. Whether it’s oils, watercolor, or other traditional media, for the artist to have absolute control over their colors it’s crucial to have some kind of palette, plate, jar, or other off-canvas area to mix colors together. While it’s easy to overlook this in digital painting (where selecting fresh new colors without mixing at all is both easy and free), Krita has a few very useful and unique features for off-canvas mixing.
Color Sampler Blending
Added in version 4.1.
Krita, like almost every art and graphics program, has a Color Sampler Tool which allows you to very quickly sample a color from any pixel on your canvas. While this tool may seem relatively simple and humble, it is also one of the most important and commonly used tools in the digital artist’s toolbox - perhaps only second to the brush! In fact, the color sampler tool is at the very heart of mixing colors, and is often used in combination with on-canvas techniques like glazing and scumbling to produce smooth blends of color.
And still, there is more to this little tool than meets the eye! Not only can you configure Krita’s color sampler to sample from the average color of a radius of pixels, Krita’s Color Sampler also has a unique blending feature: a powerful and intuitive tool for off-canvas color mixing!
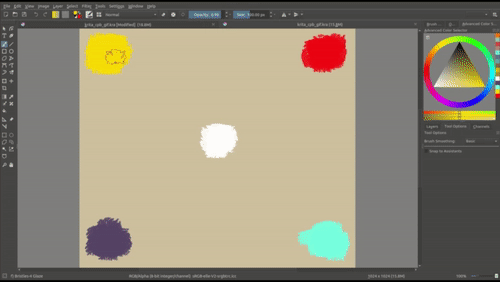
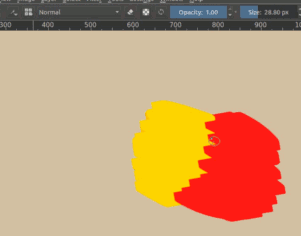
The Color Sampler Blending feature changes the way that picking colors has traditionally worked for decades; instead of completely replacing your current brush color with the newly sampled color, blending allows you to quickly “soak up” some portion of the sampled color, which is then mixed with your current brush color.
You can use Color Sampler Blending much like a physical paint brush in traditional media. If you were to dip your paint brush into a pool of blue paint, and then immediately dip again into a pool of red paint and paint a stroke across your canvas, the stoke wouldn’t be pure red - it would be some combination of blue and red which would mix to create an intermediate purple color. Which shade of purple would depend on the ratio of paints that mix together within the hairs of your brush, and this is essentially what the Color Sampler’s “blend” option controls: what percentage of sampled color is mixed together with your current brush color!
Not only does Krita’s Color Sampler Blending feel even more like mixing paints, it is also completely off-canvas and independent of opacity, flow, shape, and other brush settings. Furthermore, unlike most on-canvas mixing techniques, Color Sampler Blending works regardless of the location of colors on your canvas - enabling you to mix with colors at any position, on any layer, or even in different documents! Quickly mix lighting colors with local colors, mix the ambient sky color into shadows, create atmospheric depth, mix from a preselected palette of colors in another layer/document, etc.
To use Color Sampler Blending, simply set the “blend” option in the Tool Options Docker while the Color Sampler Tool is active; setting blend to 100% will cause your Color Sampler to work in the traditional way (completely replacing your brush color with the picked color), setting to around 50% will give you a half-way mix between colors, and setting to a lower value will create more subtle shifts in colors each click. Of course, blending affects both your dedicated Color Sampler Tool as well as the Ctrl + shortcut.
Note
Clicking and dragging the Color Sampler around the canvas currently causes it to sample many times as it switches pixels. You can use this trait to quickly soak up more color by “dipping” your color sampler into color and swirling it around. This can be pretty satisfying! However, this also means that some care must be taken to prevent from accidentally picking up more color than you want. It’s pretty easy to click a single pixel only one time using a mouse, but when painting with a drawing tablet and pen it can sometimes be desirable to use a slightly lower blend setting!
The Digital Colors Mixer
Somewhat hidden away in the Dockers menu (), this can be a useful tool for off-canvas mixing. The Digital Colors Mixer looks a little bit like an audio mixing board that you’d see in a recording studio, but instead of mixing music it mixes colors! It contains 6 independent color mixers that mix your current brush color with any color of your choosing.
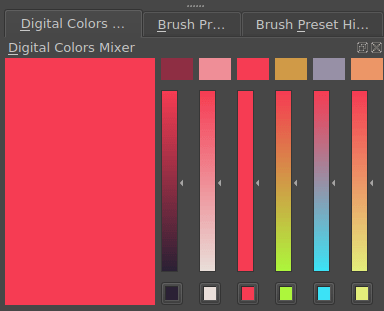
By clicking the color buttons below each mixer you can choose a palette of colors to mix with. Above each mixer is a color patch that will produce a color that mixes some amount of your current brush color with the palette color. Colors towards the top of the mixer will deliver subtle changes to your current color, while colors towards the bottom will be much closer to the palette color of that channel.
Other Tips
Outside of making it easier to create smooth gradients, mixing has another benefit: It allows you to create a cohesive piece.
Limiting the number of colors we use and then mixing tends to give a more cohesive palette, as we’re not trying to do too much at once. This cohesive palette in turn means it will become easier to create a certain mood in an image. Sometimes, mixing in a little bit of accent color can also create unexpected results which in turn can be a little discovery for the audience to delight over as they discover the world of your image.
What we can learn from this, is that the next time we select, say, gray, instead of reaching for a random or generic gray from the Advanced Color Selector, consider using one of Krita’s many wonderful mixing tools to create an interesting and fitting gray from hues that are roughly complementary (opposite each other on the hue wheel).
While on-canvas and off-canvas techniques are fundamentally different categories of mixing colors, they are not mutually exclusive. All of the mixing methods in this article have pros and cons; different tools can be useful for different situations, and combining various techniques can be extremely powerful and fun!
Finally, mixing colors will often go far better in a higher bit-depth like 16bit, though it’ll make the image take up much more working memory (RAM). Furthermore, using a linear color space can often give far better mixtures than a gamma-corrected one, though doing sketches and line art is easier to do in a gamma-corrected space.