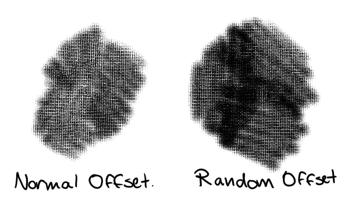
How much a brush is offset, random offset sets a new per stroke.
Texturing mode
All texture modes affect the alpha channel, with the exception of lightness map and gradient map, which
affect the color channels.
Soft Texturing
Added in version 5.3.
When the strength option is on, its value is used as a factor on how the texture is applied using the selected texturing mode. By toggling the soft texturing option you can alter this behavior.
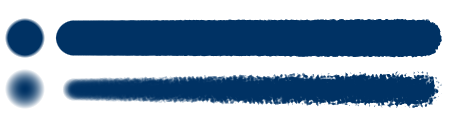
With 100% strength the texturing looks the same no matter the state of the soft texturing option, which is the same as when the strength option is off. But when using lower values for the strength, soft texturing will take effect: if it is off then, for lower strength values, the texturing is applied normally but the stroke seems to disappear, giving an effect similar to rubbing a drawing tool against some textured surface with more or less pressure. On the other hand, if the soft texturing option is on then, for lower strength values, the stroke looks more like as if the texture was not applied at all, leaving the stroke with the un-textured look.
The soft texturing can be activated to better replicate the Photoshop brushes for the modes other than height and linear height.
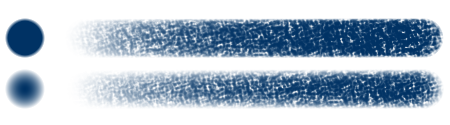
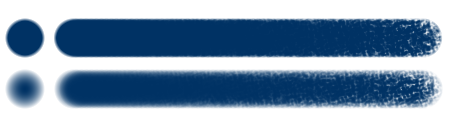
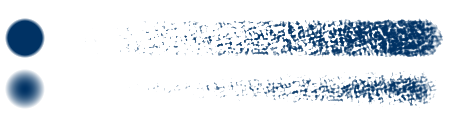
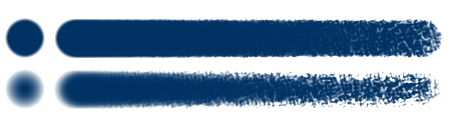
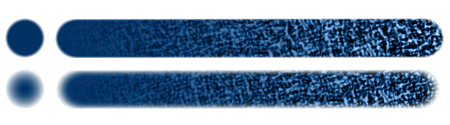
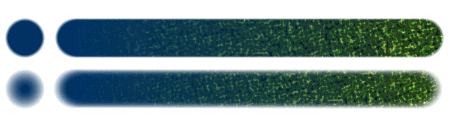
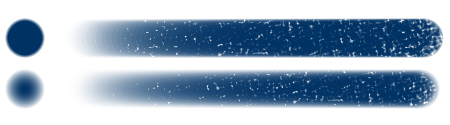
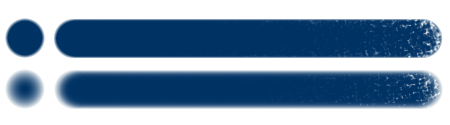
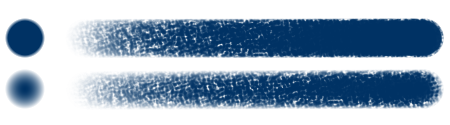
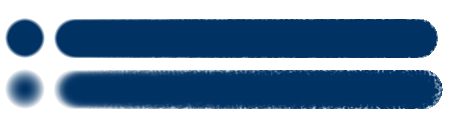
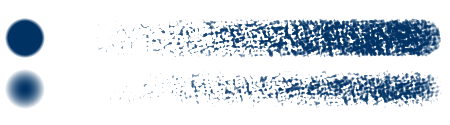
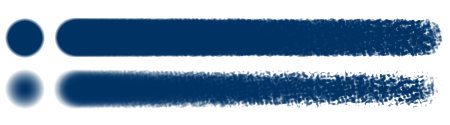
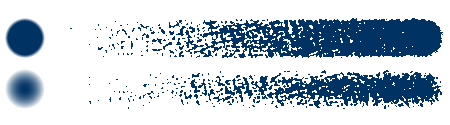
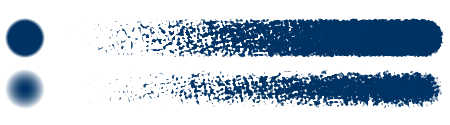
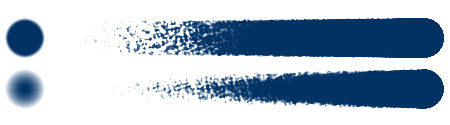
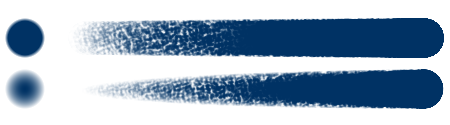
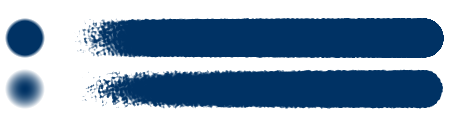
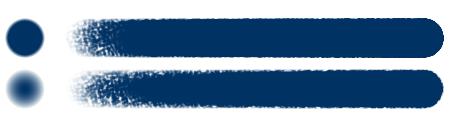
In the following explanations, the sample strokes go from low strength on the left side to high strength on the
right side. The top stroke uses a hard brush tip and the bottom one a soft brush tip. On the left side of the
strokes there are two non-textured dots, just for comparison sake.
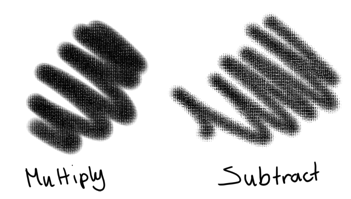
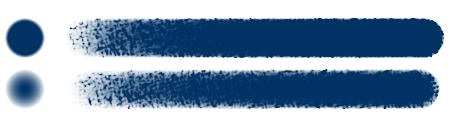
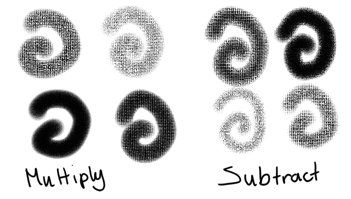
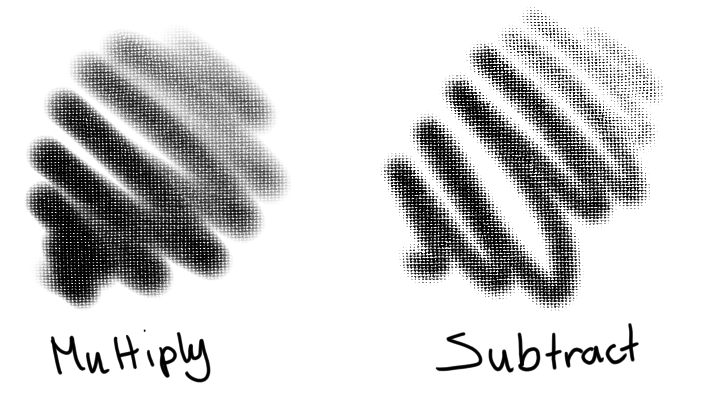
Multiply
Uses alpha multiplication to determine the effect of the texture. Has a soft feel.
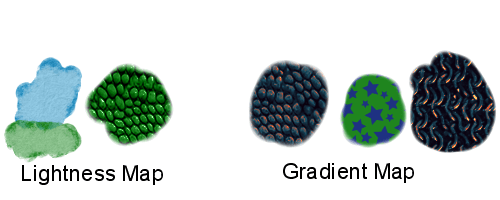
Applies lightness values of the texture to the paint. Can be used to simulate paper/canvas, or for painting a texture, like reptile skin or tree bark.
그라디언트 맵
Added in version 4.4.
Maps gray/lightness values of the texture to the currently selected gradient. Useful for painting textures with multiple colors, like reptile skin, tree bark, stars, etc.
어둡게
Added in version 5.0.
This mode chooses the minimum alpha value between the brush tip and the texture. The effect is as if the texture
made holes in the opaque areas of the brush tip.
The texture is softly applied to the semi-transparent areas of the brush tip.
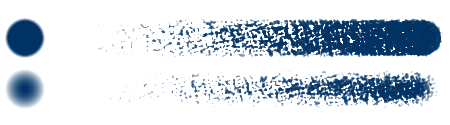
This mode produces a result similar to multiply but allowing for full coverage when high strength values are used.
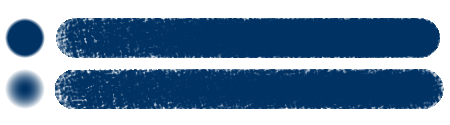
This mode produces a result similar to burn or linear burn and allows to obtain full coverage when high strength values
are used. The resulting edges are very hard (in fact, aliased).
This mode is similar to the subtract mode but with a higher range of possibilities when applying the strength.
Contrary to subtract, it allows to achieve full coverage with one stroke.
As the height mode, this mode is similar to the subtract mode but with a higher range of possibilities when applying
the strength. Contrary to subtract, it allows to achieve full coverage with one stroke. This mode tries to
emulate the height mode present in Photoshop and it only differs from Krita’s height mode on how the strength
is mapped in the algorithm. When using a strength value of 0.1 the results are almost identical to the subtract
mode with a strength of 1.
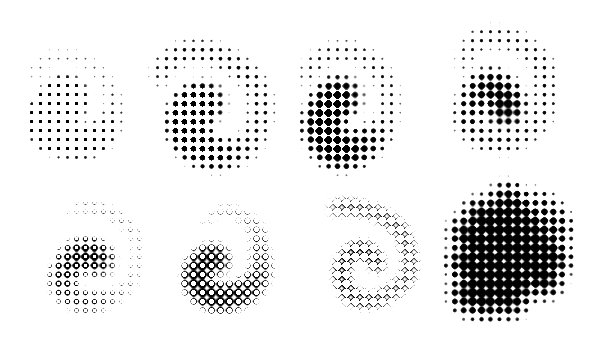
Cutoff policy will determine what range and where the strength will affect the textured outcome.
Disabled
Doesn’t cut off. Full range will be used.
패턴
Cuts the pattern off.
Brush
Cuts the brush tip off.
컷오프
Cutoff is… the grayscale range that you can limit the texture to. This also affects the limit takes by the strength. In the below example, we move from the right arrow moved close to the left one, resulting in only the darkest values being drawn. After that, three images with larger range, and underneath that, three ranges with the left arrow moved, result in the darkest values being cut away, leaving only the lightest. The last example is the pattern without cutoff.
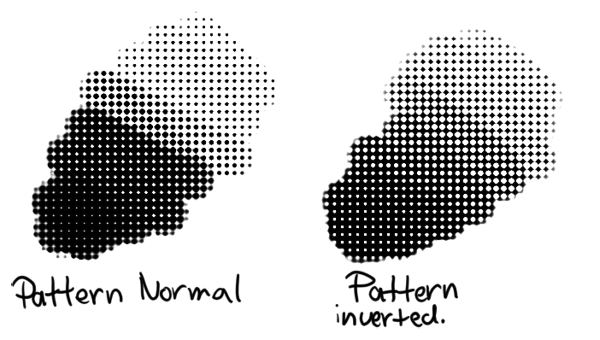
반전 패턴
Invert the pattern.
Auto Invert For Eraser
Added in version 5.3.0.
Automatically inverts the pattern when the brush is switched into eraser mode. If “Invert Pattern” option is enabled, then switching to eraser mode disables inversion.
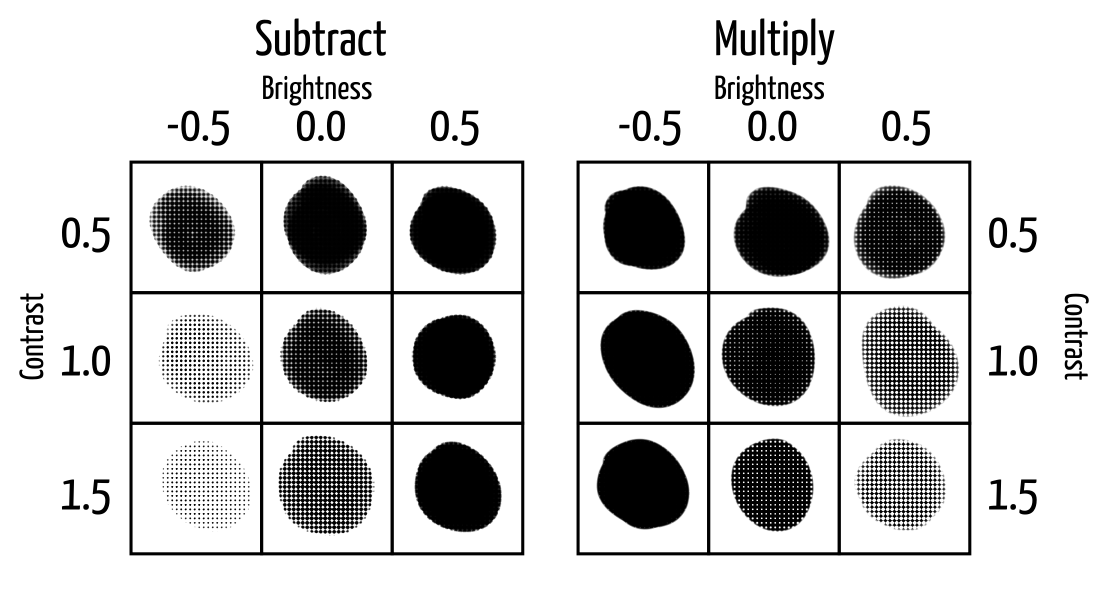
Brightness and Contrast
Added in version 3.3.1.
Adjust the pattern with a simple brightness/contrast filter to make it easier to use. Because Subtract and Multiply work differently, it’s recommended to use different values with each:
Added in version 4.4: Neutral Point adjustment:
중립점
Adjust the gray value that is considered neutral in the texture. 0.5 keeps the texture as is; higher values make the texture darker, and lower values make the texture lighter. Works a bit differently from the brightness option, and is mostly useful to adjust existing textures to work well with Lightness Map and Gradient Map modes (though it can have applications with the other two modes).
This allows you to set the texture to Sensors. It will use the cutoff to continuously draw lighter values of the texture (making the result darker).
Added in version 4.4: For Lightness Map and Gradient Map modes, Strength controls how much of the texture is applied compared to how much of the selected paint color comes through.