Making An Azalea With The Transformation Masks

Note
This page was ported from the original post on the main page to KDE UserBase wiki.
Okay, so I’ve wanted to do a tutorial for transform masks for a while now, and this is sorta ending up to be a flower-drawing tutorial. Do note that this tutorial requires you to use Krita 2.9.4 at MINIMUM. It has a certain speed-up that allows you to work with transform masks reliably!
I like drawing flowers because they are a bit of an unappreciated subject, yet allow for a lot of practice in terms of rendering. Also, you can explore cool tricks in Krita with them.
Today’s flower is the Azalea flower. These flowers are usually pink to red and appear in clusters, the clusters allow me to exercise with transform masks!
I got an image from Wikipedia for reference, mostly because it’s public domain, and as an artist I find it important to respect other artists. You can copy it and, if you already have a canvas, or .
Then, if you didn’t have a new canvas make one. I made an A5 300dpi canvas. This is not very big, but we’re only practicing. I also have the background color set to a yellow-grayish color (#CAC5B3), partly because it reminds me of paper, and partly because bright screen white can strain the eyes and make it difficult to focus on values and colors while painting. Also, due to the lack of strain on the eyes, you’ll find yourself soothed a bit. Other artists use #c0c0c0, or even more different values.
So, if you go to , you will find that now your reference image and your working canvas are side by side. The reason I am using this instead of the docker is because I am lazy and don’t feel like saving the wikipedia image. We’re not going to touch the image much.
Let’s get to drawing!
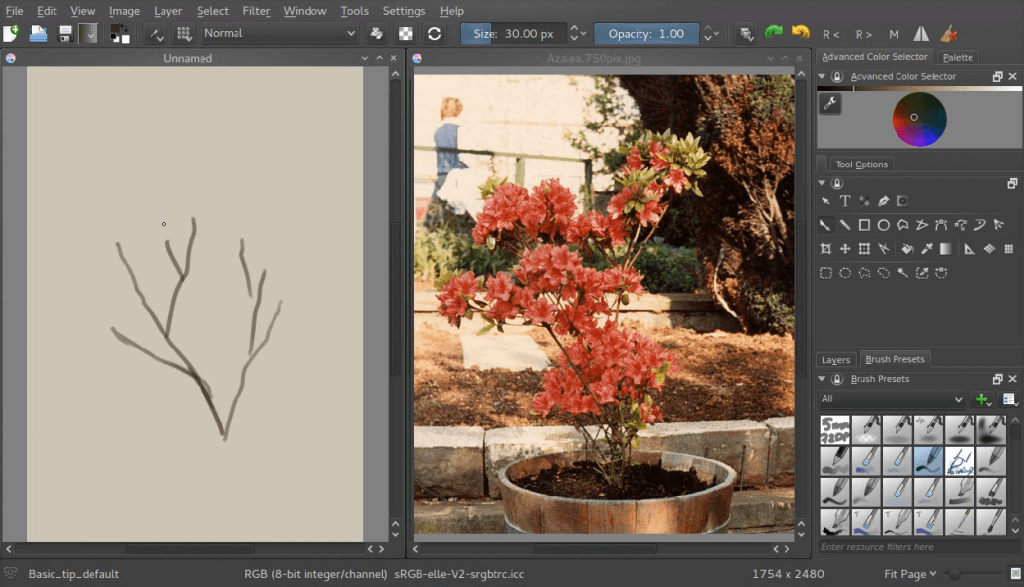
First we make a bunch of branches. I picked a slightly darker color here than usual, because I know that I’ll be painting over these branches with the lighter colors later on. Look at the reference how branches are formed.
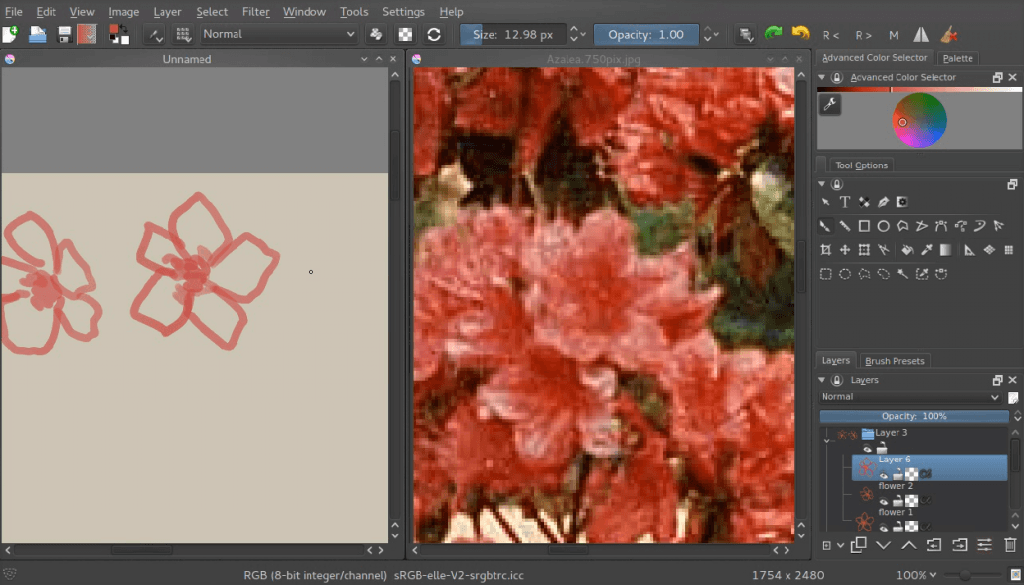
Then we make an approximation of a single flower on a layer. We make a few of these, all on separate layers. We also do not sample the red from the image with the color sampler tool, but we guess at it. This is good practice, so we can learn to analyze a color as well as how to use our color selector. If we’d only sample colors from the image, it would be difficult to understand the relationship between them, so it’s best to attempt matching them by eye.
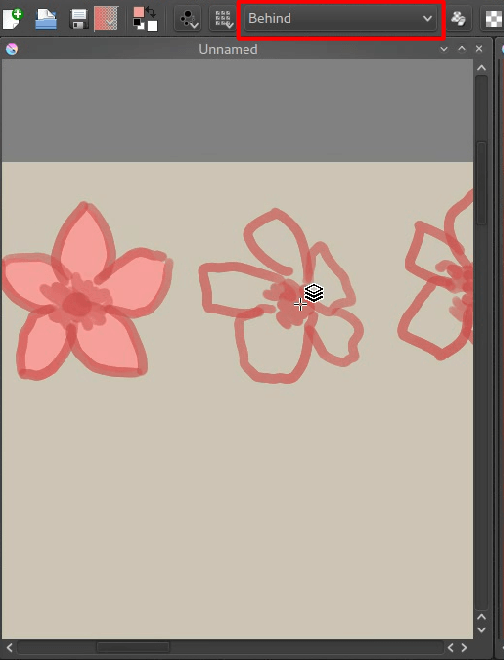
I chose to make the flower shape opaque quickly by using the behind blending mode. This’ll mean Krita is painting the new pixels behind the old ones. Very useful for quickly filling up shapes, just don’t forget to go back to normal once you’re done.
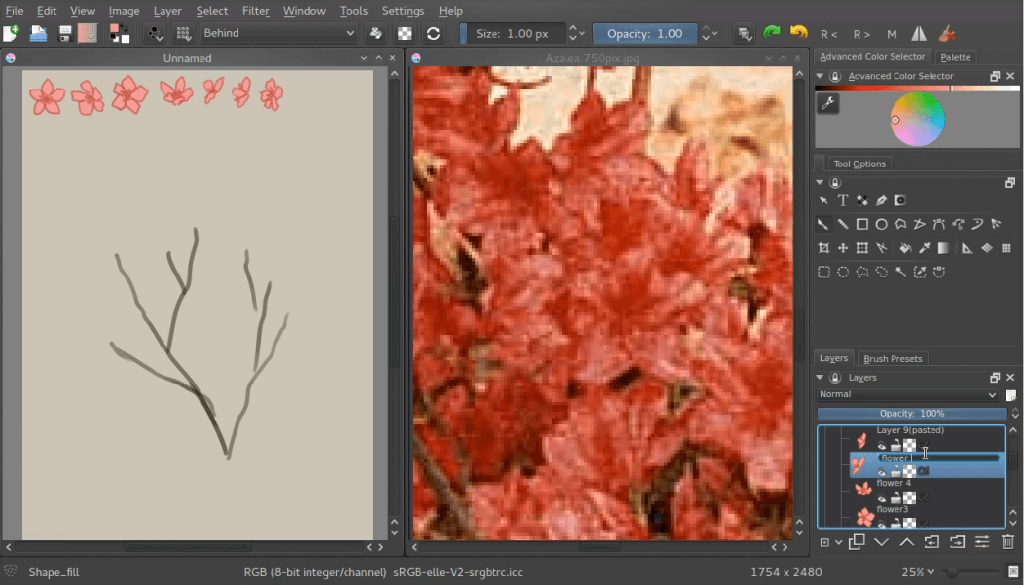
Now, we’ll put the flowers in the upper left corner, and group them. You can group by making a group layer, and selecting the flower layers in your docker with the Ctrl +  shortcut and dragging them into the group. The reason why we’re putting them in the upper left corner is because we’ll be selecting them a lot, and Krita allows you to select layers with the R +
  shortcut on the canvas quickly. Just hold the R key and
  the pixels belonging to the layer you want, and Krita will select the layer in the Layer docker.
Clone Layers
Now, we will make clusters. What we’ll be doing is that we select a given flower and then make a new clone layer. A clone layer is a layer that is literally a clone of the original. They can’t be edited themselves, but edit the original and the clone layer will follow suit. Clone Layers, and File layers, are our greatest friends when it comes to transform masks, and you’ll see why in a moment.
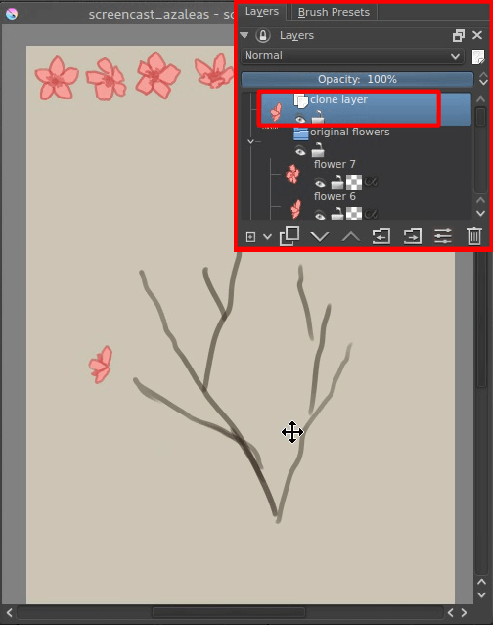
You’ll quickly notice that our flowers are not good enough for a cluster: we need far more angles on the profile for example. If only there was a way to transform them… but we can’t do that with clone layers. Or can we?
Enter Transform Masks!
Transform Masks are a really powerful feature introduced in 2.9. They are in fact so powerful, that when you first use them, you can’t even begin to grasp where to use them.
Transform masks allow us to do a transform operation onto a layer, any given layer, and have it be completely dynamic! This includes our clone layer flowers!
How to use them:
 the layer you want to do the transform on, and add a Transform mask.
A transform mask should now have been added. You can recognize them by the little ‘scissor’ icon.
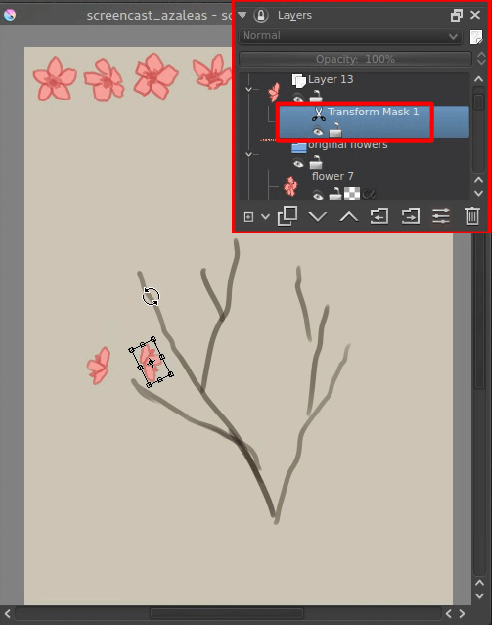
Now, with the transform mask selected, select the , and rotate our clone layer. Apply the transform. You know you’re successful when you can hide the transform mask, and the layer goes back to its original state!
You can even go and edit your transform! Just activate the again while on a transform mask, and you will see the original transform so you can edit it. If you go to a different transform operation however, you will reset the transform completely, so watch out.
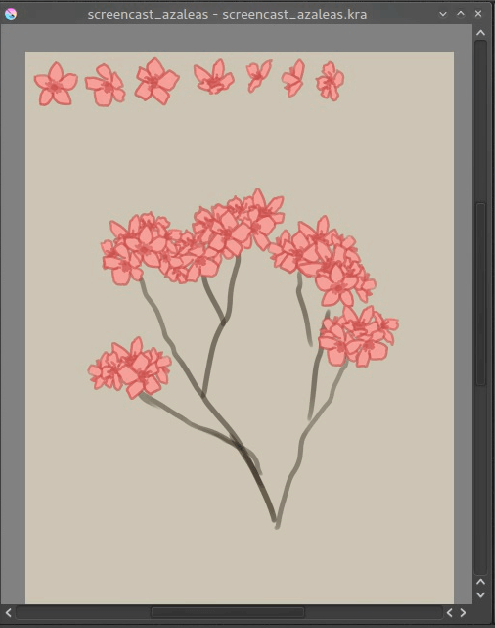
We’ll be only using affine transformations in this tutorial (which are the regular and perspective transform), but this can also be done with warp, cage and liquify, which’ll have a bit of a delay (3 seconds to be precise). This is to prevent your computer from being over-occupied with these more complex transforms, so you can keep on painting.
We continue on making our clusters till we have a nice arrangement.
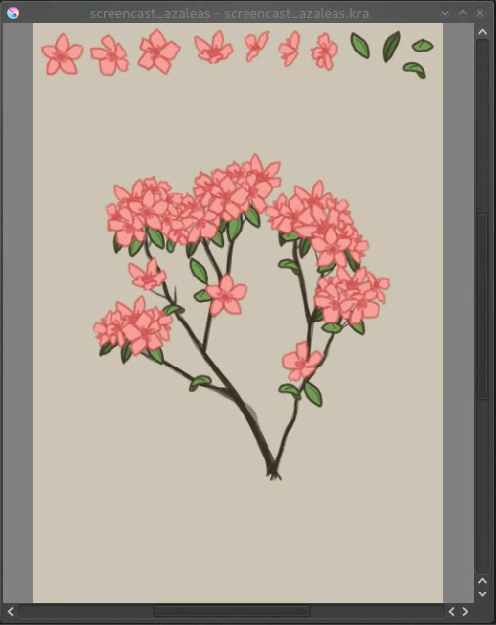
Now do the same thing for the leaves.
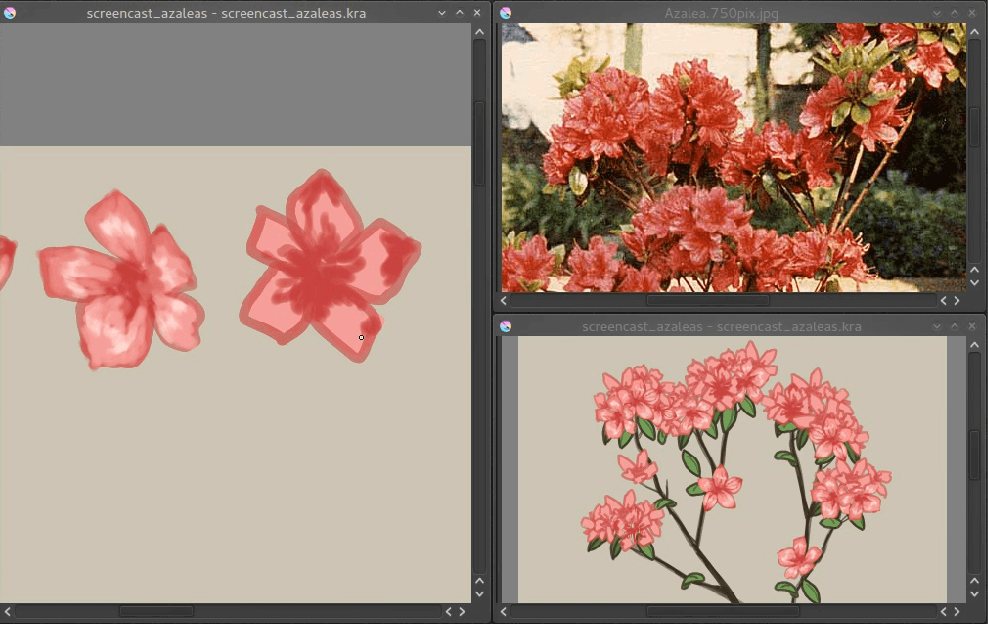
Now, if you select the original paint layers and draw on them, you can see that all clone masks are immediately updated!
Above you can see there’s been a new view added so we can focus on painting the flower and at the same time see how it’ll look. You can make a new view by going and selecting the name of your current canvas (save first!). Views can be rotated and mirrored differently.
Now continue painting the original flowers and leaves, and we’ll move over to adding extra shadow to make it seem more lifelike!
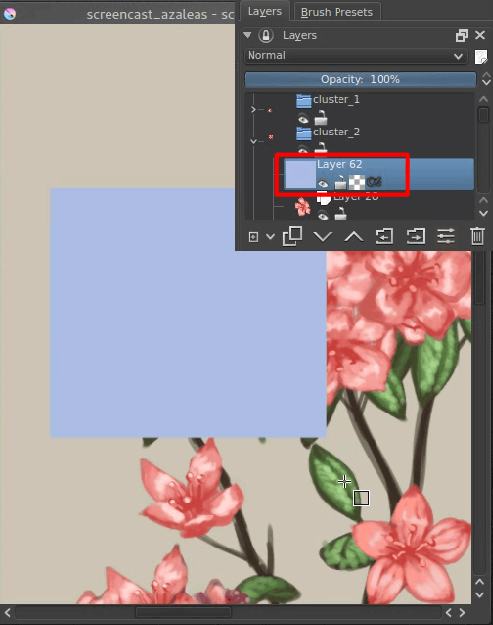
We’re now going to use Alpha Inheritance. Alpha inheritance is an ill-understood concept, because a lot of programs use clipping masks instead, which clip the layer’s alpha using only the alpha of the first next layer.
Alpha inheritance, however, uses all layers in a stack, so all the layers in the group that haven’t got alpha inheritance active themselves, or all the layers in the stack when the layer isn’t in a group. Because most people have an opaque layer at the bottom of their layer stack, alpha inheritance doesn’t seem to do much.
But for us, alpha inheritance is useful, because we can use all clone-layers in a cluster (if you grouped them), transformed or not, for clipping. Just draw a light blue square over all the flowers in a given cluster.
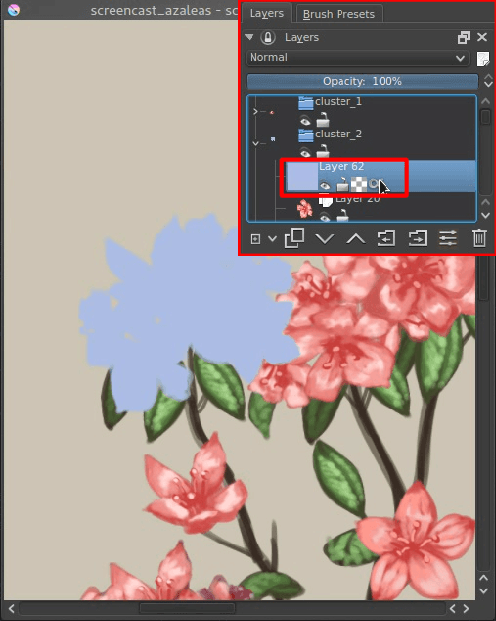
Then press the last icon in the layer stack, the alpha-inherit button, to activate alpha-inheritance.
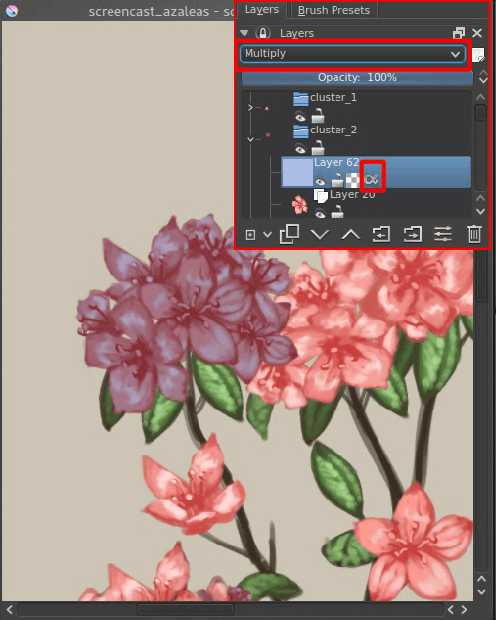
Set the layer to multiply then, so it’ll look like everything’s darker blue.
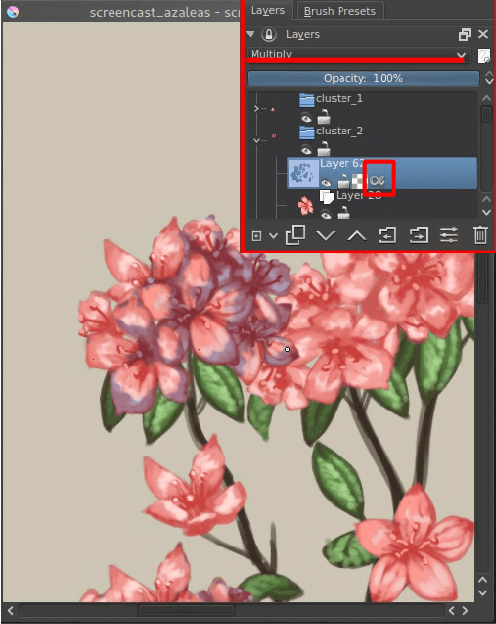
Then, with multiply and alpha inheritance on, use an eraser to remove the areas where there should be no shadow.
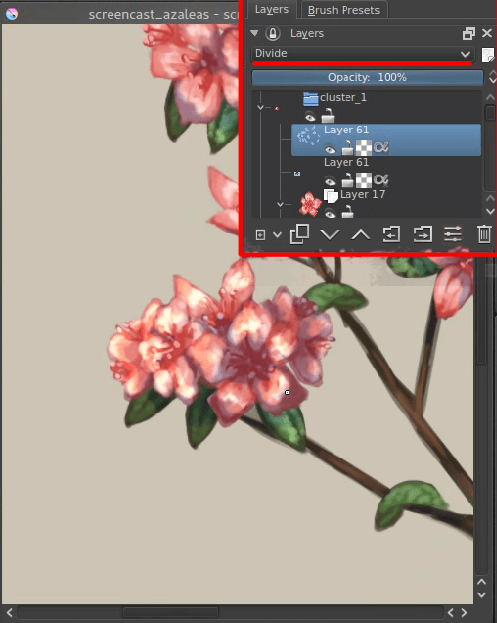
For the highlights use exactly the same method, AND exactly the same color, but instead set the layer to Divide (you can find this amongst the Arithmetic blending modes). Using Divide has exactly the opposite effect as using multiply with the same color. The benefit of this is that you can easily set up a complementary harmony in your shadows and highlights using these two.
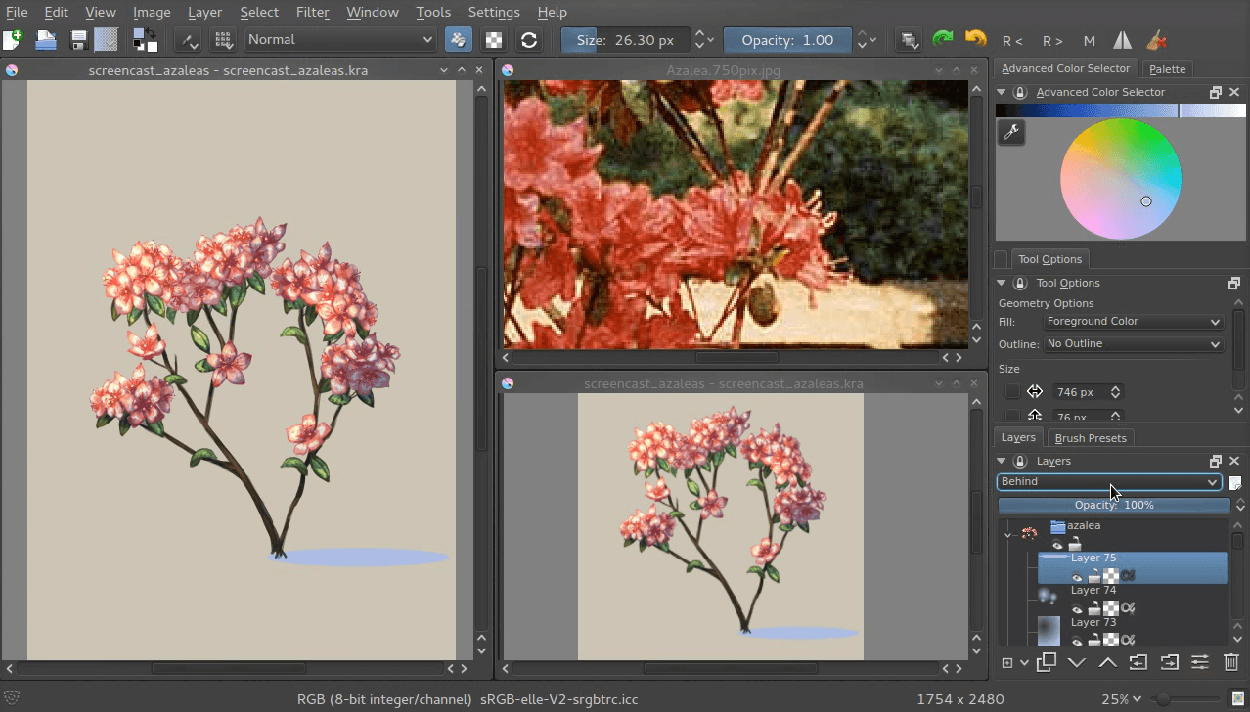
Do this with all clusters and leaves, and maybe on the whole plant (you will first need to stick it into a group layer given the background is opaque) and you’re done!
Transform masks can be used on paint layers, vector layers, group layers, clone layers and even file layers. I hope this tutorial has given you a nice idea on how to use them, and hope to see much more use of the transform masks in the future!
You can get the file I made here to examine it further! (Caution: It will freeze up Krita if your version is below 2.9.4. The speed-ups in 2.9.4 are due to this file.)
