Options
Aérographe
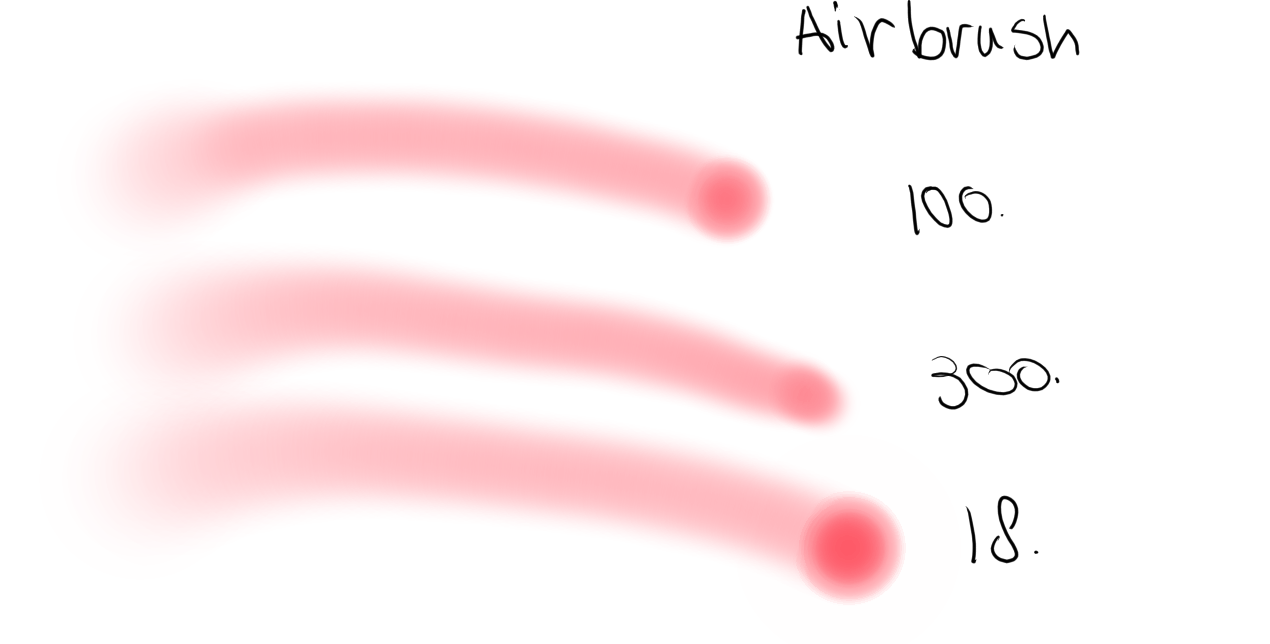
If you hold the brush still, but are still pressing down, this will keep adding color onto the canvas. The lower the rate, the quicker the color gets added.
Mirror
This allows you to mirror the Brush tip with Sensors.
- Horizontal
Mirrors the mask horizontally.
- Vertical
Mirrors the mask vertically.
Some examples of mirroring and using it in combination with Rotation.
Rotation
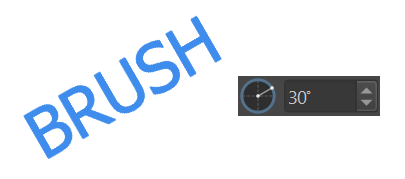
Brush Tip Angle
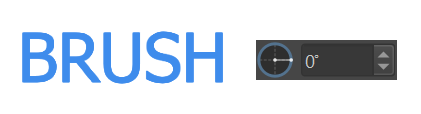
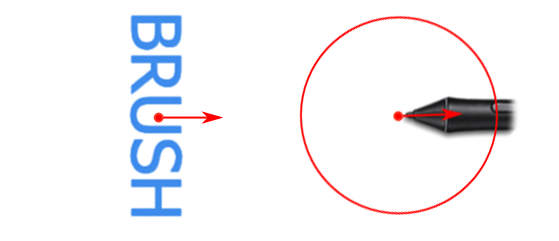
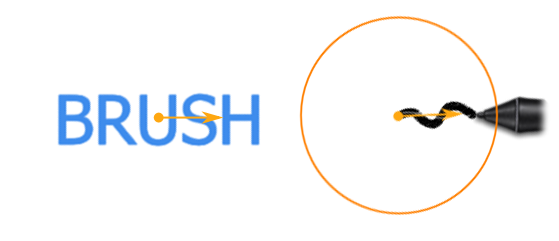
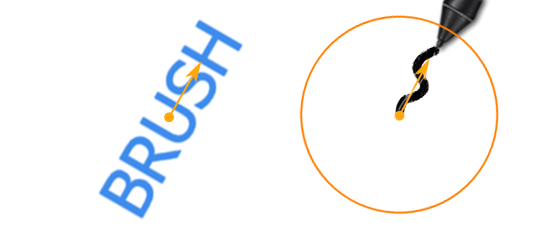
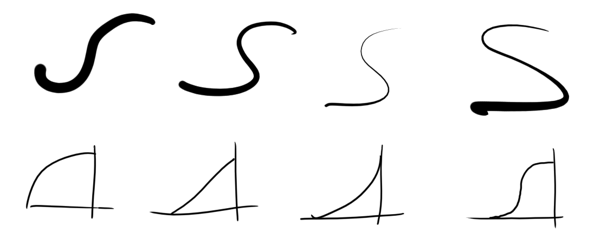
The final brush tip rotation depends on the enabled Rotation Sensors. Let's first review the basic behavior of the brush tip with an example brush that uses the text "BRUSH" as the brush tip texture. If no Sensor is active, and the brush tip rotation is 0 degrees, the brush looks like this:
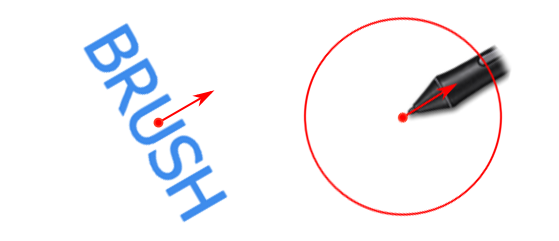
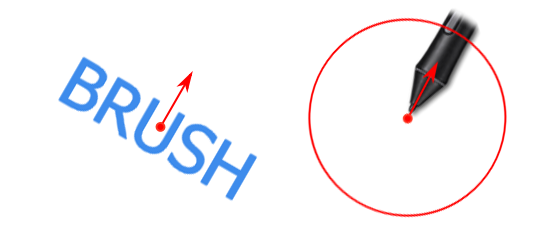
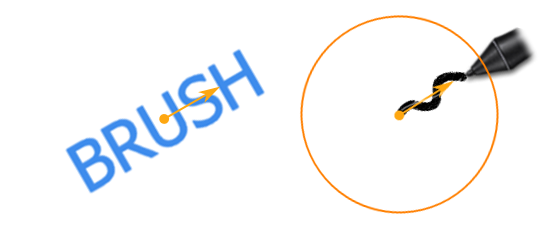
As the brush tip rotation is increased, the tip rotates counter-clockwise:
When the Rotation option is enabled, it adds its angle contribution to the base tip angle shown above. Though the way how each sensor affects the brush rotation is different.
Pressure sensor
For the Pressure sensor, the original non-rotated brush state is linked to the pressure value of 50%. When the user increases the pressure, the brush rotation increases (i.e. rotates counter-clockwise). When the user decreases the pressure, the brush rotation decreases (i.e. rotates clockwise).
Most of the sensors behave like the Pressure sensor, i.e. non-rotated state is at sensor value of 50%, increasing the sensor value increases the rotation, decreasing the sensor value decreases the rotation.
There are two notable exceptions to this rule: Tilt Direction and Drawing Angle sensors.
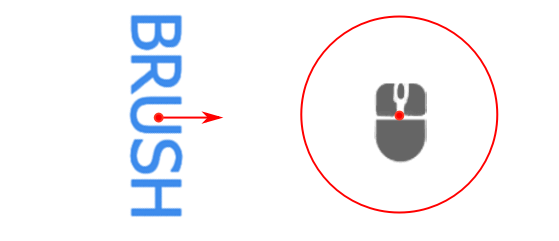
Tilt Direction
Tilt Direction sensor is linked to the physical direction of the stylus in space. It links the vertical axis of the brush to the direction of the stylus:
When Krita cannot detect stylus' tilt direction, it puts the brush into neutral position. The neutral position of the pen tilt corresponds to the pen being held in the right hand at a 3 o'clock position
The neutral position is used in one of the following cases:
the stylus stands strictly vertically
the tablet device doesn't support tilt
the mouse is used (which doesn't support tilt either)
Note
For left-handed users, there's an option to adjust the global tilt offset in the Tablet Settings. To get the same neutral point rotation but with the left hand, the global tilt offset should be set to 180 degrees.
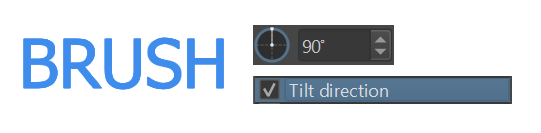
To get a natural looking brush tip with the Tilt Direction sensor enabled, the brush tip rotation angle needs to be set to 90 degrees:
Drawing Angle
Drawing Angle sensor is commonly used in combination with rake-type brushes. It is especially useful because it does not rely on tablet-specific sensors.
In contrast to Tilt Direction it links the horizontal axis of the brush to the direction of the direction of the painting stroke:
Other sensors
In addition to the sensors discussed above, there are many other Rotation Sensors available that allow for a variety of effects.
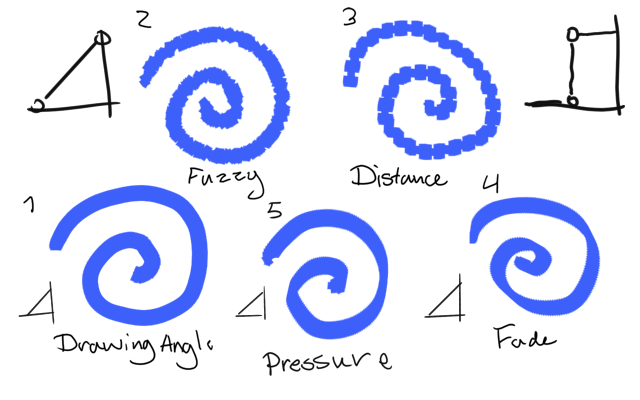
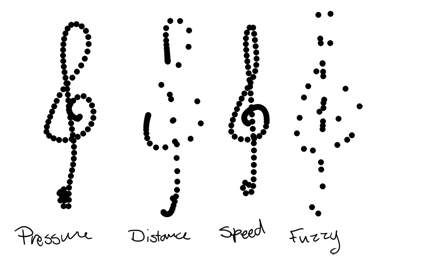
In the above example, several applications of the parameter.
Fuzzy -- Also very common, this gives a nice bit of randomness for texture.
Distance -- With careful editing of the Sensor curve, you can create nice patterns.
Fade -- This slowly fades the rotation from one into another.
Pressure -- An interesting one that can create an alternative looking line.
Lightness Strength
Ajouté dans la version 4.4: This allows you to affect the Lightness Strength of your brush tip with Sensors. Only available with brush tips in Lightness Map mode.
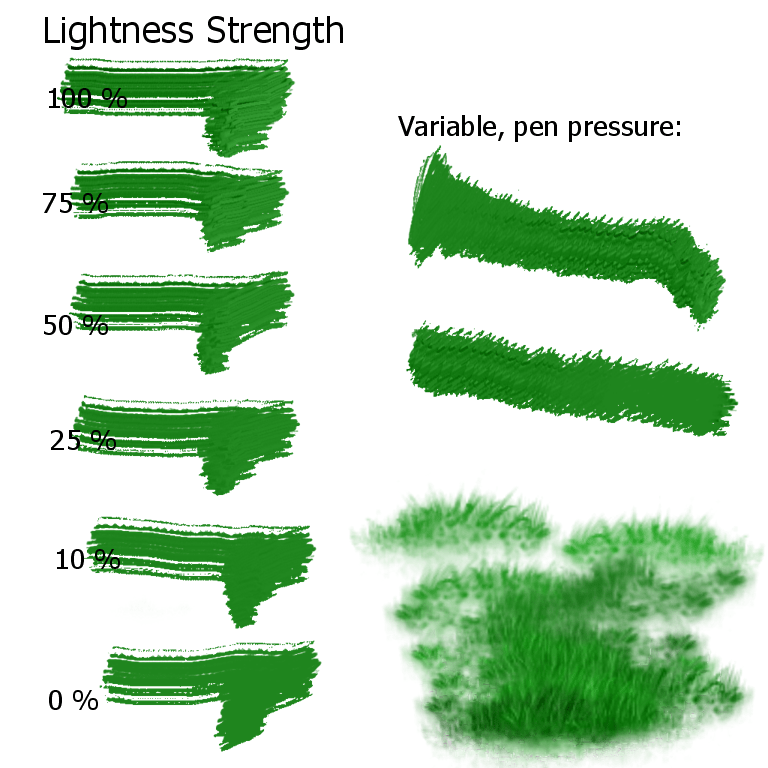
This changes the contrast of the brush tip, so that at 100%, the full effect of the lightness variation is visible in the brush, while at 0% the brush paints without any lightness variation. This allows a variable impasto effect with lightness brushes, and for variation in texture stamp brushes that use a lightness-enabled brush tip.
Dispersion
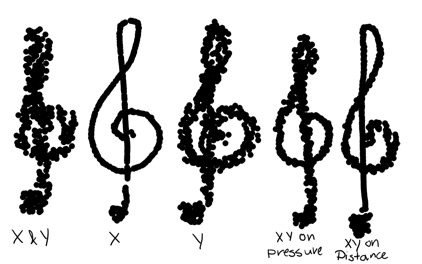
This parameter allows you to set the random placing of a brush-dab. You can affect them with Sensors.
- X
The scattering on the angle you are drawing from.
- Y
The scattering, perpendicular to the drawing angle (has the most effect).
Sharpness
Puts a threshold filter over the brush mask. This can be used for brush like strokes, but it also makes for good pixel art brushes.
- Strength
Controls the threshold, and can be controlled by the sensors below.
- Soften Edge
Controls the extra non-fully opaque pixels. This adds a little softness to the stroke.
Modifié dans la version 4.2: The sensors now control the threshold instead of the subpixel precision, softness slider was added.
- Align the brush preview outline to the pixel grid.
Whether to have the brush outline align to the pixel grid. This is useful with some forms of pixel art.
Ajouté dans la version 5.1.
Size
This parameter is not the diameter itself, but rather the curve for how it's affected.
So, if you want to lock the diameter of the brush, lock the Brush tip. Locking the size parameter will only lock this curve. Allowing this curve to be affected by the Sensors can be very useful to get the right kind of brush. For example, if you have trouble drawing fine lines, try to use a concave curve set to pressure. That way you'll have to press hard for thick lines.
Also popular is setting the size to the sensor fuzzy or perspective, with the later in combination with a Perspective.
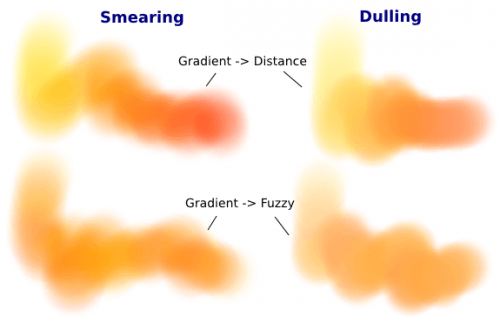
Douceur
This allows you to affect Fade with Sensors.
Has a slight brush-decreasing effect, especially noticeable with soft-brush, and is overall more noticeable on large brushes.
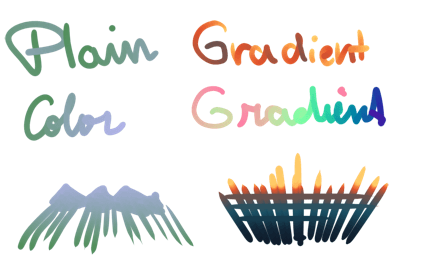
Source
Picks the source-color for the brush-dab.
- Plain Color
Current foreground color.
- Gradient
Picks active gradient.
- Uniform Random
Gives a random color to each brush dab.
- Total Random
Random noise pattern is now painted.
- Pattern
Uses active pattern, but alignment is different per stroke.
- Locked Pattern
Locks the pattern to the brushdab.
Mix
Allows you to affect the mix of the Source color with Sensors. It will work with Plain Color and Gradient as source. If Plain Color is selected as source, it will mix between the currently selected foreground and background color. If Gradient is selected, it chooses a point on the gradient to use as painting color according to the sensors selected.
Utilisations
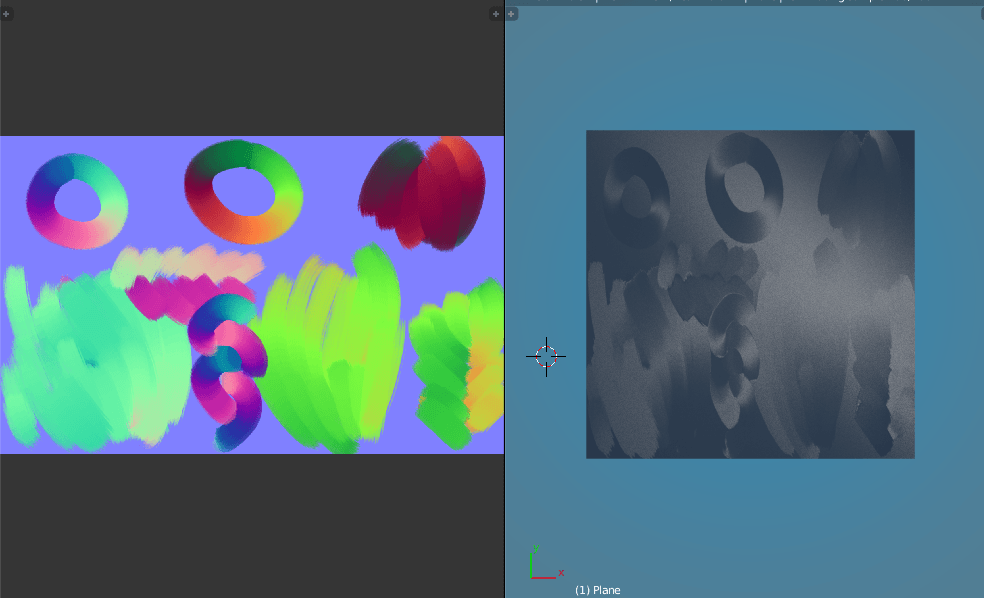
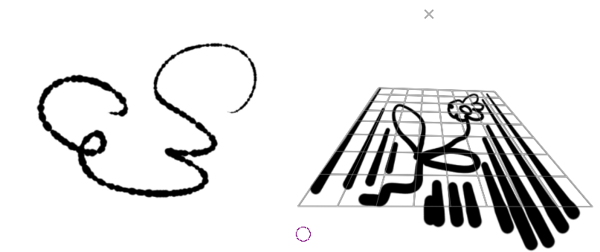
- Flow map
The above example uses a Krita painted flowmap in the 3D program Blender. A brush was set to and . The gradient in question contained the 360° for normal map colors. Flow maps are used in several Shaders, such as brushed metal, hair and certain river-shaders.
Gradient
Exactly the same as using with Mix, but only available for the Color Smudge Brush.
You can either:
Leave the default setting, and just change the foreground and background colors
Select a more specific gradient
Or make custom gradients.
Espacement
This allows you to affect Brush Tips with Capteurs.
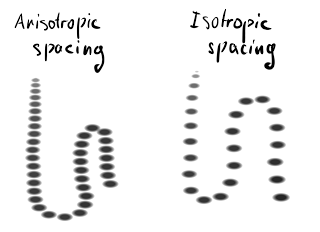
- Isotropic spacing
Instead of the spacing being related to the ratio of the brush, it will be on diameter only.
Ratio
Allows you to change the ratio of the brush and bind it to parameters. This also works for predefined brushes.