
Saving For The Web
Krita’s default saving format is the *.kra format. This format saves everything Krita can manipulate about an image: Layers, Filters, Assistants, Masks, Color spaces, etc. However, that’s a lot of data, so *.kra files are pretty big. This doesn’t make them very good for uploading to the internet. Imagine how many people’s data-plans hit the limit if they only could look at *.kra files! So instead, we optimise our images for the web.
There are a few steps involved:
Save as a
.kra. This is your working file and serves as a backup if you make any mistakes.Flatten all layers. This turns all your layers into a single one. Just go to or press the Ctrl + Shift + E shortcut. Flattening can take a while, so if you have a big image, don’t be scared if Krita freezes for a few seconds. It’ll become responsive soon enough.
Convert the color space to 8bit sRGB (if it isn’t yet). This is important to lower the filesize, and PNG for example can’t take higher than 16bit. and set the options to RGB, 8bit and sRGB-elle-v2-srgbtrc.icc respectively. If you are coming from a linear space, uncheck little CMS optimisations
Resize! Go to or use the Ctrl + Alt + I shortcut. This calls up the resize menu. A good rule of thumb for resizing is that you try to get both sizes to be less than 1200 pixels. (This being the size of HD formats). You can easily get there by setting the Resolution under Print Size to 72 dots per inch. Then press OK to have everything resized.
Sharpen the image a little. This is especially necessary for social media. Social media websites often scale and convert your image in such a way that it gets a little blurry, because they optimize towards photos and not paintings. To have your images stay sharp, it is worth it to run a sharpen filter beforehand. Because the sharpen filter is quite powerful, you are best off adding a sharpen filter mask on top of the stack and lowering its opacity till you feel the sharpness is appropriate.
Save as a web-safe image format. There’s three that are especially recommended:
JPG
Use this for images with a lot of different colors, like paintings.
PNG
Use this for images with few colors or which are black and white, like comics and pixel-art. Select Save as indexed PNG, if possible to optimise even more.
GIF
Only use this for animation (will be supported this year) or images with a super low color count, because they will get indexed.
Saving with Transparency
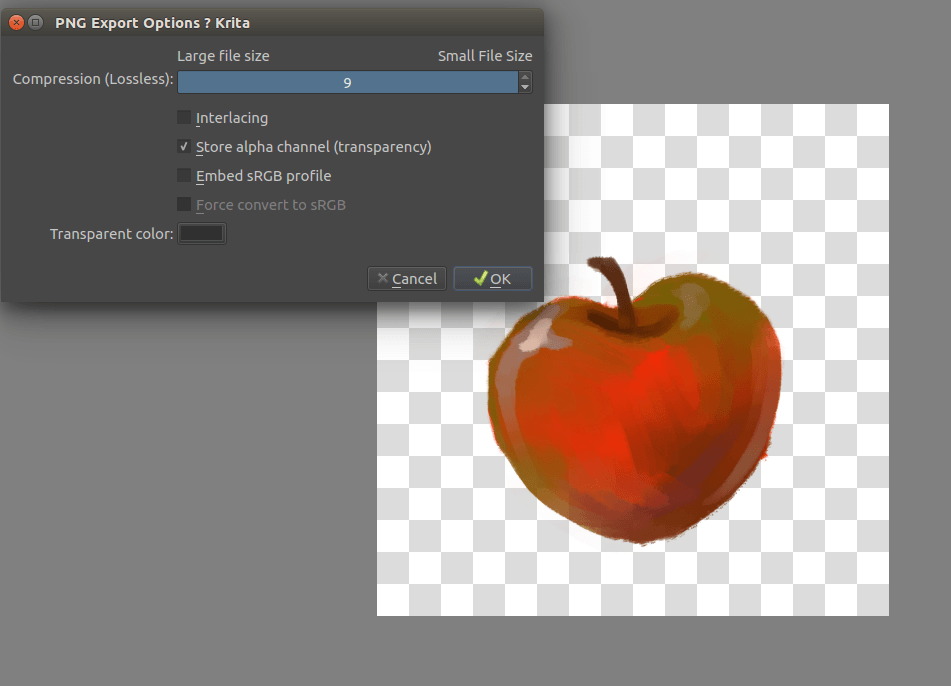
Saving with transparency is only possible with GIF and PNG. First, make sure you see the transparency checkers (this can be done by simply hiding the bottom layers, changing the projection color in , or by using ). Then, save as PNG and tick Store alpha channel (transparency)
Save your image, upload, and show it off!