
Brosses
These are the brush tip or textures used in the brush presets. They can be PNG files or .abr file from Photoshop or .gbr files from GIMP.
Note
Currently Krita only import a brush texture from abr file, you have to recreate the brushes by adding appropriate values in size, spacing etc.
They can be modified/tagged in the brush preset editor.
See Brush Tips for more info.
Example: Loading a Photoshop Brush (*.ABR)
For some time Photoshop has been using the ABR format to compile brushes into a single file. Krita can read and load .abr files, although there are certain features. For this example we will use an example of an .abr file that contains numerous images of types of trees and ferns. We have two objectives. The first is to create a series of brushes that we an quickly access from the Brush Presets dock to easily put together a believable forest. The second is to create a single brush that we can change on the fly to use for a variety of flora, without the need to have a dedicated Brush Preset for each type.
First up is download the file (
.zip,.rar,...) that contains the.abrfile and any licensing or other notes. Be sure to read the license if there is one!Extract the
.abrfile into Krita's home directory for brushes.In your Brush Presets dock, select one of your brushes that uses the Pixel Brush Engine. An Ink Pen or solid fill type should do fine.
Open the Brush Settings Editor (F5 key).
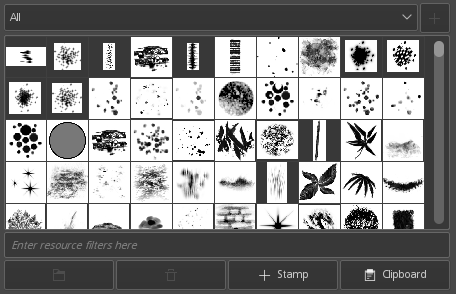
Click on the tab "Predefined" next to "Auto". This will change the editor to show a scrollable screen of thumbnail images, most will be black on a white background. At the bottom of the window are two icons:
Click on the blue file folder on the left and then navigate to where you saved your
.abrfile and open it.If everything went fine you will see a number of new thumbnails show up at the bottom of the window. In our case, they would all be thumbnails representing different types of trees. Your job now is to decide which of these you want to have as Brush Preset (Just like your Pencil) or you think you'll only use sporadically.
Let's say that there is an image of an evergreen tree that we're pretty sure is going to be a regular feature in some of our paintings and we want to have a dedicated brush for it. To do this we would do the following:
Click on the image of the tree we want.
Change the name of the brush at the very top of the Brush Editor Settings dialog. Something like "Trees - Tall Evergreen" would be appropriate.
Click the "Save to Presets" button.
Now that you have a "Tall Evergreen" brush safely saved you can experiment with the settings to see if there is anything you would like to change, for instance, by altering the size setting and the pressure parameter you could set the brush to change the tree size depending on the pressure you were using with your stylus (assuming you have a stylus!).
Once you're satisfied with your brush and its settings you need to do one last thing (but click Overwrite Brush first!).
It's time now to create the Brush Preview graphic. The simplest and easiest way to do this for a brush of this type is to clear out the ScratchPad using the Reset button. Now, center your cursor in the Brush Preview square at the top of the ScratchPad and click once. You should see an image of your texture (in this case it would be the evergreen tree). In order to work correctly though the entire image should fit comfortably within the square. This might mean that you have to tweak the size of the brush. Once you have something you are happy with then click the Overwrite Brush button and your brush and its preview image will be saved.
An alternative method that requires a little more work but gives you greater control of the outcome is the following:
Locate the Brush Preview thumbnail .kpp file in Krita and open it to get a 200x200 file that you can edit to your wishes.
You're ready to add the next texture! From here on it's just a matter of wash, rinse and repeat for each texture where you want to create a dedicated Brush Preset.