
Pixel Brush Engine
Brushes are ordered alphabetically. The brush that is selected by default when you start with Krita is the Pixel Brush. The pixel brush is the traditional mainstay of digital art. This brush paints impressions of the brush tip along your stroke with a greater or smaller density.
Let’s first review these mechanics:
Select a brush tip. This can be a generated brush tip (round, square, star-shaped), a predefined bitmap brush tip, a custom brush tip or a text.
Select the spacing: this determines how many impressions of the tip will be made along your stroke.
Select the effects: the pressure of your stylus, your speed of painting or other inputs can change the size, the color, the opacity or other aspects of the currently painted brush tip instance – some applications call that a “dab”.
Depending on the brush mode, the previously painted brush tip instance is mixed with the current one, causing a darker, more painterly stroke, or the complete stroke is computed and put on your layer. You will see the stroke grow while painting in both cases, of course!
Since 4.0, the Pixel Brush Engine has Multithreaded brush-tips, with the default brush being the fastest mask.
Available Options:
Specific Parameters to the Pixel Brush Engine
Darken
Allows you to Darken the source color with Sensors.
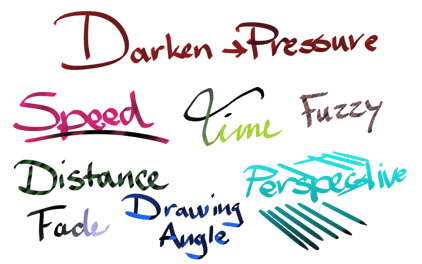
The color will always become black in the end, and will work with Plain Color, Gradient and Uniform random as source.
Hue, Saturation, Value
These parameters allow you to do an HSV adjustment filter on the Source and control it with Sensors.
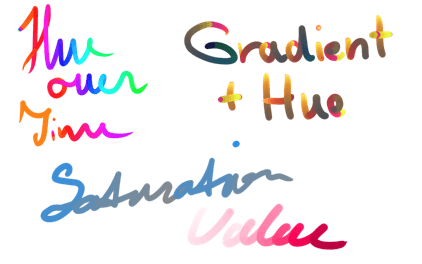
Works with Plain Color, Gradient and Uniform random as source.
Uses
Having all three parameters on Fuzzy will help with rich color texture. In combination with Mix, you can have even finer control.