
Adjust
The Adjustment filters are image-wide and are for manipulating colors and contrast.
Dodge
An image-wide dodge-filter. Dodge is named after a trick in traditional dark-room photography that gave the same results.
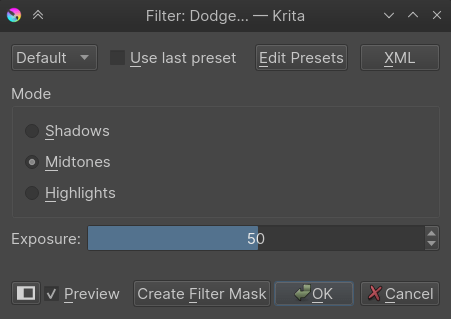
- Shadows
The effect will mostly apply to dark tones.
- Midtones
The effect will apply to mostly midtones.
- Highlights
This will apply the effect on the highlights only.
- Exposure
The strength at which this filter is applied.
Burn
An image-wide burn-filter. Burn is named after a trick in traditional dark-room photography that gave similar results.
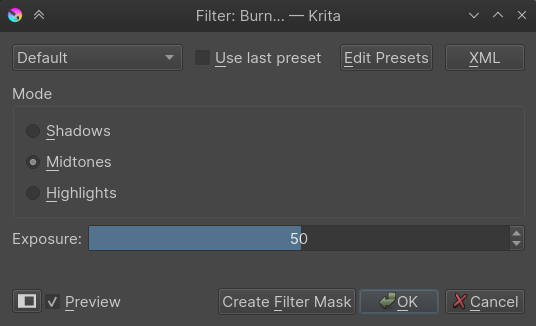
- Shadows
The effect will mostly apply to dark tones.
- Midtones
The effect will apply to mostly midtones.
- Highlights
This will apply the effect on the highlights only.
- Exposure
The strength at which this filter is applied.
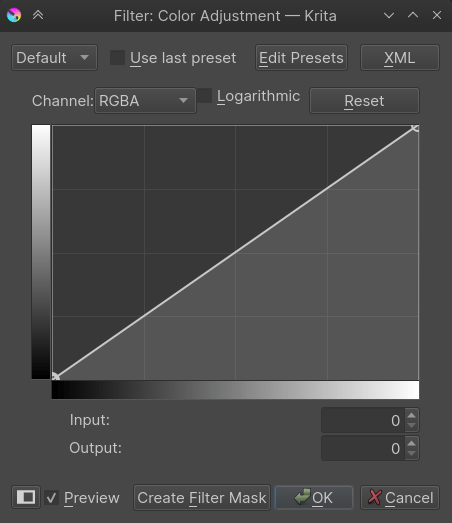
Levels
This filter allows you to directly modify the levels of the tone-values of an image, by manipulating sliders for highlights, midtones and shadows. You can even set an output and input range of tones for the image. A histogram is displayed to show you the tonal distribution. The default shortcut for levels filter is Ctrl + L.
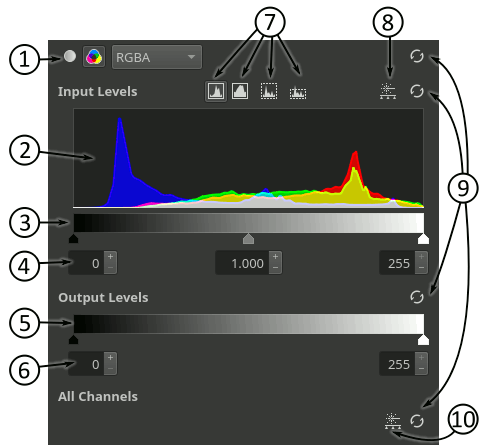
With these two buttons you can switch between “lightness only” and “per channel” levels adjustment. If you use the second mode you can modify the levels for each channel independently and you can change the active channel by selecting it in the list that appears at the right side of the buttons.
This area shows the histogram for the active channel.
This is a slider that you can use to quickly change the input black and white points and gamma.
These input boxes do the same as the input levels slider, but allow you to finetune the values.
This is a slider that you can use to quickly change the output black and white points.
These input boxes do the same as the output levels slider, but allow you to finetune the values.
These buttons allow you to control the visualization of the histogram. The first button makes it use a linear scale (the default). The second one makes it use a logarithmic scale. The third one changes its vertical size to fit the whole histogram in the area. The fourth one changes the vertical size to fit in the area most of the histogram but cutting long peaks produced by outliers. You can also change the size of the histogram by clicking and dragging vertically on the area or by double-clicking to change between “fit all” and “fit cutting long peaks”.
This button brings up the auto levels dialog for the current channel.
These buttons allow you to reset (from top to bottom) the levels of the current channel, the input levels of the current channel, the output levels of the current channel, and the levels of all the channels.
This button brings up the multi-channel auto levels dialog (only available in the RGBA color model).
This filter is very useful to do an initial cleanup of scanned lineart or grayscale images. If the scanned lineart is light you can slide the black handle in the input levels to the right to make it darker or if you want to remove the gray areas you can slide the white handle to the left.
Auto levels is a quick way to adjust tone of an image. You can update the levels of the filter automatically by using the auto levels dialog that appears when clicking one of the buttons explained earlier:
Added in version 5.1.
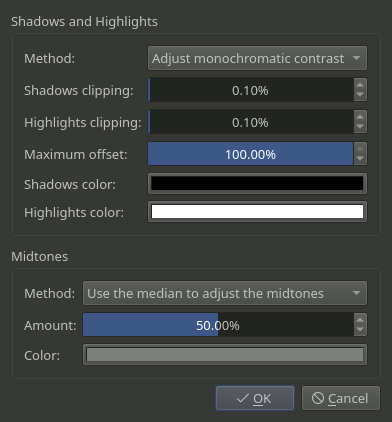
Shadows and Highlights: In this group of widgets you can select how the shadows and highlights are enhanced.
Method: this is available only in the RGBA color model when using the multi-channel autolevels and allows you to select if you want to apply the same input levels to all the channels or different input levels to each.
Shadows clipping and Highlights clipping: these parameters tell the percentage of dark/light colors that are going to be clipped. This is useful when the histogram has long, low valued, tails at the shadows/highlights extremes.
Maximum offset: this allows to set how much the input black and white points can be moved from their relative extremes.
Shadows color and Highlights color: allows you to choose which colors should be used for the output shadows/highlights.
Midtones: In this group of widgets you can select how the midtones are enhanced.
Method: here you can choose not to enhance the midtones or a method to find the midtone point of the image using the median or the mean of the histogram.
Amount: with this parameter you can choose how much the final midtone point used to adjust the image differs from the center of the histogram. If you choose 0% then the center of the histogram is used as midtone point (which means no correction except for the output color). If you choose 100% then the median or mean is used (depending on the method selected). And if you choose a value in between then a midtone point between those is used by linearly interpolating them.
Color: allows you to choose which color should be used for the output midtones.
If you want to change the settings later you can click on the Create Filter Mask button to add the levels as a filter mask.
Color Adjustment Curves
This filter allows you to adjust each channel by manipulating the curves. You can even adjust the alpha channel and the lightness channel through this filter. This is used very often by artists as a post processing filter to slightly heighten the mood of the painting by adjust the overall color. For example a scene with fire breathing dragon may be made more red and yellow by adjusting the curves to give it more warmer look, similarly a snowy mountain scene can be made to look cooler by adjusting the blues and greens. The default shortcut for this filter is Ctrl + M.
Changed in version 4.1: Since 4.1 this filter can also handle Hue and Saturation curves.
Cross-channel color adjustment
Added in version 4.1.
Sometimes, when you are adjusting the colors for an image, you want bright colors to be more saturated, or have a little bit of brightness in the purples.
The Cross-channel color adjustment filter allows you to do this.
At the top, there are two drop-downs. The first one is to choose which Channel you wish to modify. The Driver Channel drop down is what channel you use to control which parts are modified.
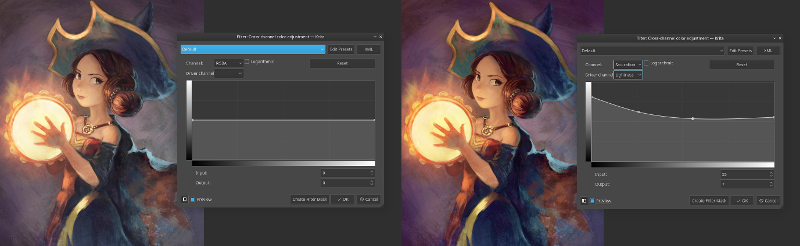
The curve, on the horizontal axis, represents the driver channel, while the vertical axis represent the channel you wish to modify.
So if you wish to increase the saturation in the lighter parts, you pick Saturation in the first drop-down, and Lightness as the driver channel. Then, pull up the right end to the top.
If you wish to desaturate everything but the teal/blues, you select Saturation for the channel and Hue for the driver. Then put a dot in the middle and pull down the dots on either sides.
Brightness/Contrast curves
This filter allows you to adjust the brightness and contrast of the image by adjusting the curves.
Deprecated since version 4.0: These have been removed in Krita 4.0, because the Color Adjustment filter can do the same. Old files with brightness/contrast curves will be loaded as Color Adjustment curves.
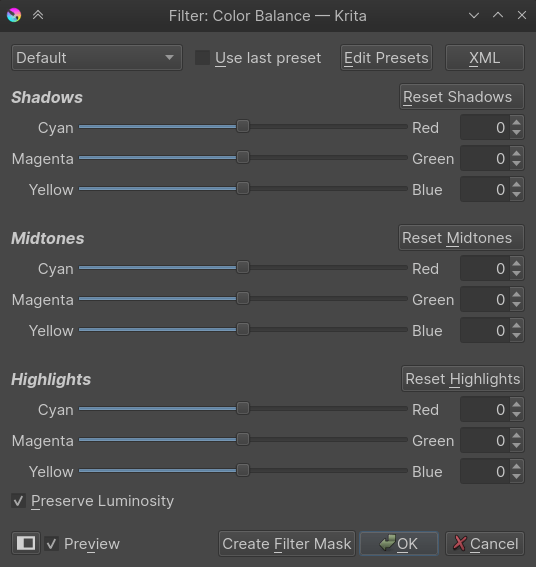
Color Balance
This filter allows you to control the color balance of the image by adjusting the sliders for Shadows, Midtones and Highlights. The default shortcut for this filter is Ctrl + B.
Desaturate
Image-wide desaturation filter. Will make any image Grayscale. Has several choices by which logic the colors are turned to gray. The default shortcut for this filter is Ctrl + Shift + U.
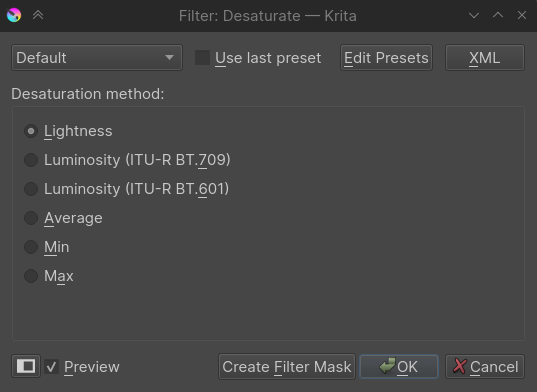
- Lightness
This will turn colors to gray using the HSL model.
- Luminosity (ITU-R BT.709)
Will turn the color to gray by using the appropriate amount of weighting per channel according to ITU-R BT.709.
- Luminosity (ITU-R BT.601)
Will turn the color to gray by using the appropriate amount of weighting per channel according to ITU-R BT.601.
- Average
Will make an average of all channels.
- Min
Subtracts all from one another to find the gray value.
- Max
Adds all channels together to get a gray value.
Invert
This filter like the name suggests inverts the color values in the image. So white (1,1,1) becomes black (0,0,0), yellow (1,1,0) becomes blue (0,1,1), etc. The default shortcut for this filter is Ctrl + I.
Auto Contrast
Tries to adjust the contrast to universally acceptable levels.
HSV/HSL Adjustment
With this filter, you can adjust the Hue, Saturation, Value or Lightness, through sliders. The default shortcut for this filter is Ctrl + U.
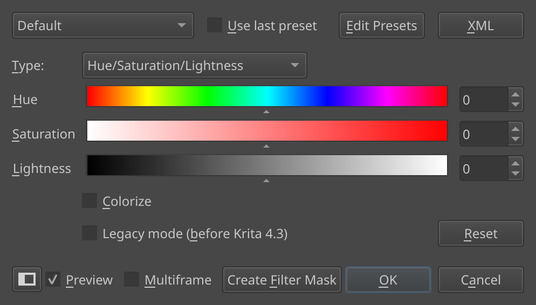
- Colorize
This is an option to have all the pixels have the same hue. It uses a HSL formula by default.
- Legacy Mode
In the development of Krita 4.3, the HSV algorithm was adjusted to maintain the variation in brightness better. This is important because brightness contrast is the most important contrast, so you want to avoid losing variation in it. This option toggles the old behaviour for files made in previous versions.
Threshold
A simple black and white threshold filter that uses sRGB luminosity. It’ll convert any image to a image with only black and white, with the input number indicating the threshold value at which black becomes white.
Slope, Offset, Power
A different kind of color balance filter, with three color selectors, which will have the same shape as the one used in settings.
This filter is particular useful because it has been defined by the American Society for Cinema as “ASC_CDL”, meaning that it is a standard way of describing a color balance method.
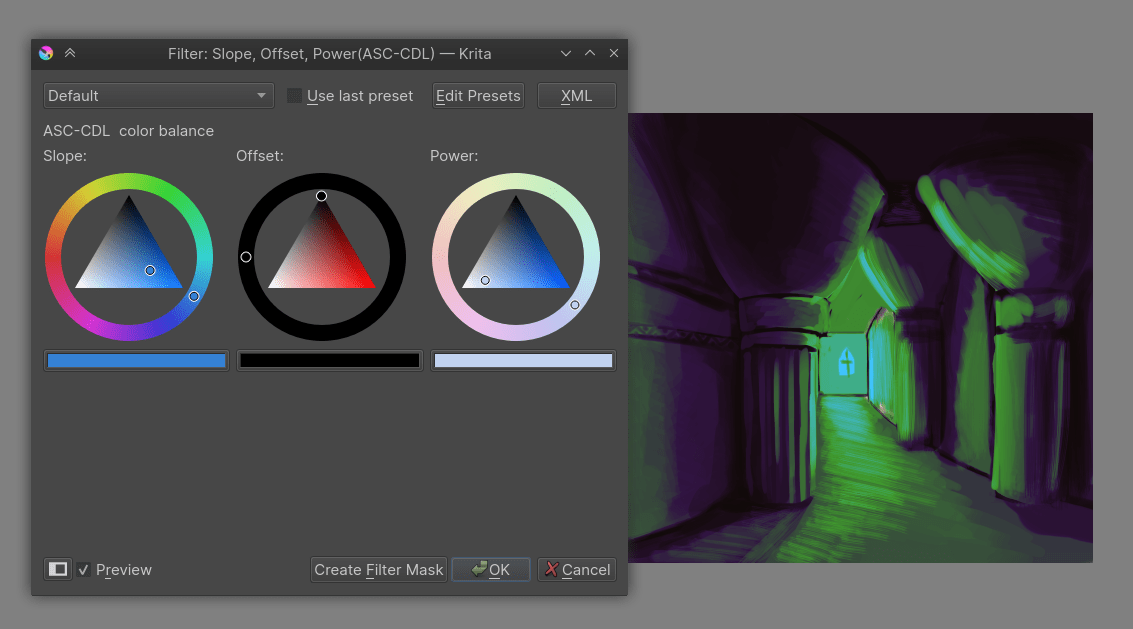
- Slope
This represents a multiplication and determine the adjustment of the brighter colors in an image.
- Offset
This determines how much the bottom is offset from the top, and so determines the color of the darkest colors.
- Power
This represents a power function, and determines the adjustment of the mid-tone to dark colors of an image.